Travels for Taste

Tales of travel and food with a touch of spice

  • Home
  • About
    • In the Press, Published Work and Interviews
    • PR and Disclosure Policy
  • Food
    • Recipe Index
      • Indian
        • C.K.P recipes
        • Curry – Meat, Seafood
        • Curry – Vegetarian
        • Sides
        • Chutneys
      • Healthy
        • Soups
        • Salads
      • Quick and Easy
      • Baking
        • Desserts
      • Meat
      • Seafood
      • Vegetarian
        • Salads
      • Vegan
    • Product Reviews
    • Events
  • Travel
    • UK
    • India
    • Around the World
  • Lifestyle
    • Home
    • Kitchen
    • Restaurant Reviews
    • Miscellaneous
  • Giveaways
  • Work with me
    • Meet interesting foodie entrepreneurs here

Choco Chip Cookies to kill insomnia and cure heartache

August 9, 2012 by manjirichitnis 2 Comments

I baked these to cheer myself up and trust me they have done more than that ! I baked cookies for the first time ever and I was gald they turned out so nice .

They take a total of about 30 minutes to prepare  including the baking time so they are not just easy peasy they will earn you massive brownie points with everyone at home !Enjoy!

Ingredient List :

  1. 175g softened butter
  2. 115g sugar
  3. 225g self-raising flour
  4. 50g chopped chocolate

These will make about 25 small cookies and about 15 beeeggg ones , I like the bigger ones more fun to chew ,chomp and gobble !

Method:

  1. Measure out the butter and sugar and mix well with a spoon in a mixing bowl . I love my beeegg Orange plastic bowl for this :).The butter should be kept outside and must be soft , if not put it not a thick glass bowl and hold it over a pot containing ho water , that should do the trick!
  2. Then add the flour in parts and mix well.
  3. Add a pinch of soda bicarbonate and another pinch of baking powder.
  4. Then crush the chocolate with your hand if it is soft ,if not just make pieces and add them with the little chocolate dust that you create in the process.
  5. If you have a cookie cutter use that to cut out shapes , especially if you are baking for little ones:)
  6. I simply make tiny dough balls in my palms , rolled them around and kept the centre puffy and flattened the sides , then placed them on my baking trays and baked them for 15 minutes at 180C.
  7. After 15 minutes remove from oven and place on a wire rack to completely cool down.
  8. The settings on other ovens which coordinate are 350F/Gas mark 4.

Enjoy with your cuppa tea , sip sip ,dip dip 🙂

Images :

The Dough is all done….

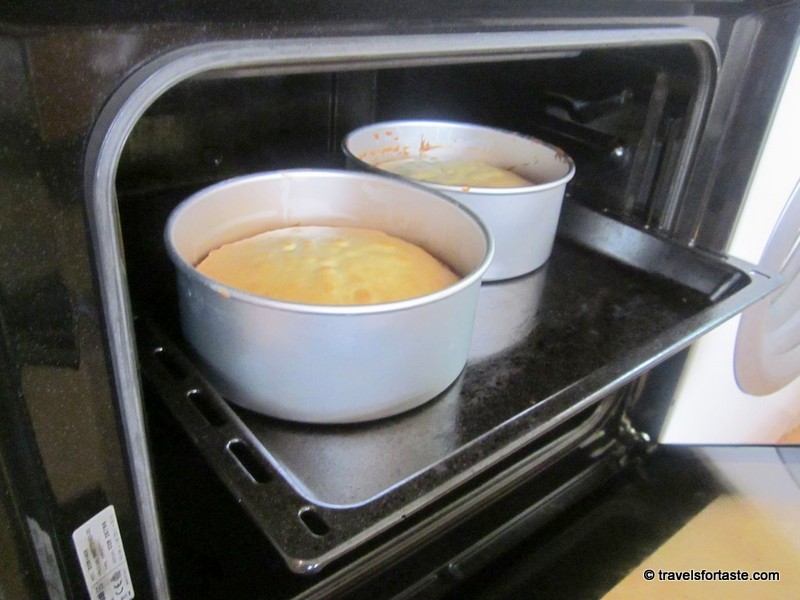
The 2nd tray is ready to go into the oven to Bake

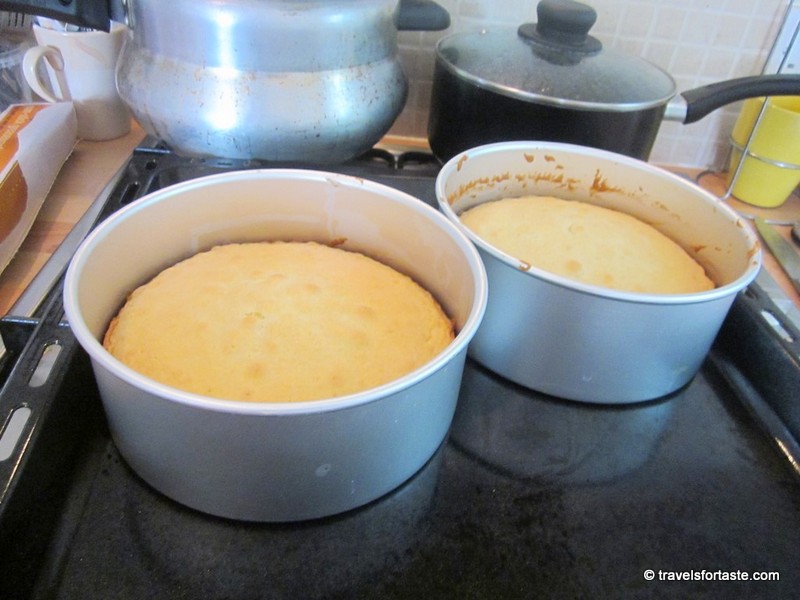
The 1st tray was polished off in minutes , this is what remains from the 2nd tray ,whoooahahahahhaha;)

The SUPERMAN mug was then filled with some cold milk and several burps later a few crumbs remained :


Filed Under: Baking, Food, Recipe Index Tagged With: bake, begineers, chip, choco, chocolate chip cookies, cold, cookies, easy, milk, recipe

Prawn Khichadi (Pulav/Pilaf/Poolav)

August 7, 2012 by manjirichitnis 5 Comments

This is NOT just a  recipe, it’s a Family Heirloom passed down the generations and cooked with great relish by my mother-in-law and her mum who is now 82 years old and still can stir up some to-die-for finger-licking dishes!

But before I start off rattling the ingredient list, a ”slice” of some history about the origin of this rice and prawn union. Coastal cuisine in the western Indian state of Maharashtra relished by the Maharashtrian community relies heavily on the use of all versions of the coconut, the most potent form being as part of the Goda masala. This and of course, the abundant availability of fresh seafood has given birth to many delicacies many of which are age-old like this dish.

It’s also my prized comfort food and guarantees a great Sunday afternoon nap 🙂 and will ensure you are crowned kitchen queen and master chef of all things nice hehehehe

Ok here goes, the ingredient list – This dish serves 2 adults for 2 meals with 2 generous helpings each and leftovers for the next day.

Prawn Khichadi (Pulav/Pilaf/Poolav)

5 from 1 vote
Heirloom recipe, Traditional Maharashtrian coastal recipe, C.K.P
Print Recipe
Servings: 4
Course: Main Course
Cuisine: Indian
Ingredients Equipment Method

Ingredients
  

  • 500 gm Prawns
  • 2.5 Cup Rice
  • 3 Bay leaves
  • Goda Masala
  • Tumeric Powder
  • Red Chilli powder
  • 1/2 Lime
  • Oil
  • Salt to taste
  • Ginger and Garlic Paste
  • Wet grated coconut
  • 2 Red onions finely sliced
  • 1 thumb-sized piece Cinnamon (Dalchini)
  • 3 Cloves
  • Green Masala

Equipment

  • 1 Big Sauce Pan
  • 1 Mixer / Blender / Hand-blender
  • 1 Knife
  • 1 Spatula
  • 1 Chopping Board

Method
 

  1. On a pan on low heat sauté one finely chopped onionand the fresh wet grated coconut till the onions starts to caramelise, afterthis cools give it a spin in the mixer and make a fine paste.
  2. Marinate the washed rice in some the above wetgrated coconut and onion paste, some goda masala , a squeeze of half of alime, salt, ginger and garlic paste and some Cinnamon. Set aside.
  3. De-vein the prawns, wash under tap water andmarinate with red chilli powder, turmeric and green masala.
  4. Take oil in a vessel and sauté the marinated prawnsfor 1-2 minutes.
  5. Heat Oil in a vessel big enough to cook the riceand prawns together that will hold the water as well , add the cloves,remaining cinnamon and one very finely chopped red onion, add the marinatedrice and stir it , do this on a low flame.
  6. Then add the marinated prawnsand water, for rice dishes water is always double the measure of the rice usedso for 2.5 cup measures of rice use 5 cups of water.
  7. Cover and cook on a low flame.
  8. Serve piping hot with a side of cooling curd, you can also serve with your favourite pickle. I generally serve this with a spicy Curry.

How to make Green Masala

Green Masala – Use a bunch of coriander and two green chillies and give them a spin in the mixer, store this fine paste in the freezer and use it as and when needed, it’s one of the most basic marination masalas in most Maharashtrian non-veg dishes, especially seafood.

Spicy Curry

In a pan heat some oil and add asafoetida one pinch, add puree of 2-3 large red onions and one tomato and puree of 1 handful of wet grated coconut, season with red chilli powder, turmeric, salt, green masala, Goda masala and cook on a low flame with enough water to ensure a thick curry, Amp up the red chilli powder and green masala to your level of tolerance of spicy food!

Do let me know via comments if any of you made this dish and what you thought of the recipe!

P.S: Forgive the poor image quality, I have a Simple Canon Camera which I am unable to use too well and add to that the total lack of any photography skills but well the food tasted awesome :), that’s what counts right, hehe!

Update in 2013

A few days after I published this recipe, ‘A’ gifted me my first DSLR Camera – a shiny new Canon 600DS and I’ve been clicking away like a happy bunny ever since 🙂

To my absolute delight, he helped me add a new lens to my kit and gifted me a 50mm f 1.8 lens this year on my birthday. It is great for close-up food shots and true to the reviews, it works well in low light conditions.

Here’s an example:

The image below is from my kit lens where am struggling to fit everything in frame and focus on the prawns, I have sharpened the image, adjusted light and cropped it using Picasa 3.

Now see the difference in the image below, I love how the prawns are in sharp focus and how am able to easily adjust and fit everything in the viewfinder.I have adjusted light and sharpened the image very slightly, I am truly pleased with the results 🙂

LEARN HOW TO MAKE INDIAN FOOD FROM SCRATCH WITH MY EASY TO FOLLOW RECIPES

  • Fresh dill and yellow moong daal recipe
  • Goda sheera/ sooji ka halwa/ Indian dessert
  • CKP Surmai curry
  • Pompfret fry
  • Vaangayche Bharit/ Smoked stuffed Aubergine ( Eggplant/Brinjal) in a thick gravy/ Baingan ka bharta
  • Valache Birdhe – (वालाचे बिरडे) – MADE IN A TYPICAL C.K.P WAY
  • Kairi Panhe/ Aam ka panha – Raw mango summer drink
  • Cauliflower- vatana bhaji – cauliflower and green peas vegetarian side dish
  • Podhnichi khichadi
  • Akkha masoor aamti CKP style / Whole red lentils with skin curry recipe
  • Achari Mutton curry
  • Spicy Chicken curry
  • Egg curry
  • Upma
  • Punjabi Kadhi
  • Gujrati Kadhi
  • Shahi Khichadi
  • Sweetcorn and paneer bhaji/sabzi (vegetable side dish)
  • Tomato and coconut chutney
  • Steamed Idli batter
  • Ragi (Finger Millet) and blueberry pancakes
  • Masala egg omlette
  • Chicken tikka masala
  • Tikka masala curry paste
  • Tawa chicken Frankie roll
  • Chai concentrate
  • Grated carrot salad
  • Strawberry flavoured shrikhand

Filed Under: C.K.P recipes, Food, Indian, Recipe Index Tagged With: chillies, cinnamon, coastal cuisine, comfort food, coriander, family, goda, grated cocnut, green, heirloom, kitchen, koolambi, low flame, magic, masala, prawn khichadi, Pulav, puree, red chillies, red onion, rice, saute, sliced, spice, spicy, turmeric

”POSH ”Victoria Sponge Cake

August 3, 2012 by manjirichitnis 4 Comments

What better way to celebrate the excitement surrounding the Olympics happening in London than sinking my teeth into a perfectly delicious soft Victoria Sponge Cake!

It’s an easy recipe and the result left me feeling like so very happy!

I tried to read up online why it is called a ”Victoria” Sponge cake and the apt answer seems that since Queen Victoria loved this soft cake with her afternoon tea! So I am going to savour the cake and afternoon tea as I cheer myself hoarse in front of the telly whilst watching the Olympics 🙂

Lovely! So let’s get baking and when your done gobbling some of it, drop me a line and let me know how much you enjoyed creating this yummy delight!

This cake serves 8 people, takes about an hour to prepare.

I choose to call it ”POSH” because that’s Victoria Beckham’s pop name, our very own British star and this cake is modernised version of a British Classic recipe with a twist as it is layered with Creme Chantilly’ – very posh sounding indeed!

Ingredients:

  • 225 g unsalted butter, softened, plus extra for greasing
  • 4 medium-sized eggs, organic if you please
  • 225 g caster sugar
  • 225 g self-raising flour
  • 4- 5 Large tablespoons of Strawberry Jam, the traditional version uses raspberry Jam, I used strawberry conserve.
  • 250 gm fresh strawberries sliced lengthways
  • Icing Sugar for dusting on top of the cake
  • Soda Bicarbonate – 1 teaspoon
  • Baking Powder 1 Teaspoon

To make the  crème Chantilly:

  • 300 ml double cream – so sinful 😉
  • 25 g icing sugar
  • I tiny cap full of Vanilla essence, the original recipe inspired by The Good Food Channel advises to use – 1 vanilla pod, halved lengthways and seeds scraped or vanilla extract

METHOD :

  • Preheat the oven to 180C/160C fan/gas 4. Grease and line two 18cm cake tins with a removable based with baking paper. I inaugurated my brand new weighing scales and cute cake tins I purchased for all future cake making experiments!
  • Put the butter and sugar in the bowl of an electric mixer and cream well until light and fluffy – this will take at least 10 minutes to get it properly aerated. Use the 10 minutes you have to wash and clean the strawberries and slice them lengthwise. This was also a first for me in terms of using my food processor to mix the butter and sugar mix. Then empty this butter sugar mix into a large mixing bowl, I also have a NEW nice bright Orange bowl!
  • Break each egg and add one at a time, whisk the mixture well after each addition to ensure it is soft and fluffy.
  • Add the self-raising flour to the above butter, sugar and egg mixtures, I added one spoon at a times and mixed it really well each time. Add the Bicarbonate of soda and Baking Powder to this mixture, I used this as I do in every cake but the original good food channel recipe does not mention these 2 ingredients. Later I used a hand blender to really get this mixture to feel like one entity and till it felt right to pour into the ready cake tins.
  • Now pour the above cake mix in equal portions into the  2 cake tins and smooth the top with a plastic spoon, the type you get with a food processor.
  • Bake for 20 minutes, with a timer, until risen and golden. Ensure you do not go over the 20 minutes, also if you are using a fan oven as I do, use only the setting that heats from below.

For the crème Chantilly:

  • Put the cream in the food processor, add the icing sugar and the vanilla essence. Whip to the soft peak stage, using the slow speed setting then refrigerate until slightly firmed.
  • Take the strawberry jam into a small pan and warm gently whilst stirring, use low flame and do not leave on pan for tool long.
  • Remove the cakes from the cake tin, on the top of one cake spread the jam from the pan and add the chopped strawberries.
  • Then get the Creme Chantilly’ from the fridge and spread generously over this.
  • Place the second cake on this and press down ever so gently.
  • Dust the top of this lovely sponge cake with a bit of icing sugar and decorate with a blob of the Creme Chantilly’ and some sliced strawberries!

Voila, the classic British cake with a twist – Posh Victoria Sponge is ready for you to savour, impress your family and friends and enjoy baking over and over again!

Filed Under: Desserts, Food, Recipe Index Tagged With: afternoon snack, bake, beat, butter, celebrate, easy, easy recipe, eggs, fluffy, food, Good Food, icing, mixture, pipe, Queen Victoria, recipe, self, simple, soft, sponge, strrawberries, sugar, tea, tea party, Team GB, time, unsalted, Victoria, weighing scale, whisk

Ressurecting LEFTOVERS ! A quick recipe for Phodnichi Khichadi

June 13, 2012 by manjirichitnis 2 Comments

Heya all ye blog readers, followers or mere net trawler’s!

I have a simple yet effective way of resurrecting plain white boiled/steamed rice and conjuring up a tasty spicy dish to allow for a guilt free ,time-saving recipe which will not only help you NOT die of guilt for throwing away rice that’s perfectly OK but just stale and also having the pleasure of cooking an easy peasy meal all on your own. Of course it’s NOT my own recipe but a hand me down from my mother! GAAH and YOU actually thought I was that creative …giggles to herself and continues typing …

Well you need, yes! Of course my dear genius some leftover white plain cooked rice.

Depending on bow much rice you have say roughly a medium sized soup bowl for example, you will need:

1.2 tablespoons oil

2.2 cloves of garlic with skin

3.1 medium sized red onion finely chopped and I mean FINELY !hehehe I like trying to sound very professional, am just joking here, chop it how you will!

4.few fresh green lovely curry leaves.

5.Turmeric Powder

6. Salt to taste

7.Chilli Powder

8.Pinch of Asafoetida

9.  A pinch of each Jeera (Cumin seeds) & Mohri (Mustard Seeds)

10. A tiny squeeze of lime

11. Some finely chopped freshly coriander for garnish

12. One or two green chillies chopped

Ok now heat the oil in a pan , add the Hing (Asafoetida powder) , add the Mustard seeds and Cumin seeds and wait for the mustard seeds to crackle in the hot oil, then add the garlic finely chopped with the skin and let it turn brown and crisp , believe me,it adds a power packed punch to the flavour of the rice,then add some green chillies chopped to a size that you can pick them out if you don’t want to set your tongue on fire ! Then,in go the curry leaves and the chopped red onion,after the onions are nicely tossed and turned in the oil to give them just the soft and crunchy texture you need,toss in the rice and slightly turn it with your hand before you do to prevent it from sticking , it should open up so that the flavours of the tadka (seasoning ) touch EACH grain and coat it with their heavenly goodness !

Then add the turmeic powder, red chilli powder and mix well, cover the vessel and cook on a very low flame so as to prevent the rice from sticking to the pan at the bottom. Steam for some time and open the lid,squeeze a generous bit of lime on this dish and garnish with fresh coriander, you can even add a few bits of chopped fresh tomato of you like.

Serve HOT with any curry or ”leftover” dal reheated.

I LOVE eating this plain with a big dollop of curd or plain yogurt too !

See told you it was easy peasy !

Filed Under: Food, Indian, Recipe Index, Vegetarian Tagged With: asafoetoda, boiled, cook, cover, cumin seeds, curd, curry, curry leaves, dal, easy, finely chopped.coriander, flame, fresh, garnish, green chilly, hot, Jamie Oliverr, jeers, leftovers, mohri, mustard seeds, oil, pan, plain, red onion, relish, rice, simple, spicy, steamed, stir, tomato, yogurt

Shahi Khichadi

April 9, 2012 by manjirichitnis 9 Comments

I have decided to finally upload some of the recipes which received a lot of comments on my Facebook food album and I ended up sending out the recipe by email to many of contacts. Here is one of the easier and more popular ones . When I was a kid when my mother said ”khaichadi” in response to what’s for dinner ? it usually meant that one of us feverish and needed something gentle on the tummy or one of us was trying to recover from an upset tummy .Of course the taste of the boiled rice and green gram halved and with skin on or the yellow version without skin , is ultimately satisfying a great comfort food when served piping hot with a dollop of ghee and some warm milk ,a good night’s sleep guaranteed !

But my version is spicy ,with a tasty twist and a lot of fun to cook and even more fun to eat .

I adopted this recipe from the way my mother makes khichadi and also from how my pal S of www.jainfoodie.com makes Jain Dal Khichadi . I choose to call it Shahi meaning Regal or Royal here because it is rather a posh version of the humble boiled version. Khichadi meaning an Indian for a slurpalicious RICE and lentil dish cooked like a pulav /pulao/pilau /pilaf.

Ingredients (enough to serve 2 with second and maybe a third helping !)

  • Rice 1 cup
  • A Mix of the following in equalish parts in the same cup used to measure the rice – Massor Dal also called Red Lentils-split and skinless, Moong Dal also called Green Gram yellow we will use the  spilt skinless variety and the split green moong dal with green skin on , Urid Dal also called Black Gram halved with skin ,some Toor Dal also called pigeon peas – yellow spilt and skinless .
  • 1 large red Onion
  • 1 medium tomato
  • 2-3 Bay leaves
  •  Bits of Cinnamon bark
  • 2 cloves of garlic smashed with skin on
  •  2 green chillies
  •  Jeera / Cumin
  •  Hing / Asafoetida
  • Salt to taste
  • Red Chilli Powder
  • Turmeric Powder
  •  2 small potatoes
  •  Few Curry leaves
  •  Few Cloves
  •  Few black whole peppercorns
  • 18. Oil for sauteing
  • Some Ghee – maybe 2 spoons – Clarified Butter

Method :

  • Wash the rice and lentils and place them in a pressure cooker ,add 4 cups (use same cup as the one used to measure the rice and the dals) of water and another to make it a little softer than regular rice ,pressure cook till 4 whistles are done.
  • Once the steam slowly releases from the cooker , you can open the lid and it will look like the picture below but a bit different in colour because when I made this I was short on red lentils so didn’t add them . Actually even you make this dish with rice and only yellow moong dal it will taste just as good 🙂
  • While the cooker is cooling down ,chop the potatoes into longish strips and stir fry them in hot oil till they turn brown, add some salt, sprinkled over them just as they get done, these potato fries are our garnishing to add that REAL REGAL or SHAHI touch to the dish . Once done keep them aside and STOP yourself from munching on them before your dish is ready , my husband managed to gobble quite a few ,pretending he was helping me ”stir” the onions while I clicked pictures ..grrrrr
  • Now Lets prepare the tadka /tarka or the tempering. First slice the onion and the tomato vertically into thinish slices .
  • Add oil about 2 large tablespoons into a pan and one teaspoon of ghee just for flavour and aroma , when this mix is hot add some hing , then add the jeera and the crushed garlic and the 2 green chillies spilt along the middle lengthwise as it opens them up and allows the pungent seeds to spread through the tempering , one kick ass way to add that hotttt KICK to the dish ,trust me this one is explosive spicy HOTT as it has all the ingredients to help the taste explode in your mouth, saute till the garlic is brown and the garlic’s skin starts to crackle , then add the cloves, the whole black peppercorns , bits of the barks of Cinnamon ,curry leaves, bay leaves and keep stiring this mixture to prevent charring or over heating ,it will look like in the picture below :
  • Then add the chopped onion, It should look like the picture below:
  • Then after a while when the onion has begun to turn a lovely pinkish ,brownish colour and looks the picture below it’s time to add the tomato .
  • Now add the vertically sliced tomato slices , I can assure you that now the potent aroma of all those lovely spices and the onion are stirring up quite an appetite inside you and making you hungrier every passing minute .
  • I dislike chunky bits of tomato floating in my mouth while I gobble up the khichadi so I jus a flat wooden spatula and gently ensure that the tomatoes are totally mashed  in a way that allows the mixture to become one entity, it should look like in the picture below :
  • Add just a bit of red chilli powder and some turmeric powder to the mixture above and add salt to taste ,Now add the cooked rice and lentil mixture to the above tempered mix of spices ,onions and tomatoes ,mix well stirring well, add salt again enough to flavour the rice and lentil mix .
  • It’s almost done , just keep this on a low flame for about a minute or two to allow the flavours of the spices to penetrate deep inside the rice and lentils .
  • The SHAHI KHICHADI is now ready to be garnished! Yay 🙂
  • WOW now doesn’t that look awesome ? I am quite proud about this creative production from my kitchen , hope you relish it as much as I did errr we did , hubby had to agree 🙂
  • If you fear that all the spices may be a bit too much for your sensitive palate prepare a quick cooling cucumber and curd accompaniment . Beat 2 spoons of set yogurt or thick flowing yogurt and add tiny square bits of fresh cucumber , season with a bit of salt ,some sugar and some jeera powder to taste .

Enjoy !

Filed Under: Food, Indian, Recipe Index, Vegetarian Tagged With: bay leaves, chilli, chop, cinnamom, cloves, cooker, cucumber, cumin, curd, curry leaves, dal, flame, fry, garlic, ghee, green chilly, hot, jeera, khichadi, kitchen, lentils, masoor, moong, oil, onion, peppercorns, pictures, pilaf, Pilao, potatoes, powder, pressure, pulao, Pulav, recipe, red, regal, rice, royal, salt, shahi, spicy, sugar, tempering, tomato, toor, turmeric, urid, yogurt

Goda Sheera (Sooji Halwa in Hindi, Prasadacha Sheera for Satyanarayan Pooja)

April 4, 2012 by manjirichitnis 6 Comments

I have been planning for ages to make some Goda sheera (goda =sweet in Marathi , my mother tongue and sheera stands for a sweet preparation made using Semolina as the primary ingredient ). I wanted to prepare this for Holi but was too lazy to do it but on Gudi Padwa, which is the Maharashtrian New year, I decided to be a good girl and prepare this sweet dish and offer it to my favourite god Ganpati Bappa:)

I love using milk and mashed bananas as it reminds me of the way my elder Sister prepares it and also of the many Satyanarayan Pooja Prasad (Prasad = offering made to god in the form of food etc) that I have greedily gobbled up all my life back home in India. My mother though prefers to prepare this dish using a mixture of sugar dissolved in water to add a sweet taste. Any way you choose to prepare it, I assure you it is a hugely satisfying experience preparing it  and gobbling it afterwards 🙂

It would be unfair to throw Indian terms at my non Indian readers so , Gudi Padwa is a festival wherein we Maharashtrians celebrate the end of the harvest season and welcome a brand new year with the Hindu Calender. Satanarayan Pooja is a Hindu ritual of worship performed to celebrate new beginnings like a wedding, a housewarming or during the annual Ganesh Festival. It requires the Man and the Lady of the house to perform an elaborate offering to god and the beautiful part of the pooja or the ritual is the Katha (Katha simply means story in Marathi) as it takes the listener on a journey through tales that define our religion. The ultimate offering of love for god at the end of this ritual is called a Prasad and is almost always Sheera. Please click on the hyperlinks to enjoy reading in detail about the terms used. I thank all contributors to Wikipedia for providing such useful and beautifully written information. Oh yes, and the most fun part of Gudi Padwa is the Gudi, it is basically a long stick covered in shiny wrapping paper and a decorative piece of cloth is placed on the top and an inverted ”gadoo” or a stainless glass of a particular shape is placed over it or a brass container which is used for poojas and is again a very auspicious piece of the ritual. The swastika symbol is made on it using bright red kumkum, then this is wrapped with a garland of fresh marigolds and bright green leaves of the mango tree and also a garland made from ” Batashe” which is a white leaf-like thing made from concentrated sugar syrup and strung onto a string and made into a garland. This is then perched on the balcony and worshipped and kept on display for all to see, it is quite a sight to see colourful ”gudi’s” swaying outside everyone’s windows and balconies.

I had to make mine this year using an unused shower curtain rod, golden wrapping paper recycled from Christmas, a steel bowl instead of the traditional glass and a bright red stole instead of the usual auspicious colours of green or gold! Anyway, this is what it looked like :), am quite proud of it really!

Below I have chosen 2 images from google that I feel are really good and stunningly clear images and really capture the spirit of the festival, the first of a couple dressed all traditionally and with the beautiful Gudi being worshipped using a well-decorated thali (plate containing several items for performing the ritual) and the second image is of the sexy Ms Isha Koppikar looking like a million bucks and the Gudi looks lovely as well!

Pic 1: Image courtesy iDiva dot com

Pic 2: Image Courtesy Click here

Ok ! so now, let me try to put down here the recipe in a simple and easy-peasy manner.

Preparation time: Approx 45 minutes Serves:4

Ingredients :

  1. Semolina /Rava/Suji – I use fine rava as it is what I find is best for this recipe. approximately 2 small watis or ramekins.
  2. Ghee – plenty!
  3. Raisins – a handful
  4. Badam/Almonds – again a handful
  5. Saffron/Kesar/Zafran – a small pinch just to add colour and pomp!
  6. Cashewneuts/Kaju/Kajoo – if you like them, not necessary) – a generous handful without the peel and unsalted.
  7. Milk about 200 ml
  8. One ripe Banana
  9. Elaichi/ Green Cardamom – about 6-8 – open them and crush the brown seeds to make a powder using a mortar pestle we will also use the green outer cover to add a distinctive aroma to the recipe :), sounds so romantic doesn’t it ( err well …)
  10. Sugar – I use granulated white sugar, and take 2 – 2.5 measures of a small bowl, actually, the proportion is always 2:1 for the Semolina: Sugar for this dish so choose the quantity accordingly.

Method :

  • Boil some water and add into a small bowl, add the almonds, this will make it easy to peel off the skin. Soak some raisins in lukewarm water so that they absorb water and can be dunked into the semolina at a later stage.
  • Add the Saffron strands ever so carefully to a small bowl of water so as to allow the beautiful golden orange colour to disperse into the water.
  • Take 2 bowl fulls of Semolina and add to a pan and constantly stir it until it turns a light brown colour, if you do not keep stirring or put the pan on a very high flame it might burn and we don’t want that do we? Also, I use a rather heavy bottom pan to ensure that the heat spreads evenly and that the Semolina browns well.
  • This is how it looks before we brown it :
  • This is how it will look after stirring for a while :
  • This is how it will look when it is done and ready for the next stage,i.e to be added to the ghee:
  • Remove the pan from the flame and keep the Semolina aside .Now take 2-4 large tablespoons of ghee (Clarified Butter) in a vessel and warm it on a low flame, be very carefull when frying with ghee as GHEE heats up very fast and anything unattended inside the hot ghee can char easily. When the ghee is warming up add the cashew nuts first and wait for them to start browning, then add the remaining raisins – not the ones which are kept soaking in water ! The strong aroma of the warm Semolina , the beautiful smell of desi ghee and the in-your-face tasty aroma of the fried cashews will assault your senses in the most pleasant way and fill up your kitchen with an almost auspicious atmosphere, it’s when this happens that one truly feels festive from within and it is also at such moments I have massive nostalgia attacks and realise how deeply coded our childhood memories are and  how much a part of our memories are made up of familiar sights and sounds. I oftentimes find life in the western world paler, less colourful and too quite compared to the pomp , blast of colours and festivity that make up India …sighhhh !
  • The cashew nuts and raisins turn a golden hue as seen in the picture above and the raisins puff up quite a bit due to the heat of the ghee,be careful not to overdo the raisins as they are akin to tiny missiles filled with boiling hot oil and if they burst , you can get serious burns …booooo! The kitchen is quite a dangerous place for the uninitiated isn’t it ?!
  • Ok, while the cashew nuts are being processed , take a small vessel and add the 200 to 250 ml milk on a low flame, add the sugar and dissolve, stirring till it completely dissolves, do not allow the milk to boil but reduce it on a low flame, add the crushed green cardamom powder and the outer green cover. Add some of the saffron and the water in which it was soaked as well, keep some for adding into the mixture later. When this mixture is on the flame , it gives out an unmistakable aroma of sweet sugary milk and I can almost feel my teeth sink into the soft sheera and mentally I am biting into the fried cashews and the yummee soft Banana bits that play hide and seek with my tongue as I devour the sheera – AAHHH , anyway , don’t allow that to happen as it is considered wrong to savor the ”Prasad” before the Almighty is offered some for ”bhog” or in simple words god has been offered the sweet dish and it is assumed that he has symbolically consumed our offering and blessed us with all that we wish and desire for 🙂
  • When the cashew nuts and the raisins have been fried, add the semolina slowly in the hot ghee mixture, stirring continuously to prevent any lumps from forming and also to ensure that the semolina soaks up the ghee properly.
  • Once all the Semolina is mixed well into the ghee and fried dry fruit mix it will look like the picture above, then add the remaining saffron and water in which it was soaked to the mixture.
  • Then add the roughly mashed banana pieces to the semolina mixture.
  • When the sugar has completely dissolved and the milk has reduced a little, it is ready to be added to the semolina mixture. Add it stirring slowly, it will look like the picture below immediately after adding the milk and sugar into it.
  • Stir a bit more and here is what it will look like now:
  • For the smallest possible time , cover the mixture above on the lowest possible flame , it is then ready to be served, now add the almonds to season over the top , peel off the skin , thanks to the warm water they will come off very easily and then just halve the almonds or if you want to be very artistic and have some time cut the almonds into longish thin strips ,anyway which they add a definite crunch to the sweet dish and I love that ,you dish will now look like this :
  • Take some of this beautiful dish and serve into a small bowl to offer to the Ganpati Bappa – who has been made to shine and sparkle for the day and place it in front of him , hands folded ask for his blessings and wait for sometime till you are convinced he’s had some of the offering or ”Prasad”.

Aaah , now just look at the cute Bappa 🙂

HAPPY EATING ALL YE READERS who attempt to make it, do let me know any feedback 🙂 all good of course 😉

Learn how to cook western coastal Indian cuisine from the C.K.P community with my easy-to-follow recipes.

Find below a list of Indian recipes on my blog, some traditional, some fusion, and many regional favourites!

  • Valache Birdhe – (वालाचे बिरडे) – Made in a typical C.K.P way
  • Fresh dill and yellow moong daal recipe
  • CKP Surmai curry
  • Pompfret fry
  • Konbichi khichadi – Prawn khichadi
  • Vaangayche Bharit/ Smoked stuffed Aubergine ( Eggplant/Brinjal) in a thick gravy/ Baingan ka bharta
  • Kairi Panhe/ Aam ka panha – Raw mango summer drink
  • Cauliflower- vatana bhaji – cauliflower and green peas vegetarian side dish
  • Podhnichi khichadi
  • Akkha masoor aamti CKP style / Whole red lentils with skin curry recipe
  • Achari Mutton curry
  • Spicy Chicken curry
  • Egg curry
  • Kadhi – fusion of Punjabi and Gujrati kadhi recipes with vadi’s
  • Upma
  • Gujrati Kadhi
  • Shahi Khichadi
  • Sweetcorn and paneer bhaji/sabzi (vegetable side dish)
  • Tomato and coconut chutney
  • Steamed Idli batter
  • Ragi (Finger Millet) and blueberry pancakes
  • Masala egg omlette
  • Chicken tikka masala
  • Tikka masala curry paste
  • Tawa chicken Frankie roll
  • Chai concentrate
  • Grated carrot salad
  • Strawberry flavoured shrikhand

Filed Under: Desserts, Food, Indian, Recipe Index Tagged With: add, almonds, aroma, banana, bappa, bhog, bowl, brown, cardamom, chop, clarified butter, colourful, colurfull, desi, dessert, dish, dry, elaichi, festivakl, flame, fried, fruits, fry, ganesh, ganpati, ghee, god, golden, green, gudi, Indian, kajoo, kaju, katha, lord, low, maharashtrians, Marathi, milk, mix, mortar, offering, padwa, pan, pestle, pooja, prasad, raisins, rangoli, rava, recipe, ripe, saffron, satyanaryan, semolina, sheera, shira, soak, sooji, spirit, stir, sugar, suji, sway, sweet, sweet dish, tahli, tasty, thali, waft, zafaran

Masoorachi Aamti or Red Lentil Curry

January 23, 2012 by manjirichitnis 10 Comments

Akkhe Masoor or whole red lentils

Masoorachi Aamti or Red Lentil Curry – Recipe adaptation from Mother, Mother in Law and a close C.K.P friend – who loves to stir up some spicy CKP fare and generally succeeds at it 🙂

Masoorachi Aamti or Red Lentil Curry

Delicious, easy and quick recipe for using whole red lentils with skin on
Print Recipe
Servings: 4 portions
Course: Main Course
Cuisine: Indian
Ingredients Equipment Method

Ingredients
  

  • 300 Grams MasoorDal (Red Lentil) with their brown covers intact and whole
  • 1 tsp Mustard Seeds
  • 3 cloves Garlic with skin on
  • 5-6 Curry leaves
  • 2-3 Green Chillies
  • 1 tsp Cumin
  • 1.5 tbsp freshly grated soft white coconut
  • 1.5 tbsp Goda Masala
  • 2 tbsp Coriander Powder
  • 1.5 tbsp Ginger – Garlic Paste
  • 3 mediumsized Red onions, chopped fine
  • 1/2 tsp Asafoetida
  • 1.5 tsp Turmeric powder
  • 2 tsp Red Chilli Powder
  • Jaggery to taste
  • Salt to taste
  • 2 – 3 petals Garcinia Indica – wet, salt preserved
  • Fresh leaves of Coriander chopped fine for dressing
  • 2 tbsp Sunflower Oil

Equipment

  • 1 Pan with lid
  • 1 Knife
  • 1 Chopping Board
  • 1 Spatula

Method
 

  1. Soak the washed lentils in luke warm water for about 20 minutes. You can par-boil the lentils too, to save time. t
  2. Heat two large generous tablespoons of oil in a wok, no weight loss tip this, huh? Indeed!
  3. Add mustard seeds and wait for them to pop.
  4. To this hot oil, dd Asafoetida, crushed garlic cloves , let the skin remian attached.
  5. When the garlic is starting to brown add the curry leaves, green chillies, cumin and then the fresh grated coconut.
  6. Now stir in the Goda masala, coriander powder, turmeric powder, red chilli powder, ginger garlic paste and coriander chilli paste and mix well.
  7. Now add the chopped onion and cook them on a low heat until they begin to break down and caramelise.
  8. Drain excess water from the lentils and add them into this spice and oil mix. Stir well. Cover and cook on medium to low heat until almost done. Check occasionally and stir as so to ensure it does not burn.
  9. Add the soaked Garcinia Indica alongwith the water it was soaking in. Mix well. Cook without the lid on low heat until fully cooked.
  10. Season with finely chopped fresh as ever coriander andserve piping hot with phulkas dripping with ghee (clarified butter) or the plain old boiled white rice.

Recipe Notes

  • Goda Masala – this is a mix of various spices readily available in Asian Grocery stores it’s basically a mixture of dry coconut roasted with a mixture of at least 10 different spices, best of all it’s available to buy online at Red Rickshaw – previously called itadka.com. Refrigerate this pack to increase shelf life,yayay so many tips from me, don’t YOU just LOVE me if u better don’t just READ this make n slurp it all ALONE, drop me A LINE and thank meeeeeeeeeeeeeeee) Better still make your own, recipe coming soon – watch this space!
  • Aamsul / Amsul – also known as Kokum or Garcinia Indica, is a plant belonging to the mangosteen family (Clusiaceae). This is one of those revered ingredients that is commonly used in Indian cooking especially in Maharashtra, along the coast. Much like my beloved coconut this fruit has multiple applications and is very versatile, besides it is such a good-looking gorgeous and delicious tropical fruit.
  • Coriander and Chilli paste – 2 small-sized bunches of coriander pureed with 2-3 green chillies – freeze and use on demand, handy and 1 of my 5 “save your face” purees for unwanted guests popping in at odd hours – the other 4 are listed at the end of this recipe.
  • The other 4 SAVE ME NOW pastes are: a garlic ginger coarse paste, Finely grated fresh white coconut paste, Tomato red onion puree -1:3, And the best one for last aye? – a few onions chopped lengthwise n lightly roasted in a kadhai (wok) with fresh white coconut finely grated till they turn slightly brown, then churned into a paste in the mixer.
  • The masoor dal can be done 2 ways for stage 1 of this process, 1st is the short cut which I love as I suddenly get an urge mid-evening to cook this typical CKP recipe to appease my urges to run to Heathrow n take the next flight to my parents home in Pune, hummmmm, so we soak the masoor dal 2 measures feeds 2 adults with a ravenous appetite and leaves some to spare.

Key

This is the key to a mystical tropical paradise…. errrr… sorry but it is not, it is simply the key to some important words that you will encounter pretty often while reading my posts or watching my videos. I am after all a student of Chemistry and treat my kitchen like my personal laboratory where I create my own kitchen experiments! This is why the word ‘Key’ reminds me of my Chemistry textbook in my school years 😉

  • C.K.P stands for Chandraseniya Kayastha Prabhu a sub-section of the Maharashtrian community in India and they generally hail from the coastal regions and hence are rather partial to freshly grated coconut and amsool in their food, not to mention their love for fresh fish and mutton, oh yeah!
  • Daal is used to loosely to refer to the uncooked Lentil and AAMTI is a Marathi word meaning cooked curry.
  • Coriander for my friends from across the pond is Cilantro.
  • Phodni – Marathi for tempering, also one of my favourite words to say. Follow my hashtag on Instagram #phodnitales , please pretty please? 🙂
  • Kadhai – The Marathi pronunciation sounds like it ends in ‘ee’, while the Hindi pronunciation stretches the first ‘a’ following the ‘K’ to sound like ‘aaa’ , easy or what?!
  • Phulkas – Also called chapattis or the delightful Indian Bread soft and fluffy and fresh off the pan has ghee smeared on it to pack some punch and many, many calories 🙂

EXPLORE MORE RECIPES FROM MAHARASHTRA, INDIA

  • Valache Birdhe – C.K.P style recipe -वालाचे बिरडे
  • Konkani Pompfret Fish Curry पापलेटचं कलवण
  • Prawn Khichadi – कोळंबीची खिचडी
  • C.K.P Style King Fish Curry – सुरमई चे कालवण
  • C.K.P Style Prawn Curry

Random Thoughts

I would totally rechristen the word ‘Method’ in a recipe post with the name ‘Process ‘ Why, well once a Chemistry student and a retail employee I guess some things just stay with you forever. Also, instead of “PREPARATION” I choose the word ”Process” which is drilled into a Retail Managers brain like young parents making their kids rote learn alphabets)

Pic 1: The saucepan contains oil heated and then the asafoetida, cumin seeds, mustard seeds, then the garlic, chopped green chillies and curry leaves and last but the best one is GODA masala

Pic 2 :Chopped red onion added to the mix

Pic 3: That’s the dal cooking

Pic 4 & 5: All done , the AROMA is filling my senses and transporting me into my MIL’s kitchen , I want to HUG her nowwwwwwwwwww

P.S: Will post pictures to compare the 2 sizes of Mustard seeds at a later date , I am now going to be too busy slurping my Aamti off the plate 🙂

Filed Under: Curry - Vegetarian, Food, Indian, Recipe Index, Vegetarian Tagged With: aamsul, allergic, amsul, amti, aromatic, asafoetida, Atyamala, birund, blog, boil, Bollywood, bread, busy, butter, calories, chillies, chukra, CKP, cloves, clusiaceae, coarse, coastal, coconut, cook, corainder, curry, dal, dance, dhania, dish, dried, easy, elastic, fast, food, food blog, garcinia indica, garlic, ghee, goda masala, green, Gujrat, heeng, Hindi, hing, hot, hug, hurry, internet, itadka, jaggery, jeera, juices, Kadhai, Karnataka, kokum, konkan, laptop, leaves, lentil, lick, link, Madame Tussads, Madhuri Dixit, maharashtrian, mangosteen, Marathi, masoor, men, MIL, moi, Murgal, Murgala, mustard, mutton, Orissa, palate, paste, phodni, phulkas, piping, pour, powder, process, Punampuli, Pune, pungent, Raktapurak, ratamba, Ratnagiri, raw, recipe, red, region, rice, Sanskrit, season, seeds, slurping, song, Tamil Nadu, tasty, tease, tempering, Tintali, tintidika, tomato, tumeric, turmeric, typical, Vrikshamla, waist, water, wax, wet, white, wiki, wok

An Omelette with a twist

January 23, 2012 by manjirichitnis 4 Comments

Your regular omelette but better

Easy omelette recipe

What’s life without a bit of a twist I say!

So here’s one of my “different” omelette recipes, I love eating eggs in all shapes and forms and am more so obsessed with omelettes and scrambled eggs.

This recipe is for hungry morning times when you have a rumbling tummy and need time to hold the tummy quiet and prepare for rest of the day. It is a filling, satisfying yummy start to the day, I serve this with 2 slices of toast buttered with a generous blog of organic grass-fed butter and a large glass of freshly squeezed orange juice to wash it down 🙂

Ok so you will need the following ingredients and a really easy short process to cook this yummy egg omelette

An Omelette with a twist

5 from 6 votes
Fluffy, delicious egg omelette
Print Recipe
Prep Time 5 minutes mins
Cook Time 6 minutes mins
Servings: 1 person
Course: Breakfast
Cuisine: Fusion
Ingredients Equipment Method

Ingredients
  

  • 2 Eggs
  • 1 large Red onion chopped lengthwise
  • 1/2 Garlic cloves sliced very fine lengthwise again
  • 1 Chicken Sausage
  • 2 Green chillies
  • 1 tsp Red chilli powder
  • Olive Oil as required or unsalted butter
  • Salt as per taste

Equipment

  • 1 Non-stick frying pan
  • 1 egg-whisk or fork
  • 1 Spatula
  • 1 Knife
  • 1 Chopping Board

Method
 

  1. Chop the red onion lengthwise and so also the garlic clove.
  2. Heat frying pan over medium heat.
  3. Sauté the red onion n garlic slices in a generous blob of butter on a pan until the onion starts to reduce turns a mild brown n stays ab it soft.
  4. Transfer the onion and garlic onto a creamic plate and allow to cool down a bit.
  5. Crack two eggs in a mixing bowl, beat them well using a whisk or a fork until you see loads of bubbles forming and the eggs have a nice thick consistency.
  6. Now mix in the onions and garlic into the eggs, add the chopped chillies, red chilli powder.
  7. Roughly chop the chicken sausage and add into the egg mixture, mix well
  8. Heat the same frying pan on a medium add and add some more butter if you like, when the pan is hot , pour the egg mixture into the pan.
  9. Cook with a lid for a few minutes, then using a wooden spatula loosen the omelette around the eggs, flip and cook until done on the other side without a lid, reduce the heat as required.
  10. Serve hot with toasted sourdough smothered in butter, a nice strong cup of masala chai and some freshly squeezed orange juice or a slice of grapefruit.

Recipe Notes:

  • I like to chop the red onion and garlic lengthwise. Why, you ask? Because in an omelette the tiny square bits will loose themselves and vanish I like to chomp on and feel the taste of all the ingredients as I eat the omelette and appreciate each and every ingredient, it’s just so much more fulfilling and creates an immense feeling of happiness as a creator of a true mouth-watering masterpiece.
  • The red onion should be sauteed to the point it is still soft and light brown so that when you bite into it, it releases a sweet burst of onion taste on your palate.
  • Feel free to swap the butter for olive oil or an oil spray.
  • I prefer to use unsalted butter, I mean who wants to pump their body with extra sodium, not me, hellow normal blood pressure!
  • A fluffy, well-cooked omelette is a joy to cook and serve and even nigger pleasure to eat so it is imperative to get the timing of flipping it over absolutely spot-on and correct, it comes with practise and you will love it!
  • Feel free to innovate and improvise this recipe, throw in bits of sweet pepper, sweet corn, spinach that is about to go off, or some kale that is looking tired, add in your favourite cheese or not. I leave that to your imagination, creativity, and what is available at hand!

AAAHHH pure omelette pleasure.

If you do make and enjoy eating this share your partner or husband or children’s reactions, it will surely make me smile.

Egg-citing egg recipes to inspire you!

  • Soft-boiled eggs and asparagus soldiers
  • Masala egg curry, a recipe famous on the street-food stall in Mumbai
  • Smoky chorizo and chives with eggs oven-baked in pots
  • Turkish Poached eggs
  • Indian Masala egg omelette
  • Egg based Team-Time Treats – compilation of recipes
I visisted a busy egg Farm where hens roam in rural England, have a read and browse through some pictures for a virtual tour

Behind the scenes at an Egg Farm

Filed Under: Food, Recipe Index, Vegetarian Tagged With: blob, breakfast, butter, caramelise, caramelize, chicken sausage, chillies, chopped, chubbybrown, cloves, cut, delicious, eat, eggs, enjoy, fat, finely, food, food blog, fork, fresh, garlic, green, guilt, hot, immense, ingerdients, juice, low, Lurpack, mashed, masterpiece, mix, omlette, onion, orange, pan, powder, red, salivate, salt, squeeze, tatsy, toast, tongue, twist, yummy

  • « Previous Page
  • 1
  • …
  • 9
  • 10
  • 11

Food,travel and lifestyle writer. Photographer.

  • Email
  • Facebook
  • Instagram
  • Pinterest
  • Twitter
  • YouTube

Categories

  • Baking
  • Breads
  • C.K.P recipes
  • Cakes
  • Chutneys
  • Cocktails
  • Curry – Meat, Seafood
  • Curry – Vegetarian
  • Desserts
  • Events
  • Featured Food and Drink
  • Featured Lifestyle
  • Featured Travel Adventures
  • Food
  • Healthy
  • Home
  • India
  • Indian
  • Kitchen
  • Lifestyle
  • London and rest of U.K
  • Meat
  • Miscellaneous
  • Product Reviews
  • Quick and Easy
  • Recipe Index
  • Rest of the World
  • Restaurant Reviews
  • Salads
  • seafood
  • Sides
  • Smoothies
  • Soups
  • Travel
  • Uncategorized
  • Vegan
  • Vegetarian

Featured Blogger on Great British Chefs

GBC_blogger-badge_150x300px    

Need a New Power Blender?

13076814_10154185434898293_7387808474266473605_n

Travelsfortaste is Featured on Expats Blog

England expat blogs
Privacy & Cookies: This site uses cookies. By continuing to use this website, you agree to their use.
To find out more, including how to control cookies, see here: Cookie Policy
Squaremeal.co.uk - Restaurant Reviews

About me

Writer and Photographer. Food,Travel & Lifestyle, Blogger and Digital Marketer. Read More…

  • Email
  • Facebook
  • Instagram
  • Twitter
  • YouTube

Recent Posts

  • Diamond Jubilee Tea Salon, Fortnum & Mason – Afternoon Tea Review
  • Brown’s Brasserie and Bar celebrates 50th Anniversary with Covent Garden Grand re-opening
  • Hampton Court Palace Food Festival – Review
  • Brigit’s Bakery Afternoon Tea, Covent Garden, London – Review
  • Maplin Photo Walk around Central London

Copyright © 2025 · Foodie Pro Theme by Shay Bocks · Built on the Genesis Framework · Powered by WordPress

This website uses cookies to improve your experience. We'll assume you're ok with this, but you can opt-out if you wish.Accept Read More
Privacy & Cookies Policy

Privacy Overview

This website uses cookies to improve your experience while you navigate through the website. Out of these, the cookies that are categorized as necessary are stored on your browser as they are essential for the working of basic functionalities of the website. We also use third-party cookies that help us analyze and understand how you use this website. These cookies will be stored in your browser only with your consent. You also have the option to opt-out of these cookies. But opting out of some of these cookies may affect your browsing experience.
Necessary
Always Enabled
Necessary cookies are absolutely essential for the website to function properly. This category only includes cookies that ensures basic functionalities and security features of the website. These cookies do not store any personal information.
Non-necessary
Any cookies that may not be particularly necessary for the website to function and is used specifically to collect user personal data via analytics, ads, other embedded contents are termed as non-necessary cookies. It is mandatory to procure user consent prior to running these cookies on your website.
SAVE & ACCEPT