Travels for Taste

Tales of travel and food with a touch of spice

  • Home
  • About
    • In the Press, Published Work and Interviews
    • PR and Disclosure Policy
  • Food
    • Recipe Index
      • Indian
        • C.K.P recipes
        • Curry – Meat, Seafood
        • Curry – Vegetarian
        • Sides
        • Chutneys
      • Healthy
        • Soups
        • Salads
      • Quick and Easy
      • Baking
        • Desserts
      • Meat
      • Seafood
      • Vegetarian
        • Salads
      • Vegan
    • Product Reviews
    • Events
  • Travel
    • UK
    • India
    • Around the World
  • Lifestyle
    • Home
    • Kitchen
    • Restaurant Reviews
    • Miscellaneous
  • Giveaways
  • Work with me
    • Meet interesting foodie entrepreneurs here

Halloween Forgotten Graveyard Cake

October 26, 2017 by manjirichitnis 201 Comments

Halloween is just around the corner and it is a great excuse to get creative with your bakes. ( As if you need any more excuses that the excitement surrounding this year’s GBBO! I can’t wait for the final next week …eeekkkkkk) Because its also half-term, baking with kids around should involve easy recipes and loads of scope for little hands to get involved.

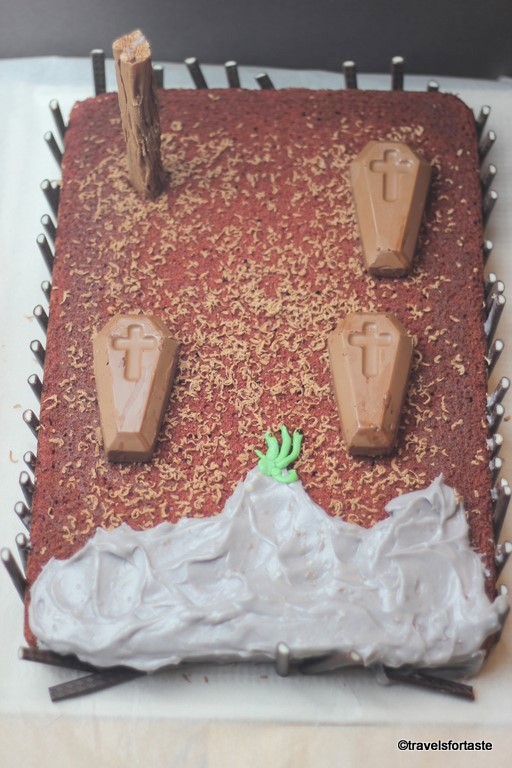
I decided to bake a delicious cake which, am sure little people will love to ‘help’ you bake, especially the chocolatey ‘graves’ that top that cake. This spookalicious Forgotten Graveyard cake depicts an old, derelict graveyard which most times lies forgotten outside a sleepy village. But on Halloween night, a strange grey slime starting sliding across the ground which has suddenly turned a blood red colour ….. all the old coffins are now surrounded by maggots that seem to be growing in numbers. The only witness to these horrors seems to be an old tree trunk and a rickety fence that is falling apart in many places… wait hang on.. what is that? A green alien hand or a zombie crawling out of the slime… who knows what will happen next….. 😉

Brrrr… 🙂 Am sure you and your little helpers can add more spooky effects to the cake! Just let their imagination run wild like I did. But first, let’s get to grips with the basics!

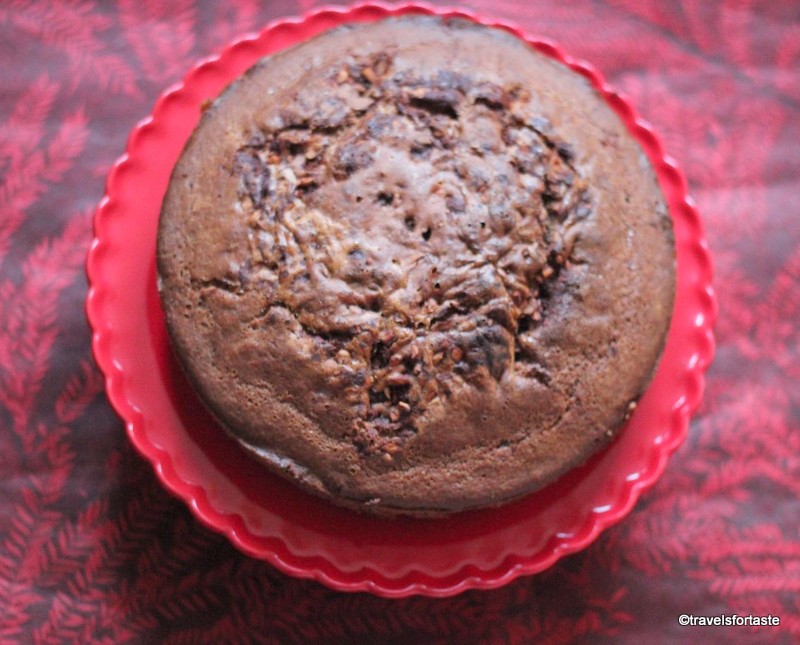
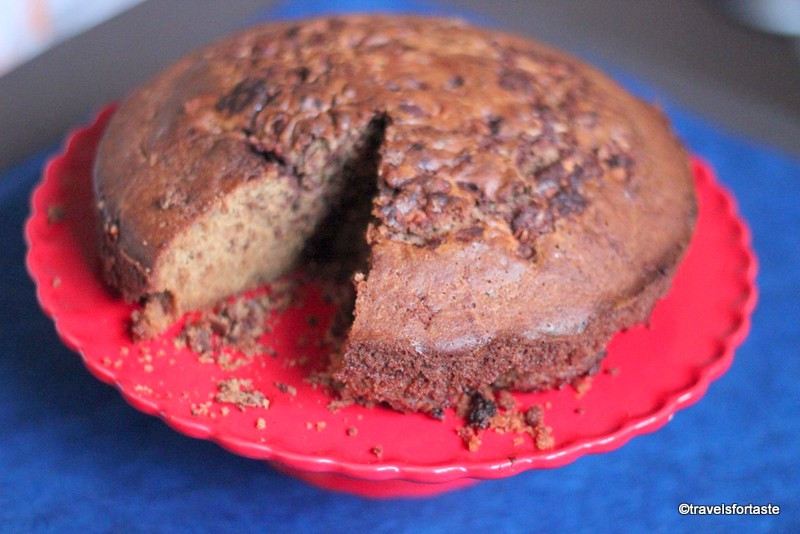
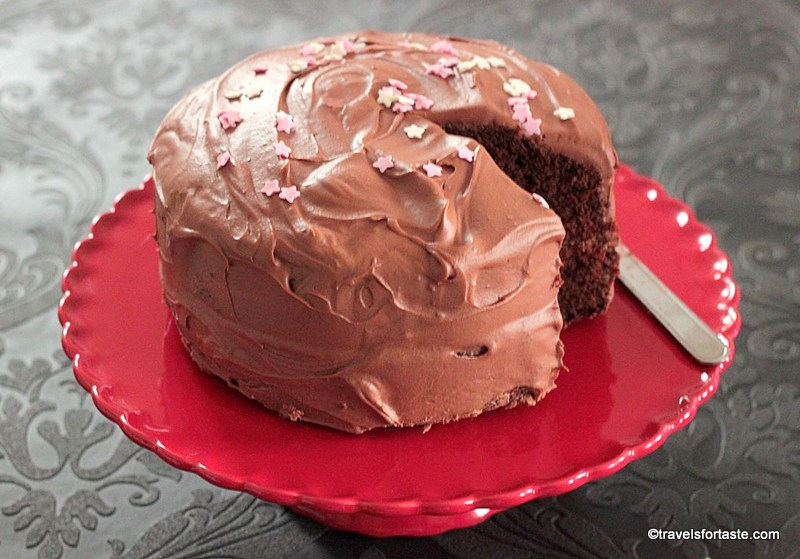
For my graveyard cake slab, I have followed a simple but brilliant Red Velvet cake recipe from here. Their triple-tested recipe is literally fool-proof so that folks like me can bake without worrying about any goof-ups. The only thing I have modified is the cream cheese frosting quantities to suit this particular bake. If you cannot find buttermilk use low fat pouring yoghurt, just add about 50 ml of water to bring up the total volume of buttermilk to 284ml

Halloween Forgotten Graveyard Cake – frosting

Manjiri
Spookaliciouscream cheese frosting in a ghostly shade of grey
5 from 18 votes
Print Recipe
Course Dessert
Servings 4

Equipment

  • Oven
  • Baking Tray
  • Hand held blender
  • Spatula

Ingredients
  

  • 300 gm Icing Sugar
  • 250 gm Unsalted melted butter
  • 250 gm Cream Cheese

Instructions
 

  • Melt the softened unslated butter in the microwave for 30 sec
  • Sieve the icing sugar into a mixing bowl
  • Pourthe butter over it and mix well
  • Add the cream cheese
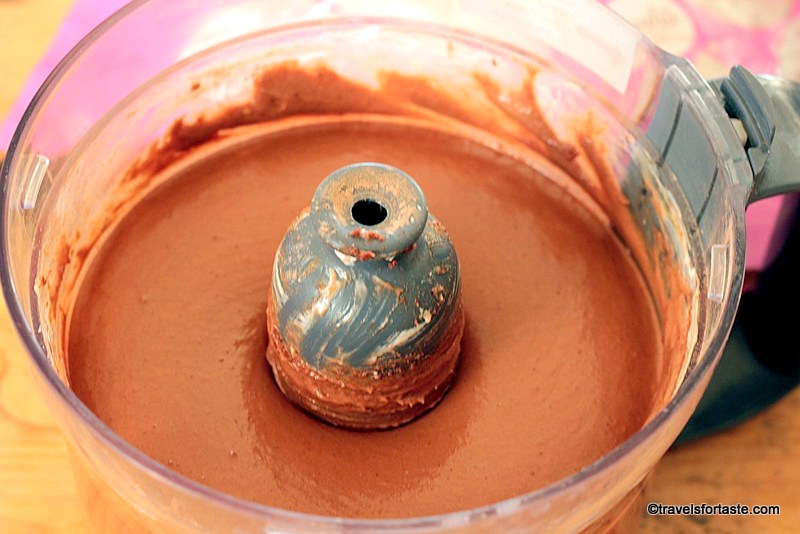
  • Using a toothpaste add 2 drops of black food colouring and with another toothpick, add 1 drop of ivory food colouring – they mix to give a spooky and slimy grey colour to the frosting
  • Blend into a smooth paste with a hand blender for almost 4 minutes or until the mixture is smooth and the sugar granules are totally mixed into the butter and cream cheese
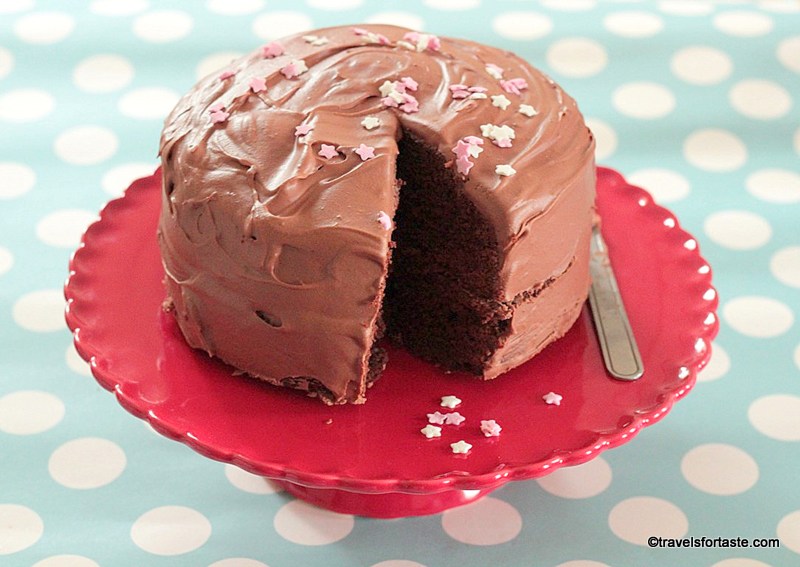
  • To decorate the cake I only used a small amount and after my nephews had a go at decorating I slathered on the remaining slime all over the cake slab – made for a very happy 2 year old 😉
  • Of you would rather not use up the whole buttercream, simply change the colour to anything you fancy and freeze – keeps for 3 weeks in an airtight box in the freezer
  • To use thaw overnight in the refrigerator and blend for minutes to get the same texture again
  • Once thawed use it all up, do not refreeze
Keyword Halloween Cake

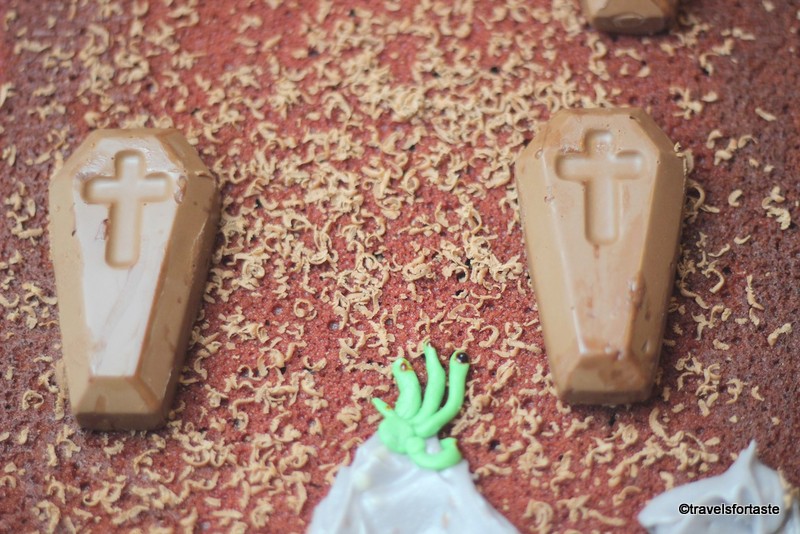
For the chocolate coffins:

Chocolatey coffin shaped cake toppers

Manjiri
Unleashyour creativity by mixing up the fillings and flavours for each cchocolate coffin!
5 from 18 votes
Print Recipe
Course Dessert

Ingredients
  

  • 1 Milk chocolate bar
  • Mixed nuts roughly chopped

Instructions
 

  • Break up the chocolate bar into a glass bowl and place it over a vessel containing boiled water
  • Use a spatula to mix in a handful of roughly chopped mixed nuts into the chocolate
  • If you want to use any strong flavours then use a bar of chilli or salted caramel flavoured chocolate or any flavour that takes your fancy
  • Spoon mixture into coffin shaped moulds and allow to set in the refrigerator for atleast 20 minutes
  • Once set, they should come off the mould pretty easily
  • Place them on the graveyard cake however you like
  • This mixture makes 6 coffin shaped chocolate cake toppers
Keyword Halloween Cake

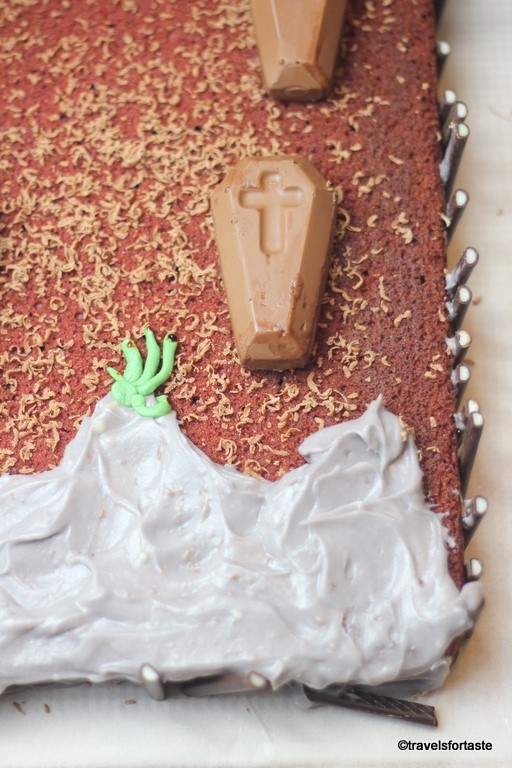
To make the alien hand I used a tiny amount of green coloured sugar frosting and ‘painted’ nails using black food colour and a toothpick. For the tree stump I have used a Cadburys flake and for the chocolate fence surrounding the graveyard perimeter, I used mint chocolate sticks. A small amount of cream cheese frosting applied using a toothpick serves as edible glue to attach the sticks to the sides of Forgotten Graveyard cake. The ‘maggots’ on the graveyard cake are simply shaved chocolate curls.

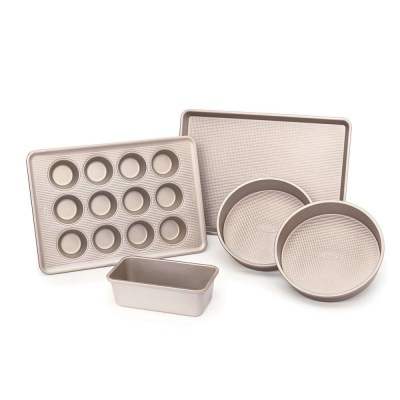
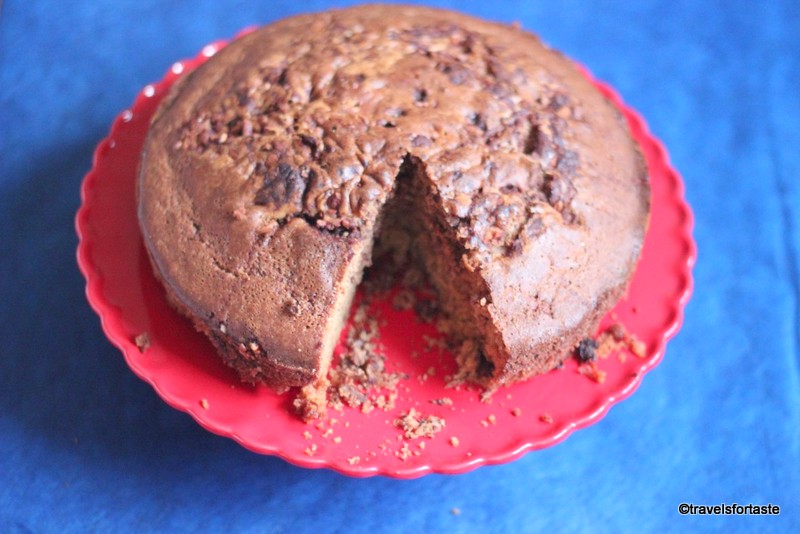
What I really want to mention here is though that I used my new OXO non-stick pro cake tin and am very happy with the result. The tray is sturdy and my cake came off very easily, thanks to the two-layer coating which is PFOA-free, and ceramic-reinforced. This also makes this gorgeous cake tin scratch, stain, corrosion and abrasion resistant.   I didn’t need to use baking parchment – which I find very fiddly. The reason the cake came off so easily was the beautiful micro-textured pattern which allows for even baking.

And after my cake completely cooled I moved it to my superb new OXO non-stick Pro commercial grade baking plate. This wide baking sheet gave me enough surface area, around the bake to decorate and display my creation, making it really easy to photograph it too. Spreading the grey ‘slime’ cream cheese frosting was a doddle thanks to the handy OXO bent icing wand.

Image courtesy OXO

Now if you are wondering how you can get your hands on these gorgeous OXO non-stick baking accessories, I have some exciting news for all of you. One of you can win a set of baking gear from OXO worth £50 as a special festive treat! How? All you need to do win this cool bakeware bundle worth £50 from OXO is to enter the giveaway below:

a Rafflecopter giveaway

Good Luck!

CONGRATULATIONS to the winner Sidrah A and Thanks to everyone who participated!

Please have a read through the Terms and Conditions below:

  • One lucky winner will be picked automatically by Rafflecopter.
  • Deadline for entering this contest is 26th Nov’ 2017 midnight GMT.
  • Entry is open only to residents of the U.K, except Scotland and Ireland.
  • All entrants must be 18 years old and above.
  • Increase your chances of winning by visiting daily and tweeting out the pre-recorded tweet, provided you have completed all other steps the first time when they enter.
  • The giveaway prize as mentioned is a bakeware bundle worth £50 from OXO consisting of a Non-Stick Pro 12 Cup Muffin Tin, 11″ Balloon Whisk, 7 Piece Measuring Cup Set and a Bent Icing Knife.
  • Neither OXO, nor I am liable for any damage of giveaway prize in transit.
  • Please allow a minimum of 15 days for delivery of the prize, which may reach earlier or later. The giveaway prize will be sent directly by OXO.
  • The prize is as stated: it is non- transferable and no cash or any other alternatives are available.
  • I retain the right to DISQUALIFY any entrant who does not complete all the steps mentioned above.
  • The winner will be notified on 27th Nov’ 2017  on Twitter by me and here on my blog post. I shall tag the winner on Twitter via their twitter id. If you are declared as the winner you agree to allow me and OXO to contact you via email id and share your details with OXO who will arrange for the goody bag to be sent out to you, to have your name announced here on my blog post and on Twitter.
  • If the winner fails to respond by 30th Nov’ 2017  then another winner will be chosen at Random.

*With thanks to OXO. *Sponsored posts help me keep my blog going and I can continue sharing fun recipe ideas with all of you.

NEED MORE RECIPE INSPIRATION TO GET BAKING?

Why not check out my other recipes here:

  • Choco-chip cookies to kill insomnia and cure heartache
  • Basic Chocolate Cake with Frosting
  • Sundried tomato and chilli spiced bread  
  • Banana Loaf – Mary Berry’s recipe
  • Cinnamon-pecan Gluten-free coffee cake

Filed Under: Baking, Cakes, Food Tagged With: spookalicious Forgotten Graveyard cake

Cinnamon Pecan Gluten Free Coffee Cake

March 2, 2017 by manjirichitnis 2 Comments

Cake! Brilliantly easy afternoon tea cake with crunchy pecans and lots of cinnamon. Plus it’s Gluten-Free!

After a really long time, today I felt like baking a really big cake. Sometimes the desire to bake just takes over and then I have to get all my baking paraphernalia out and just enjoy the process. This classic coffee cake is what we in the U.K would serve for afternoon tea and doesn’t actually contain coffee. It is a modified recipe for a classic sour cream coffee cake.  This cinnamon pecan coffee cake is not also gluten-free.

I am particularly pleased with the outcome of this one because I literally just threw things together and poured the entire cake mixture into my lovely removable bottom cake tin.

The idea of a cinnamon pecan coffee cake had been dancing around in my head for a few days now after I found an easy recipe on Betty Crocker. But of course, I had to tweak the ingredients and swap a few things here and there. I also prefer cakes just as they are minus the fuss of drizzle or icing or anything terribly fancy. Or maybe I am just lazy like that 😉

Another reason I am rather pleased with the outcome of this bake is that I have been working with alternative flours for a while now. Ever since I made these fluffy GF, dairy-free finger millet pancakes with no eggs and no refined sugar almost 2 years ago, I have made many more things using various flours.

I currently am rather obsessed with Teff flour and have even made some very yummy pancakes with them. But unfortunately haven’t been able to get the recipe up on time for Pancake Day today! And though I have finally managed to finally get back to blogging after a hectic but fun 3-month project, I still have to get all my ducks in a row. Looking for healthy pancake recipes? Try my Finger millet and blueberry GF, dairy-free and refined sugar-free, eggless pancake recipe, or why not try my mixed flours amaranth and finger millet mixed berry GF pancakes recipe – which is also dairy-free and eggless and can be made vegan!

So this baking session also gave me an opportunity to finally try the sample of gluten-free self-raising flour sent to me by the lovely Vicki or ‘Free from Fairy’. I too have studied Biochemistry after my B.sc in Lifesciences. I didn’t pursue my research in Biochemistry though as I did my MBA in Marketing and life took me on another track. But I have always loved reading about and understanding the science behind food and various ingredients.

And I am very satisfied with the consistency and results with Vicki’s fabulous blend of self-raising flour – Gluten-free whole grain which is also rice-free and has a mix of teff, sorghum, and buckwheat. All of these flours I love working with!

So here is my version of the recipe, I do hope you make this cake and enjoy it with your afternoon cuppa as it is ‘Time for a cuppa’ Day – a week where the charity Dementia, U.K raise awareness and support fund-raising activities. Also, it was St. David’s day yesterday, and yes I love the google doodle but I am also happy that I have been to Wales four times in the last six years – that’s a lot! Lucky me, twice to enjoy my stay and do every a food blogger would love to do, with some really good blogger friends and the other two times to explore the beauty of Wales and relish the food.

I have used Fairtrade dark chocolate in my recipe as 27th Feb was the start of the Fairtrade Fortnight. I met and spoke to many interesting brands at the Fairtrade Christmas show last year in July in London, more on that in another post coming soon.

But both A and me, are very drawn to Wales, especially to Snowdon. I did start writing a series of travel posts about our Welsh adventure but never really managed to publish all my posts. Why not have a look at what we got up to at Holyhead in my post here and also check out the breathtaking views from Southstack lighthouse in my post here?

Lastly, I swapped sugar with Natvia, so all these swaps make it a healthy bake right 😉 Definitely lighter on the conscience, in moderation of course!

Cinnamon Pecan Gluten Free Coffee Cake

Manjiri Chitnis
Classic coffee cake recipe with tweaks –
An easy toput together cake recipe, a quick bake for afternoon tea, an all-rounder, getsfull marks for being easy, quick, GF and fun to make!
Print Recipe
Prep Time 30 mins
Cook Time 1 hr
Course Dessert
Servings 15 pieces

Equipment

  • Oven
  • Baking Tray
  • Hand-held blender/ Food processor/ Mixer/ Stand Mixer
  • Spatula
  • Measuring spoons
  • Large Mixing Bowl
  • Sieve

Ingredients
  

For the Cinnamon Pecan Gluten Free Coffee Cake

  • 3 cups Free from Fairy's self-raising flour i.e 385 grams
  • 1.5 cups sugar substitute like Natvia
  • 1.5 tsp Baking powder
  • 1.5 tsp Baking soda
  • 3/4 tsp Salt
  • 3/4 cup Unsalted Butter
  • 3 Eggs
  • 1.5 cups Soured Cream
  • 1.5 tsp Vanilla

Instructions
 

  • Chop the pecans roughly and add to a small bowl. Break the dark chocolate bar into small pieces by hand. Mix the cinnamon powder and brown sugar and set aside
  • In a large mixing bowl sieve, the flour, and the sugar – just to ensure no lumps go into. Add the baking powder and baking soda, softened unsalted butter, vanilla and eggs did not use an electric mixer just used a large spatula and mixed the whole thing together well until a proper thick mix was formed. Then I added in the soured cream and mixed well again
  • Now pre-heat the oven to 180 degree Celsius
  • Grease a 12'' cake tin using a generous blob of the unsalted butter and pour enough cake mixture to make a thin layer then sprinkle some of the pecan mixture. Repeat at least 3 times until all the cake and pecan mixture is alternatively used up
  • Bake in the centre of the pre-heated oven at 18 degree Celsius for one hour
  • Check using a toothpick or a thin knife to check if the cake is done by inserting it into the middle of the cake. If it comes out clean then the cake is done
  • Place the cake tin on a wire rack and allow to cool completely before releasing the removable base of the tin
  • Serve with freshly brewed tea
  • Stores well in the refrigerator for at least a week in an air-tight tin
Keyword Gluten-free cake

This cake contains soured cream and I wouldn’t keep it for longer than a week refrigerated but would love to hear from you if you have stored it longer and how.

Happy Baking!

NEED MORE RECIPE INSPIRATION TO GET BAKING?

Why not check out my other recipes here:

  • Choco-chip cookies to kill insomnia and cure heartache
  • Basic Chocolate Cake with Frosting
  • Sundried tomato and chilli spiced bread  
  • Banana Loaf – Mary Berry’s recipe
  • Halloween forgotten-graveyard cake

Filed Under: Baking, Cakes, Food

Banana Loaf – Mary Berry’s recipe

March 28, 2014 by manjirichitnis 11 Comments

Ever since I had my Carpal Tunnel Decompression operation on my left hand I have been trying to test how soon my wrist can take what kind of strain and one of the things I sorely missed was cooking what I wanted when I wanted and of course blogging too.

This week I finally managed to get back to cooking though I must admit that my wrist is still wobbly. So for such a wobbly wrist but determined to bake me ,Mary Berry’s easy recipe from her book Mary Berry’s Baking Bible, is a blessing. It’s a dead simple but fabulous recipe and even though I added a few tweaks it turned out so very perfect. My friend popped over tea and was so happy to see it baking in the oven, all her praise did good things to my ego as well, no doubt there 😉

So the thing is I have stopped buying regular butter and am big on low-fat options right now , trying hard to reduce the calorie count in my cooking while still getting the taste just right.

I am also pretty crazy on kitchen cleanliness and need to organise my thoughts before I press the start button in my head so I neatly gather all the ingredients and the vessels required for baking and my food photograph – which again is just about ok thanks to very ,very shaky hands! God , I need to use a tripod and how!

I do hope that all my friends who have been asking for the recipe ever since I posted the picture on FB will get baking and tell me how it turns out 🙂 After all, who doesn’t love a good ol’ recipe from Mary Berry?!

As you are aware you need very,very ripe soft bananas for this , perfect for a lazy bum like me who can totally forget that there are already bananas at home and go get some more . So this is a thrifty recipe too with a proper feel good factor post-baking, even for first-time bakers – just 7 ingredients and 2 minutes of whizzing with your whisk – so therapeutic I tell you! I love Mary Berry‘s recipes , I simply follow them with eyes closed and the results are amazing each time!

So this is a thrifty recipe too with a proper feel good factor post-baking, even for first-time bakers – just 7 ingredients and 2 minutes of whizzing with your whisk – so therapeutic I tell you! Mary Berry makes baking and cooking look so simple and elegant, don’t you just love her?!

Ingredients:

  1. 2 ripe bananas
  2. 2 large eggs or 3 small will do – I used 3 small-sized ones
  3. 100 gm unsalted ,softened butter – I used a salted olive spread – still superb results!
  4. 225 gm self-raising flour
  5. 175 gm golden castor sugar
  6. 1 tsp baking powder
  7. 2 tbsp milk – I use skimmed milk

Method:

  • In a large mixing bowl sift the flour through a sieve, I always do but if you don’t have a sieve handy just skip this doesn’t matter in this recipe at least.
  • Peel and break off pieces of the banana and drop them into the dough, add the sugar,crack the eggs into this and add the remaining ingredients.
  • Stir properly folding in the dry ingredients with the wet to get a squidy mixture. I like to do this before using my hand-held blender – prevents the flour from flying all over the place .
  • Meanwhile , preheat the oven to 180 °C / Fan 160 °C / Gas 4 and grease a 2 lb/900 gm loaf tin with the soft butter. I did not line the tin with a baking parchment but the loaf after it has cooled down totally came off so easy no mess whatsoever!
  • Blend the mixture for 2 minutes (I counted it in my head while I used the hand blender , primarily because it was quite an agony to do this with my poor sore wrist)
  • Spoon the mixture in the loaf tin and use a flat spatula to scrape off all the remaining mixture from the bowl into the tin – again a rather satisfying thing to do 🙂
  • Level the surface of the mixture in the tin.
1-IMG_6697 (Copy)
  • Bake for one hour until it has risen and is a beautiful brown colour.
  • A few tips for fan oven users , I kept the tray on the level just off the base of the oven and kept a wire rack 2 slots above it before preheating and throughout the baking process. I just feel that somehow the wire rack placement above the tin distributes the heat more evenly if you please? Humm, just a mad theory but works for me.  Another thing in the oven setting use the heat from top and bottom even heat setting if that makes sense.
  • After one hour turn off the heat in the oven and wait for 5-10 minutes before opening the door as a huge blast of heat will slap you in the face. If you want to sure that it has baked through insert a fine skewer or a fine knife , if it comes off clean you are there !
  • Remove the loaf tin onto a wire rack and allow to cool completely before  you cut off a piece . My friend and me had to literally stop ourselves from grabbing huge chunks from the hot bake , it looked so good ummmmm!

One beautiful thing about baking is that it’s an exact measurement game and if you get the measurements bang on the result is always really good.So invest in a decent weighing scale!

Starting to bake with easier simple recipes like the a Banana Loaf  is a great way to boost your confidence until you graduate to the more complex bakes. Thank you Mary Berry !

Bon Appe’tit folks 🙂

2-IMG_6725 (Copy)

Filed Under: Baking, Breads, Food, Recipe Index Tagged With: 180 °C, 900gm, baking parchment, baking powder, Banana Loaf - Mary Berry's recipe, boost your confidence, Carpal Tunnel Decompression operation, cool off, dry ingredients, easy recipe, Fan 160 °C, flat spatula, Gas 4, golden castor sugar, grease a 2lb loaf tin, impress your guests, just 7 ingredients, large eggs, Mary Berry's Baking Bible, only 2 minutes of blending, Peel and break off, preheat the oven, salted olive spread, scrape off, self raising flour, serve with tea, skimmed milk, sliceoffme bakes, sore wrist, Spoon the mixture, travelsfortaste bakes, unsalted and softened butter, wire rack

Chocolate Coconut Cake with Coconut flavoured Icing

February 14, 2014 by manjirichitnis 38 Comments

Decadent Chocolate cake with a delicious coconut flavoured icing

Dreaming of a chocolate cake, baking it, and devouring it, is a common obsession of mine. Also, I had many excuses to bake chocolatey treats, what with Valentine’s just around the corner. Not to mention many other reasons to eat cake following in quick succession after Valentines – my dad and husband’s birthday and our wedding anniversary, woohoo!

With so many occasions all lined up one after the other, a mega celebration was in order. And as we all know any celebration, big or small is incomplete without, yes you guessed right a proper cake.

So my plan was to bake an indulgent and rich chocolate cake and how better than Nigella to look to for a good recipe! Unable to pick a recipe on my own, I asked my neighbour’s adorable 5-year daughter to flip through Nigella Lawson’s book ”Feast” – Food That Celebrates Life. Lucky for me she stopped flipping pages at Nigella’s Old Fashioned Chocolate cake recipe. Better still it is made using only the food processor – so very perfect.

Besides, no better way to bring in Valentine’s week than by baking a decadent chocolate cake with hints of coconut flavour and adding some coconut flavoured icing on the top. I love Nigella’s original recipe which I have (dared to!) modify as I had been thinking of ways to use the lovely samples sent to me by Sugar and Crumbs.

I have modified the original recipe by using three medium-sized regular eggs, thick yogurt instead of sour cream, and have reduced the quantity of ingredients for the icing because I am not a big fan of slathering a very thick layer of sugary icing in between the layers nor am I very fond of a huge layer of icing on the top but I guess even after reducing the quantities of ingredients for the icing I still managed to get lots to smother the cake with. I have used Sugar and Crumbs flavoured cocoa powder in Chocolate Coconut and Sugar and Crumbs flavored natural icing sugar in coconut flavour, result – a perfectly balanced taste of coconut without being overpowering. So am calling my cake – ”Chocolate Coconut Cake with Coconut flavoured Icing”.For the remaining part, the original recipe is perfect, basic, simple, and therefore beautiful as it is foolproof and even a novice can get an excellent delicious, fluffy, and intensely chocolatey cake – very satisfying indeed! Thank You, Nigella!

Chocolate Coconut Cake with Coconut flavoured Icing

Chocolate Coconut Cake

Easy and delicious Chocolate cake recipe
Print Recipe
Prep Time 25 mins
Cook Time 25 mins
Course Dessert
Servings 8 portions

Equipment

  • Two 8 inch Round cake tins
  • Food Processor or stand-mixer
  • Spatula
  • Measuring spoons
  • Cake tester or thin skewer

Ingredients
  

  • 200 grams plain flour
  • 200 grams caster sugar
  • 1 teaspoon baking powder
  • 40 grams Sugar and Crumbs flavoured cocoa powder in Chocolate Coconut
  • ½ teaspoon bicarbonate of soda
  • 175 grams soft unsalted butter
  • 3 medium-sized eggs
  • 2 teaspoons vanilla extract
  • 150 ml thick-set yogurt

Instructions
 

  • Sift the plain flour through a sieve into a large mixing bowl
  • Add the caster sugar, cocoa powder, baking soda, and bicarbonate of soda
  • Mix well with a spatula and transfer it into the food processor
  • Crack the eggs into the mixture, add the vanilla essence and the yogurt and mix roughly with a spatula before running the food processor to ensure that the loose flour doesn’t fly all over the place. For the first 30 seconds, I lightly covered the chute of the processor with my palm to prevent the flour from flying out in a mist. Now, this is the reason I want a Kitchen Aid 😉
  • After an initial spin, use the blunt edge of the knife to scoop out what stuck to the walls of the processor and mix well with the cake batter.
  • Don’t worry if you think the batter is very thick, another spin for about a minute should give you the required consistency to ”pour” into the cake tins
  • Grease two removable base 8-inch tins with butter and equally divide the cake batter into each tin
  • Preheat the oven to gas mark 4/180°C/350ºF
  • Bake for 25 minutes and then test the center of the cake with a cake tester or thin skewer
  • My cakes were done in 25 minutes but you may need up to 30 minutes depending on the type of oven. The cakes rose beautifully but the top had cracks. The icing was there to save the day and make the cake look pretty
  • Remove cakes from the baking tray and leave to cool down on a wire rack

Coconut flavoured Icing

Print Recipe

Ingredients
  

  • 50 grams unsalted butter
  • 125 grams best quality dark chocolate broken into small pieces
  • 225 grams icing sugar
  • 100 ml sour cream
  • 1 teaspoon vanilla extract

Instructions
 

  • While the cakes are in the oven prepare the icing by mixing together all the ingredients of the icing
  • The original recipe calls for adding golden syrup but I totally gave that a miss
  • Why? Because I had already borrowed some butter, some yogurt, baking powder, and bicarbonate of soda from my very patient neighbour H 😉 – yes, yes she did get a large portion of this cake 🙂
  • Now to ice the cakes place the slightly domed part of one cake face down and slather icing on the flat part and place the other cake flat side down on the icing and then slather icing all over the cake
  • I had some pretty pink and white sugar stars which I used to decorate my cake.

I have also been sent Sugar and Crumbs Coffee Flavoured icing sugar and a pack of salted caramel powder, maybe cupcakes need to be baked next ?:)

Need more recipe inspiration to get baking?

Why not check out my other recipes here:

  • Choco-chip cookies to kill insomnia and cure heartache
  • Basic Chocolate Cake with Frosting
  • Sundried tomato and chilli spiced bread  
  • Banana Loaf – Mary Berry’s recipe
  • Cinnamon-pecan Gluten-free coffee cake
  • Halloween forgotten-graveyard cake

Linking this post to the  We should Cocoa event hosted by Choclette who blogs at Choc Log Blog where the challenge is to use an ingredient and that ingredient is chocolate – how apt for Valentines, and with all that gorgeous dark chocolate this cake certainly qualifies!

My blog post is being linked to Dom’s Random Recipes event hosted by Dom who blogs at Belleau Kitchen, where for February the challenge is to select any chocolate-themed recipe book and to make a randomly selected recipe from that book. The idea of this recipe challenge is to make us home chefs step outside our comfort zones and make something that we would otherwise hesitate to and totally avoid. Humm okay, I got off easy this time 🙂

Also for the first time. I’m joining in with Jibber Jabber’s Love Cake first ever event where the theme for the month of love BAKING WITH PASSION and is a cake-baking challenge.

Events-1024x256

Disclaimer: With many thanks to Sugar and Crumbs for the generous amount of samples to test and review.I was not required to write a positive review and was not compensated monetarily for this post. Like all my previous posts about events and reviews, ALL opinions expressed here are entirely my own.

Filed Under: Baking, Cakes, Food, Product Reviews, Recipe Index Tagged With: anniversary, bakes, book, cakes, celebrationsand everything else in between, chocolate cake recipe, chocolate cake with coconut recipe, Chocolate Coconut Cake with Coconut flavoured Icing, desserts, e-cards, easy chocolate cake recipe, eggs, Feast - Food That Celebrates Life, flavoured cocoa powder, food processor cake recipe, Greeting Games, icing sugar, Nigella Lawson, Nigellas Old fashioned chocolate cake recipe, online games, Product review, special occasions, special week, Sugar and Crumbs, Valentines Day

Sun Dried Tomato and Chilli Spiced Bread

June 5, 2013 by manjirichitnis 5 Comments

It’s amazingly sunny this week and my spirits are up so I decided to make some  spiced bread with sun dried tomatoes and chilli, it turned out so yum I want to gobble it all up! This bread is a very filling,wholesome bread and is great for mopping up a thick gravy or having perfectly scrambled eggs with asparagus sprigs a dollop of butter – ah – sounds heavenly, my breakfast tomorrow for sure!

The oil from the sun dried tomatoes and the oil that goes in dough and really adds to the taste. It takes some kneading as I don’t own a bread maker (yet !) and didn’t really want to get into the hassle of trying the dough function on my food processor, still if you do possess one the bread bread dough tools, good for you!Recipe adaptation from here

Considering it was my first ever homemade bread, it turned out really nice, bursting with aroma and rich flavours and am now prepared to move on to well more bread making!

Ingredients:

  • 500 gm strong bread flour
  • 25 gm butter
  • Sun dried tomatoes and chillies about a large spoonfull
  • A sachet yeast
  • 1 teaspoon sugar
  • 1 teaspoon salt
  • 280 ml water at room temperature
  • Plain white flour for kneading
  • Oil from the chillies and tomato
  • Oil to grease loaf tin
  • Cling Film

Method:

  • Sift the flour and add the yeast salt and sugar with a wooden spoon.
  • Ensure butter is soft and rub in the butter with your hands till the mix looks like breadcrumbs.
  • Add the finely chopped sun dried tomatoes and chillies and some of the oil and mix well.
  • Now add the water slowly, folding it using a wooden or plastic spatula and then knead to make the dough.Keep kneading till a soft dough forms, fold in some oil and plain flour as and when needed.It will take about 15 minutes, yes I know but its worth it!
  • While kneading use the same process as you would while kneading chapati/roti aata , kneading out from center and then folding sides back into the center.
  • Cover in cling film and coat with some more oil. Leave to rise for about 2 hours in  a warm and dry place.
  • Now remove the cling film and knead the risen dough again at least for 8-10 minutes, you will notice that the dough will loose air and will almost go back to its original size.Its like mini air pockets getting tiny punches with your hands.
  • Repeat the cling film process and leave to rise for 30 minutes in a loaf tin in a warm place.
  • Preheat oven to 210 degrees , I have a fan oven,bake for 25 minutes,to ensure it’s well risen.
  • Cool in the tin for 10 minutes and then on the wire rack.
  • Serve sliced and enjoy with curries as a great alternative to regular wholemeal bread or as I plan to tomorrow with soft, perfectly done runny scrambled eggs, thinly sliced ham and asparagus sauteed in butter!

IMG_2792 (Copy)

Filed Under: Baking, Breads, Food, Recipe Index Tagged With: asparagus, butter, dough, easy bread recipe, fan oven, finely chopped, food blogger, knead, light, loaf tin, oil, oven, quick and easy bread recipe, recipe, rich flavours, salt, scarmbled eggs, sliceoffme, spicy bread recipe, sugar, sun dried tomato and chilli bread, tasty, warm, yeast, yummy

Choco Chip Cookies to kill insomnia and cure heartache

August 9, 2012 by manjirichitnis 2 Comments

I baked these to cheer myself up and trust me they have done more than that ! I baked cookies for the first time ever and I was gald they turned out so nice .

They take a total of about 30 minutes to prepare  including the baking time so they are not just easy peasy they will earn you massive brownie points with everyone at home !Enjoy!

Ingredient List :

  1. 175g softened butter
  2. 115g sugar
  3. 225g self-raising flour
  4. 50g chopped chocolate

These will make about 25 small cookies and about 15 beeeggg ones , I like the bigger ones more fun to chew ,chomp and gobble !

Method:

  1. Measure out the butter and sugar and mix well with a spoon in a mixing bowl . I love my beeegg Orange plastic bowl for this :).The butter should be kept outside and must be soft , if not put it not a thick glass bowl and hold it over a pot containing ho water , that should do the trick!
  2. Then add the flour in parts and mix well.
  3. Add a pinch of soda bicarbonate and another pinch of baking powder.
  4. Then crush the chocolate with your hand if it is soft ,if not just make pieces and add them with the little chocolate dust that you create in the process.
  5. If you have a cookie cutter use that to cut out shapes , especially if you are baking for little ones:)
  6. I simply make tiny dough balls in my palms , rolled them around and kept the centre puffy and flattened the sides , then placed them on my baking trays and baked them for 15 minutes at 180C.
  7. After 15 minutes remove from oven and place on a wire rack to completely cool down.
  8. The settings on other ovens which coordinate are 350F/Gas mark 4.

Enjoy with your cuppa tea , sip sip ,dip dip 🙂

Images :

The Dough is all done….

The 2nd tray is ready to go into the oven to Bake

The 1st tray was polished off in minutes , this is what remains from the 2nd tray ,whoooahahahahhaha;)

The SUPERMAN mug was then filled with some cold milk and several burps later a few crumbs remained :


Filed Under: Baking, Food, Recipe Index Tagged With: bake, begineers, chip, choco, chocolate chip cookies, cold, cookies, easy, milk, recipe

Food,travel and lifestyle writer. Photographer.

  • Email
  • Facebook
  • Instagram
  • Pinterest
  • Twitter
  • YouTube

Categories

  • Baking
  • Breads
  • C.K.P recipes
  • Cakes
  • Chutneys
  • Cocktails
  • Curry – Meat, Seafood
  • Curry – Vegetarian
  • Desserts
  • Events
  • Featured Food and Drink
  • Featured Lifestyle
  • Featured Travel Adventures
  • Food
  • Healthy
  • Home
  • India
  • Indian
  • Kitchen
  • Lifestyle
  • London and rest of U.K
  • Meat
  • Miscellaneous
  • Product Reviews
  • Quick and Easy
  • Recipe Index
  • Rest of the World
  • Restaurant Reviews
  • Salads
  • seafood
  • Sides
  • Smoothies
  • Soups
  • Travel
  • Uncategorized
  • Vegan
  • Vegetarian

Featured Blogger on Great British Chefs

GBC_blogger-badge_150x300px    

Need a New Power Blender?

13076814_10154185434898293_7387808474266473605_n

Read Travelfortaste’s interview on Gourmandize UK & Ireland

 Sliceoffme interviewed by Gourmandize UK & Ireland

Travelsfortaste is Featured on Expats Blog

England expat blogs

Read Travelsfortaste reviews on Zomato

View my food journey on Zomato!
Privacy & Cookies: This site uses cookies. By continuing to use this website, you agree to their use.
To find out more, including how to control cookies, see here: Cookie Policy
Squaremeal.co.uk - Restaurant Reviews

About me

Writer and Photographer. Food,Travel & Lifestyle, Blogger and Digital Marketer. Read More…

  • Email
  • Facebook
  • Instagram
  • Twitter
  • YouTube

Recent Posts

  • Easy Spinach and Pea Soup
  • Grenada Chocolate Festival – Festive Giveaway
  • Royal British Legion Centenary Cookbook – Cooking with Heroes
  • The Instagram Foodie Bag – Must have for all Food Photographers
  • Restaurant quality meat – Swaledale Online Butchers – a review

Copyright © 2023 · Foodie Pro Theme by Shay Bocks · Built on the Genesis Framework · Powered by WordPress

This website uses cookies to improve your experience. We'll assume you're ok with this, but you can opt-out if you wish.Accept Read More
Privacy & Cookies Policy

Privacy Overview

This website uses cookies to improve your experience while you navigate through the website. Out of these, the cookies that are categorized as necessary are stored on your browser as they are essential for the working of basic functionalities of the website. We also use third-party cookies that help us analyze and understand how you use this website. These cookies will be stored in your browser only with your consent. You also have the option to opt-out of these cookies. But opting out of some of these cookies may affect your browsing experience.
Necessary
Always Enabled
Necessary cookies are absolutely essential for the website to function properly. This category only includes cookies that ensures basic functionalities and security features of the website. These cookies do not store any personal information.
Non-necessary
Any cookies that may not be particularly necessary for the website to function and is used specifically to collect user personal data via analytics, ads, other embedded contents are termed as non-necessary cookies. It is mandatory to procure user consent prior to running these cookies on your website.
SAVE & ACCEPT