Travels for Taste

Tales of travel and food with a touch of spice

  • Home
  • About
    • In the Press, Published Work and Interviews
    • PR and Disclosure Policy
  • Food
    • Recipe Index
      • Indian
        • C.K.P recipes
        • Curry – Meat, Seafood
        • Curry – Vegetarian
        • Sides
        • Chutneys
      • Healthy
        • Soups
        • Salads
      • Quick and Easy
      • Baking
        • Desserts
      • Meat
      • Seafood
      • Vegetarian
        • Salads
      • Vegan
    • Product Reviews
    • Events
  • Travel
    • UK
    • India
    • Around the World
  • Lifestyle
    • Home
    • Kitchen
    • Restaurant Reviews
    • Miscellaneous
  • Giveaways
  • Work with me
    • Meet interesting foodie entrepreneurs here

Tasty Fish Dish in £1 – ready in 10 minutes – Raising awareness about extreme poverty and hunger

September 23, 2013 by manjirichitnis 6 Comments

Hearty home-made fish dinner on a tight budget? Yes, it is possible!

Recently, I read about living below a line challenge. The challenge is to feed your family by spending not more than £1 a day for 5 days. Why? To help put conservation around poverty into perspective. How the world views hunger, extreme poverty and issues related to poverty is an important conversation to have. For example, reading a hard-hitting fact like this one helped me understand how bad the issue of global hunger really is – ‘Hunger kills more than aids, malaria and tuberculosis combined’.

Please do visit The Hunger Project website to read about the challenge in detail. You can also donate, help fundraiser and do your bit to help end world hunger. World Hunger Day is on the 28th of May.

This recipe is basically to support some blogger friends who along with their families which includes their young children took up this tough challenge. But honestly, if someone told me I could make a fish main in £1 I would laugh aloud and make them a cup of tea to help them feel normal again. But trust me on this one you really can make a very delicious side dish and serve it with a spicy rice main for 2 adults for 2 main meals. Yes, it is possible to be thrifty and yet feed your family for less without compromising on taste.

When my friend S told me the easy-peasy recipe I just had to buy myself a pack from my new fav supermarket. This is probably the easiest recipe for a side dish ever.

Total prep time: Under 10 minutes Serves:2 adults as a side for 2 main meals

Ingredients:

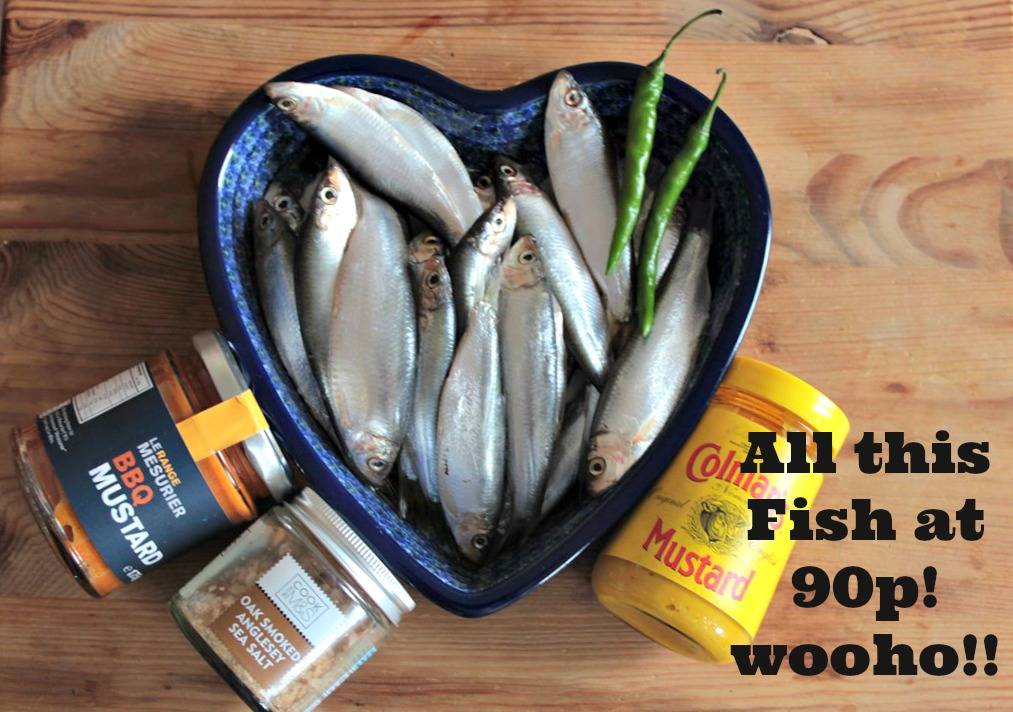
  • Sprat Fish pack – contains about 20-25 fishes and costs around 90p to 95p
  • Turmeric powder 1 tsp
  • Red Chilli Powder -1.5tsp
  • 2 small hot green chillies sliced in a slant
  • Salt to taste
  • a pinch of Asafoetida
  • Oil – 2 tsp
  • 4 tsp Colmans Mustard
  • 1 tsp hot BBQ Mustard – don’t worry if you don’t have this just add half a teaspoon of paprika to 1 tsp of any mustard that you have lying around and mix half tsp of  BBQ sauce into this for a smoky flavour.

IMG_4734 with text

Recipe:

  • Wash the fish well under tap water and handle gently as it’s a small delicate creature and needs some fawning over but hey not much fuss I tell ya! But its all worth it because even my hubby apprehension that this fish has loads of tiny bones were all gone as he clicked his fingers after the meal 🙂
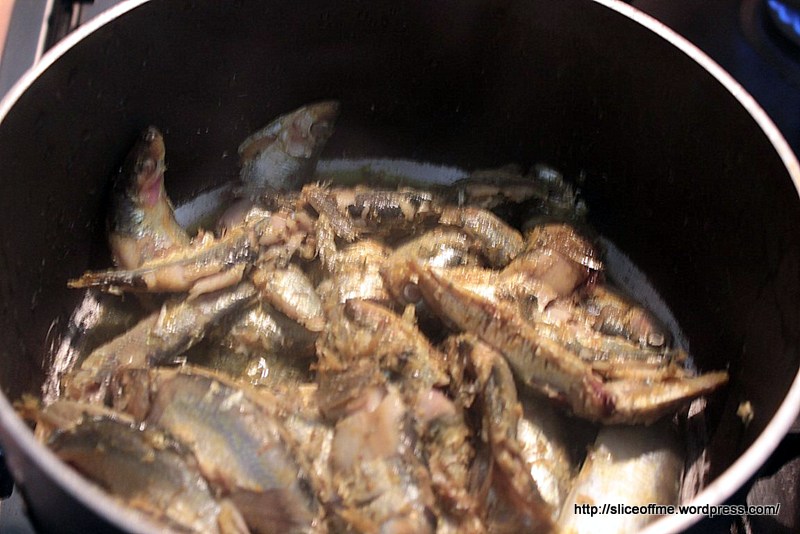
  • Heat a saucepan and  add 1sp oil, add asafoetida and the turmeric powder and salt and then the washed Sprat fish
  • Gently sautee them for about 1 minute or until you see the skin start to come off, don’t overdo it as they need to cook with the mustard in the next step.

Sprat has been sauteed

  • Remove the fish into a clean bowl and in the same sauce on a very low flame add another tsp oil, both the mustards pastes, chopped green chillies, red chilli powder and then the fish.
  • As it is a delicate fish it will cook quickly and as it does the big bone that runs lengthwise inside this tiny fish will be easy to remove and so you can get the head off to, I am not squeamish but my husband is and he refuses to eat the eyes but they are supposed to be packed with iron and fish itself is high on Omega 3 fatty acids, the good stuff your body needs. Mothers who breastfeed and consume fish are said to help give the baby better eyesight which is due to the high content Omega 3 fatty acids. Not only that as this recipe contains turmeric it has a heap of health benefits especially the fact that it helps people struggling to cope with psoriasis. If anyone has seen that episode of The Food Hospital on Channel 4 where a young mother and her son struggled with psoriasis, one of the big changes that they did to their diet was adding turmeric to even stuff like scrambled eggs.
  • A word here about the Le Range Mesurier BBQ Mustard, it’s one of the few things I purchased at the Cake & Bake Show 2013 apart from the sweet stuff. I also got a jar of zesty lime mayo from the same brand, they had a super offer of 4 jars at a great price!
  • I slant the green chillies slanted just because it looks posh 🙂
  • Ok, so I managed to remove most of the big middle bone with the heads and the fish cooks very easily in under 3 minutes.
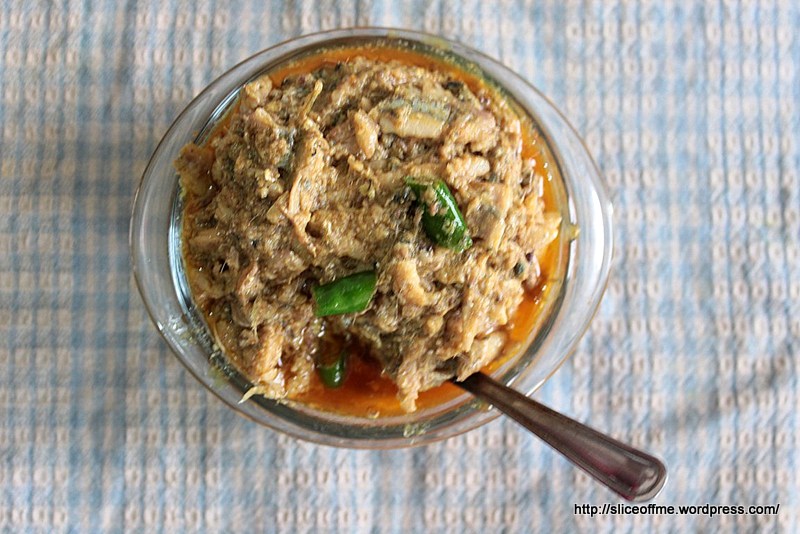
  • Add a small helping of very finely chopped coriander for garnish.
  • Serve hot with steaming hot rice or khichadi, click here for a posh khichadi recipe from one of my older posts.
  • Do leave comments below and let me know what you thought of this recipe!

Sprat fish side is ready to serve!

I am entering this dish into a wonderful linky challenge called £1 or less recipe challenge started by Michelle Rice who blogs at Utterly Scrummy , with so much fresh and yummy fish made into a delicious dish and served with plain steamed rice its a thrifty budget dream dish full of flavour and ready without too much of labouring in the kitchen. Do link up and help spread the good cheer around in times of gloom when many families are struggling to make ends meet and feeding families with healthy food on a shoestring budget is a very real challenge for many.

one pound or less logo

Tasty Fish Dish in £1 – ready in 10 minutes !

Filed Under: Food, Recipe Index, seafood Tagged With: breast feeding mothers, Brit Mums, Channel 4, child safe food, easy, easy-peasy, eat well for less money, England, fish, food that is good for you, green chilly, health benefits of turmeric, healthy recipe, improve eyesight, kitchen karma, london, low oil recipes, non oily, non spicy, oil, omega-3 fatty acids, one pound fish, one pound fish dish, PSORIASIS, psoriasis treatments, quick, ready in under 20 minutes, recession proof cooking, salt, save moeny, side dish under £1, sprat, The Food Hospital, turmeric, U.K, wiki, wikipedia

Peach Melba with Vanilla Ice Cream

July 20, 2013 by manjirichitnis Leave a Comment

This recipe of Peach Melba is a favourite with my mum in law.On one of the days when I wasn’t feeling too bright she decided to set the mood right with one of her sweet fixes.She disappeared into the kitchen and 20 minutes later appeared with a tray with this gorgeous dessert topped with vanilla ice cream begging to be devoured!

A bit of history about how this dessert came into being should be shared here I guess as it makes me appreciate the recipe so much more.This is a brainchild of French Chef Auguste Escoffier who created this in honour of Australian Soprano Dame Nellie Melba, known as the ”first Australian Diva” to quote from the website of a museum dedicated to her. When she was performing in London, The Duke of Ore’lans hosted a dinner party to celebrate Dame Nellie Melba‘s triumph and  Chef Auguste Escoffier gave the world what we now know as the Peach Melba – peaches served on a bed of ice cream, he later created various versions of which the one topped with raspberry sauce is most popular now.

Serves:4 Prep Time :20 minutes + cooling for few hour in the refrigerator

Ingredients:

  • 4 fresh juicy peaches
  • Plain everyday white sugar
  • The best vanilla ice cream you can lay your hands on
  • Toasted blanched almonds to garnish

Method:

  • Heat water in a pan,when it has boiled,gently lower the washed peaches into it  and blanch them.When you remove them the skin should readily come off. Test for how ripe your fruits are before you blanch ,over ripe fruits will not take well to being dunked in hot water!
  • Remove the skin and remove the seed and halve, if you are unable to do that just get of as much of the fleshy bit from around the seed as you can.
  • In another saucepan add enough water to hold these peaches in a pool of sugary syrup approx 250ml .
  • Add 4 heaped tablespoons of sugar and stir continuously on a low flame til the sugar is totally dissolved and you have a proper sugar syrup,nice and thick and of course sweet!
  • Dunk the peaches into this syrup and on a very low flame let them soften , do not allow the sugar syrup to turn dark in colour and a maximum of 5-7 minutes should do the trick as the peaches will ”cook” quickly”
  • Thoroughly cool the fruit+syrup mix and decant into a bowl and place in the refrigerator.
  • Serve on a bed of your best vanilla ice cream and top off with the toasted almonds.
  • Smile when your guests praise you and regale them with the story of how this lovely dessert was created or how much you enjoyed reading this blog and creating the dessert, ok all right all right, won’t show off 😉

This dessert was something I had drafted quite some time back and thankfully as I made this yum dessert to finish off my Caribbean themed summer party menu, it will now finally appear on my blog!That’s why you must make the most of the summer days and have as many parties and barbecues and picnics as you can!Wooohooo!

Peach Melba with Vanilla Ice Cream

Filed Under: Desserts, Food, Recipe Index Tagged With: dessert recipe, easy, fruit dessert, fruity, gorgeous, Peach Melba, peaches, ready in under 20 minutes, ripe, summer dessert recipe, toasted blanched almonds

Clear Vegetable soup with an Indian Phodni

January 1, 2013 by manjirichitnis 3 Comments

Clear Vegetable soup – my way – Easy Cooking, Healthy Food

Happy New Year everyone! It’s a great way to start a new year on a healthy note hence some soup for new years day lunch light and easy !

Nothing warms us up in winter like a steaming hot soup, if it is filling , easy to make and wholesome it makes life even better! Agree? I love ordering clear vegetable soup when I go eating out and though this is not the typical chinese take away and is a very home cooking and simplistic approach it’s still what a soup should essentially be – wholesome…

You can add as many veggies as you like that would marry well with the basic list I think is essential, I basically use whatever is available in my vegetable tray on the said day !

The following roughly make for 2 large bowls of soup and a small leftover portion for Lunch next day, perfect I say !

  1. Cauliflower 1/4th finely chopped
  2. Small hand full green peas
  3. 2 – 3 large sprigs of spring onion finally chopped
  4. Bottle Gourd – 1/4th finely chopped
  5. 2 large cloves of garlic
  6. A pinch of cummin seeds
  7. Half a tea-spoon ghee or low-fat butter example :Lurpack
  8. 2 small carrots finely chopped
  9. Hand full french beans very finely chopped
  10. 1/4th tomato very finely chopped for flavour
  11. Large bit of fresh ginger smashed with skin to add flavour

Optional : Brocoli, sweet corn,potatoes,cabbage

Method:

  1. Boil all the veggies in water with salt to taste and the large piece of ginger with skin after its washed thoroughly , if it has too much mud on it please remove the skin , no knife skills needed just let yourself go, as Jamie Oliver would say !
  2. While these are almost boiled ,take the ghee/butter in a tadka pan(image pasted below ) add the garlic cloves with skin smash them using a mortar pestle before adding and then add the cumin seeds when the gee/butter is hot and sputtering.Add this ”tadka” or seasoning to the boiled veggie water mix and serve hot.
  3. The toasted garlic and ghee combination give off a sweet flavour and an appetising aroma.
  4. An ideal accompaniment is a boiled sweet corn stub slathered in low-fat butter and a slice of your favourite baguette !

Cheers to good health , easy cooking , healthy and wholesome meals and of course winter warmers !

Clear Veg Soup with an Indian Tadkawholesome goodness of vegetables in a broth!

Filed Under: Food, Healthy, Recipe Index Tagged With: chinese, delicious, easy, fast, food, fresh food, happy new year, Indian Tadka, tasty, veg clear soup, vegetables, winter warmer, yummy

Cauliflower ani vatanyachi bhaji, Gobi Vatana Sabzi, Cauliflower side dish with green peas

September 5, 2012 by manjirichitnis 8 Comments

Cauliflower green peas Sabzi

I love cauliflower as a vegetable for its taste and sheer possibilities in the kitchen, my fav everyday vegetable to be eaten with chapatis is a mix of cauliflower and green peas in a spicy, semi-dry sabzi form. I used biryani masala to add a twang to my usual taste and the result was worth sharing:)

फ्लॉवर वाटाणा मसाला भाजी

Skill level beginner, basic

Serves :2 with rotis and curd to make a light meal

Cauliflower and Green peas Masala Sabzi

Manjiri Chitnis
Easy, delicious vegetarian sabzi, an everday dish in a Maharashtrian home
5 from 2 votes
Print Recipe
Prep Time 5 minutes mins
Cook Time 10 minutes mins
Course Main Course
Cuisine Indian
Servings 2 people

Equipment

  • Kadhai or Work or saucepan
  • Chopping Board
  • Sharp Knife
  • Spatula

Ingredients
  

  • 1 medium-sized Cauliflower
  • 4 tbsp Green peas
  • 1 pinch Asafoetida/hing
  • 1-2 Red Onions very finely sliced
  • 3 – 4 Curry leaves
  • 2 Green chillies
  • 2 tbsp Biryani masala
  • 1/2 Red juicy tomato
  • 1 tsp Ginger paste
  • 2 cloves Garlic very finely sliced
  • 2 tsp Oil for tadka
  • 1/4 tsp Mustard seeds
  • 1/4 Cumin seeds
  • Salt to taste
  • 1/2 tsp each of Turmeric n Red Chilli powders
  • 1 tsp Coriander powder
  • 1 tsp Jeera Powder
  • Few Sprigs Fresh Coriander leaves finely chopped to garnish
  • 1 tsp Lime Juice

Instructions
 

  • Heat cooking oil in a Kadhai/wok/ saucepan
  • When the oil is hot, add the asafoetida and mustard seed, when the seeds start to pop add cumin seeds and the finely chopped garlic bits
  • Ensure the cumin seeds turn a toasty brown and then swiftly move on to the next ingredients
  • Next, go in with the fresh green curry leaves and green chillies followed by the finely chopped onion
  • Add the coriander powder, ginger and garlic pastes and stir well and allow it to become a sticky sort of paste
  • Then add the biryani masala and feel the explosion in the aroma as it marries well with the onion and spice paste
  • Then go in with the cauliflower florets and the green peas
  • Turn off the heat for a bit, sprinkle turmeric powder, red chilli powder, cumin powder
  • Season with salt as per taste
  • Turn the heat back on, ideally a low flame on the hob and a really low setting on the electric cooker
  • Sprinkle some water enough to wet the veggies and allow for some steam to form, this will allow the cauliflower to cook
  • Stirring occasionally, cook with a lid for about under 5 minutes
  • Check after first 3 minutes to ensure the cauliflower does not overcook
  • To serve, garnish with fresh coriander leaves, chopped fine and a tiny squeeze of lime juice to add an extra twang
  • Best enjoyed served with hot puffy Polya (Marathi for Chapatis or Rotis ) off the hob!
Keyword cauliflower

Gobi Vatana Sabzi

I am linking my recipe, which happens to be my favourite fusion-Maharashtrian vegetarian recipe for Cauliflower and Green Peas Sabzi with In My Veg Box for May 2014 hosted by me for Nayna who Blogs at Simply. Food and Citrus Spice.

In my veg box cauliflower

Filed Under: Food, Indian, Recipe Index, Sides Tagged With: asafoetida, biryani, chilly, coriander, cumin, curry, easy, food, garlic, ginger, green, green peas, Indian, lime, masala, oil, original, recipe, red onion, sabzee, saji, salt, squeeze, tadka, tumeric, twsit, veg

Basic Chocolate Cake with Frosting

August 20, 2012 by manjirichitnis Leave a Comment

What better way to celebrate a new FOODISTA Badge for my post on Shahi Khichadi than by baking a chocolate cake, I firmly believe that chocolate is the one word that instantly lifts sagging spirits and the whole baking process itself is cathartic! So sistahs let’s BAKE!

Basic Chocolate Cake with Frosting

Manjiri Chitnis
Delicious, easy must-have Chocolate cake recipe with frosting
Print Recipe
Prep Time 25 minutes mins
Cook Time 30 minutes mins
Course Dessert
Cuisine Fusion

Equipment

  • Cake tin
  • Whisk
  • Hand-Blender or Stand-Mixer
  • Wire-rack to cool the cake
  • Probe to test cake
  • Spatula to frost the cake
  • Measuring spoons
  • Baking Parchment

Ingredients
  

  • 225 gms Butter softened
  • 225 gms Caster Sugar
  • 4 Eggs
  • 220 gms Self-Raising Flour
  • 3 tsp Baking Powder
  • 1 tbsp Cocoa Powder
  • 1/2 tsp Soda-Bicarbonate

For the frosting

  • 100 gms Butter
  • 100 gms Icing Sugar
  • 1 tbsp CocoaPowder
  • Shaved Chocolate for garnish
  • Fresh Strawberries for garnish
  • Granish of choice

Instructions
 

  • Lightly Grease two cake tins and line the bottoms with non stick-parchment. I manage without parchment , it's up to you, if yo are baking for the first time use it as it prevents the sides from burning.
  • Preheat Oven to 180C/350F/Gas 4.
  • Ensure butter is completely softened or else use the old foolproof way – heat water in a pan ,place a vessel on top with the butter inside minus any packaging, watch it soften like a man melts when he looks onto the eyes's of his dearest ,ahem …
  • Measure the Butter and sugar into a bowl and mix well they form a creamy mix, I used a fork and gave it a good old whipping:) – think of someone you dislike – your boss , your mil, your annoying neighbour, Baba Yaga the Witch – whoever – just whip away,hehehe
  • Add 3 medium or 4 small eggs, I used 3 medium-sized eggs.
  • Swift the self-raising flour into this mix ,followed by the baking powder, soda bicarbonate ,cocoa powder and beat till really smooth , I didn’t even need a hand blender as the butter was perfectly soft and the flour well swifted , though do go ahead and use a hand blender on low setting for about a minute , have added a picture so you know the look of consistency.
  • Divide the mixture between the two tins. I used the foil of the butter packaging to grease the cake tins, no wastage in my kitchen !
  • Bake in a pre-heated oven for approximately 25-30mins.
  • While in the oven make the icing by creaming together the butter and icing sugar and add cocoa powder, mix until smooth.
  • Cover frosting and set aside
  • Allow the baked cakes to cool down completely on a wire-rack before frosting
  • Sandwich the frosting in-between the two cakes
  • Add some on the sides and sprinkle the crunchy choco balls on the top , go all crazy and add some chocolate shavings , I did !
Keyword Basic Chocolate Cake


Looking for more inspiration to get baking?

Why not have a look at my other recipes:

  • Choco-chip cookies to kill insomnia and cure heartache
  • Sundried tomato and chilli spiced bread  
  • Chocolate coconut cake with coconut-flavoured icing
  • Banana Loaf – Mary Berry’s recipe
  • Cinnamon-pecan Gluten-free coffee cake
  • Halloween forgotten-graveyard cake


Filed Under: Desserts, Food, Recipe Index Tagged With: award, badge, bake, baking powder, butter, cake tins, celebrate, choco, chocolate cake, cocoa, crunchy, delicious, easy, eggs, Foodista, icing, oven, recipe, self raising flour, sistah, soda bicarbonate, softened, swift, whip

Choco Chip Cookies to kill insomnia and cure heartache

August 9, 2012 by manjirichitnis 2 Comments

I baked these to cheer myself up and trust me they have done more than that ! I baked cookies for the first time ever and I was gald they turned out so nice .

They take a total of about 30 minutes to prepare  including the baking time so they are not just easy peasy they will earn you massive brownie points with everyone at home !Enjoy!

Ingredient List :

  1. 175g softened butter
  2. 115g sugar
  3. 225g self-raising flour
  4. 50g chopped chocolate

These will make about 25 small cookies and about 15 beeeggg ones , I like the bigger ones more fun to chew ,chomp and gobble !

Method:

  1. Measure out the butter and sugar and mix well with a spoon in a mixing bowl . I love my beeegg Orange plastic bowl for this :).The butter should be kept outside and must be soft , if not put it not a thick glass bowl and hold it over a pot containing ho water , that should do the trick!
  2. Then add the flour in parts and mix well.
  3. Add a pinch of soda bicarbonate and another pinch of baking powder.
  4. Then crush the chocolate with your hand if it is soft ,if not just make pieces and add them with the little chocolate dust that you create in the process.
  5. If you have a cookie cutter use that to cut out shapes , especially if you are baking for little ones:)
  6. I simply make tiny dough balls in my palms , rolled them around and kept the centre puffy and flattened the sides , then placed them on my baking trays and baked them for 15 minutes at 180C.
  7. After 15 minutes remove from oven and place on a wire rack to completely cool down.
  8. The settings on other ovens which coordinate are 350F/Gas mark 4.

Enjoy with your cuppa tea , sip sip ,dip dip 🙂

Images :

The Dough is all done….

The 2nd tray is ready to go into the oven to Bake

The 1st tray was polished off in minutes , this is what remains from the 2nd tray ,whoooahahahahhaha;)

The SUPERMAN mug was then filled with some cold milk and several burps later a few crumbs remained :


Filed Under: Baking, Food, Recipe Index Tagged With: bake, begineers, chip, choco, chocolate chip cookies, cold, cookies, easy, milk, recipe

”POSH ”Victoria Sponge Cake

August 3, 2012 by manjirichitnis 4 Comments

What better way to celebrate the excitement surrounding the Olympics happening in London than sinking my teeth into a perfectly delicious soft Victoria Sponge Cake!

It’s an easy recipe and the result left me feeling like so very happy!

I tried to read up online why it is called a ”Victoria” Sponge cake and the apt answer seems that since Queen Victoria loved this soft cake with her afternoon tea! So I am going to savour the cake and afternoon tea as I cheer myself hoarse in front of the telly whilst watching the Olympics 🙂

Lovely! So let’s get baking and when your done gobbling some of it, drop me a line and let me know how much you enjoyed creating this yummy delight!

This cake serves 8 people, takes about an hour to prepare.

I choose to call it ”POSH” because that’s Victoria Beckham’s pop name, our very own British star and this cake is modernised version of a British Classic recipe with a twist as it is layered with Creme Chantilly’ – very posh sounding indeed!

Ingredients:

  • 225 g unsalted butter, softened, plus extra for greasing
  • 4 medium-sized eggs, organic if you please
  • 225 g caster sugar
  • 225 g self-raising flour
  • 4- 5 Large tablespoons of Strawberry Jam, the traditional version uses raspberry Jam, I used strawberry conserve.
  • 250 gm fresh strawberries sliced lengthways
  • Icing Sugar for dusting on top of the cake
  • Soda Bicarbonate – 1 teaspoon
  • Baking Powder 1 Teaspoon

To make the  crème Chantilly:

  • 300 ml double cream – so sinful 😉
  • 25 g icing sugar
  • I tiny cap full of Vanilla essence, the original recipe inspired by The Good Food Channel advises to use – 1 vanilla pod, halved lengthways and seeds scraped or vanilla extract

METHOD :

  • Preheat the oven to 180C/160C fan/gas 4. Grease and line two 18cm cake tins with a removable based with baking paper. I inaugurated my brand new weighing scales and cute cake tins I purchased for all future cake making experiments!
  • Put the butter and sugar in the bowl of an electric mixer and cream well until light and fluffy – this will take at least 10 minutes to get it properly aerated. Use the 10 minutes you have to wash and clean the strawberries and slice them lengthwise. This was also a first for me in terms of using my food processor to mix the butter and sugar mix. Then empty this butter sugar mix into a large mixing bowl, I also have a NEW nice bright Orange bowl!
  • Break each egg and add one at a time, whisk the mixture well after each addition to ensure it is soft and fluffy.
  • Add the self-raising flour to the above butter, sugar and egg mixtures, I added one spoon at a times and mixed it really well each time. Add the Bicarbonate of soda and Baking Powder to this mixture, I used this as I do in every cake but the original good food channel recipe does not mention these 2 ingredients. Later I used a hand blender to really get this mixture to feel like one entity and till it felt right to pour into the ready cake tins.
  • Now pour the above cake mix in equal portions into the  2 cake tins and smooth the top with a plastic spoon, the type you get with a food processor.
  • Bake for 20 minutes, with a timer, until risen and golden. Ensure you do not go over the 20 minutes, also if you are using a fan oven as I do, use only the setting that heats from below.

For the crème Chantilly:

  • Put the cream in the food processor, add the icing sugar and the vanilla essence. Whip to the soft peak stage, using the slow speed setting then refrigerate until slightly firmed.
  • Take the strawberry jam into a small pan and warm gently whilst stirring, use low flame and do not leave on pan for tool long.
  • Remove the cakes from the cake tin, on the top of one cake spread the jam from the pan and add the chopped strawberries.
  • Then get the Creme Chantilly’ from the fridge and spread generously over this.
  • Place the second cake on this and press down ever so gently.
  • Dust the top of this lovely sponge cake with a bit of icing sugar and decorate with a blob of the Creme Chantilly’ and some sliced strawberries!

Voila, the classic British cake with a twist – Posh Victoria Sponge is ready for you to savour, impress your family and friends and enjoy baking over and over again!

Filed Under: Desserts, Food, Recipe Index Tagged With: afternoon snack, bake, beat, butter, celebrate, easy, easy recipe, eggs, fluffy, food, Good Food, icing, mixture, pipe, Queen Victoria, recipe, self, simple, soft, sponge, strrawberries, sugar, tea, tea party, Team GB, time, unsalted, Victoria, weighing scale, whisk

Ressurecting LEFTOVERS ! A quick recipe for Phodnichi Khichadi

June 13, 2012 by manjirichitnis 2 Comments

Heya all ye blog readers, followers or mere net trawler’s!

I have a simple yet effective way of resurrecting plain white boiled/steamed rice and conjuring up a tasty spicy dish to allow for a guilt free ,time-saving recipe which will not only help you NOT die of guilt for throwing away rice that’s perfectly OK but just stale and also having the pleasure of cooking an easy peasy meal all on your own. Of course it’s NOT my own recipe but a hand me down from my mother! GAAH and YOU actually thought I was that creative …giggles to herself and continues typing …

Well you need, yes! Of course my dear genius some leftover white plain cooked rice.

Depending on bow much rice you have say roughly a medium sized soup bowl for example, you will need:

1.2 tablespoons oil

2.2 cloves of garlic with skin

3.1 medium sized red onion finely chopped and I mean FINELY !hehehe I like trying to sound very professional, am just joking here, chop it how you will!

4.few fresh green lovely curry leaves.

5.Turmeric Powder

6. Salt to taste

7.Chilli Powder

8.Pinch of Asafoetida

9.  A pinch of each Jeera (Cumin seeds) & Mohri (Mustard Seeds)

10. A tiny squeeze of lime

11. Some finely chopped freshly coriander for garnish

12. One or two green chillies chopped

Ok now heat the oil in a pan , add the Hing (Asafoetida powder) , add the Mustard seeds and Cumin seeds and wait for the mustard seeds to crackle in the hot oil, then add the garlic finely chopped with the skin and let it turn brown and crisp , believe me,it adds a power packed punch to the flavour of the rice,then add some green chillies chopped to a size that you can pick them out if you don’t want to set your tongue on fire ! Then,in go the curry leaves and the chopped red onion,after the onions are nicely tossed and turned in the oil to give them just the soft and crunchy texture you need,toss in the rice and slightly turn it with your hand before you do to prevent it from sticking , it should open up so that the flavours of the tadka (seasoning ) touch EACH grain and coat it with their heavenly goodness !

Then add the turmeic powder, red chilli powder and mix well, cover the vessel and cook on a very low flame so as to prevent the rice from sticking to the pan at the bottom. Steam for some time and open the lid,squeeze a generous bit of lime on this dish and garnish with fresh coriander, you can even add a few bits of chopped fresh tomato of you like.

Serve HOT with any curry or ”leftover” dal reheated.

I LOVE eating this plain with a big dollop of curd or plain yogurt too !

See told you it was easy peasy !

Filed Under: Food, Indian, Recipe Index, Vegetarian Tagged With: asafoetoda, boiled, cook, cover, cumin seeds, curd, curry, curry leaves, dal, easy, finely chopped.coriander, flame, fresh, garnish, green chilly, hot, Jamie Oliverr, jeers, leftovers, mohri, mustard seeds, oil, pan, plain, red onion, relish, rice, simple, spicy, steamed, stir, tomato, yogurt

Masoorachi Aamti or Red Lentil Curry

January 23, 2012 by manjirichitnis 10 Comments

Akkhe Masoor or whole red lentils

Masoorachi Aamti or Red Lentil Curry – Recipe adaptation from Mother, Mother in Law and a close C.K.P friend – who loves to stir up some spicy CKP fare and generally succeeds at it 🙂

Masoorachi Aamti or Red Lentil Curry

Delicious, easy and quick recipe for using whole red lentils with skin on
Print Recipe
Course Main Course
Cuisine Indian
Servings 4 portions

Equipment

  • 1 Pan with lid
  • 1 Knife
  • 1 Chopping Board
  • 1 Spatula

Ingredients
  

  • 300 Grams MasoorDal (Red Lentil) with their brown covers intact and whole
  • 1 tsp Mustard Seeds
  • 3 cloves Garlic with skin on
  • 5-6 Curry leaves
  • 2-3 Green Chillies
  • 1 tsp Cumin
  • 1.5 tbsp freshly grated soft white coconut
  • 1.5 tbsp Goda Masala
  • 2 tbsp Coriander Powder
  • 1.5 tbsp Ginger – Garlic Paste
  • 3 mediumsized Red onions, chopped fine
  • 1/2 tsp Asafoetida
  • 1.5 tsp Turmeric powder
  • 2 tsp Red Chilli Powder
  • Jaggery to taste
  • Salt to taste
  • 2 – 3 petals Garcinia Indica – wet, salt preserved
  • Fresh leaves of Coriander chopped fine for dressing
  • 2 tbsp Sunflower Oil

Instructions
 

  • Soak the washed lentils in luke warm water for about 20 minutes. You can par-boil the lentils too, to save time. t
  • Heat two large generous tablespoons of oil in a wok, no weight loss tip this, huh? Indeed!
  • Add mustard seeds and wait for them to pop.
  • To this hot oil, dd Asafoetida, crushed garlic cloves , let the skin remian attached.
  • When the garlic is starting to brown add the curry leaves, green chillies, cumin and then the fresh grated coconut.
  • Now stir in the Goda masala, coriander powder, turmeric powder, red chilli powder, ginger garlic paste and coriander chilli paste and mix well.
  • Now add the chopped onion and cook them on a low heat until they begin to break down and caramelise.
  • Drain excess water from the lentils and add them into this spice and oil mix. Stir well. Cover and cook on medium to low heat until almost done. Check occasionally and stir as so to ensure it does not burn.
  • Add the soaked Garcinia Indica alongwith the water it was soaking in. Mix well. Cook without the lid on low heat until fully cooked.
  • Season with finely chopped fresh as ever coriander andserve piping hot with phulkas dripping with ghee (clarified butter) or the plain old boiled white rice.
Keyword Masoor

Recipe Notes

  • Goda Masala – this is a mix of various spices readily available in Asian Grocery stores it’s basically a mixture of dry coconut roasted with a mixture of at least 10 different spices, best of all it’s available to buy online at Red Rickshaw – previously called itadka.com. Refrigerate this pack to increase shelf life,yayay so many tips from me, don’t YOU just LOVE me if u better don’t just READ this make n slurp it all ALONE, drop me A LINE and thank meeeeeeeeeeeeeeee) Better still make your own, recipe coming soon – watch this space!
  • Aamsul / Amsul – also known as Kokum or Garcinia Indica, is a plant belonging to the mangosteen family (Clusiaceae). This is one of those revered ingredients that is commonly used in Indian cooking especially in Maharashtra, along the coast. Much like my beloved coconut this fruit has multiple applications and is very versatile, besides it is such a good-looking gorgeous and delicious tropical fruit.
  • Coriander and Chilli paste – 2 small-sized bunches of coriander pureed with 2-3 green chillies – freeze and use on demand, handy and 1 of my 5 “save your face” purees for unwanted guests popping in at odd hours – the other 4 are listed at the end of this recipe.
  • The other 4 SAVE ME NOW pastes are: a garlic ginger coarse paste, Finely grated fresh white coconut paste, Tomato red onion puree -1:3, And the best one for last aye? – a few onions chopped lengthwise n lightly roasted in a kadhai (wok) with fresh white coconut finely grated till they turn slightly brown, then churned into a paste in the mixer.
  • The masoor dal can be done 2 ways for stage 1 of this process, 1st is the short cut which I love as I suddenly get an urge mid-evening to cook this typical CKP recipe to appease my urges to run to Heathrow n take the next flight to my parents home in Pune, hummmmm, so we soak the masoor dal 2 measures feeds 2 adults with a ravenous appetite and leaves some to spare.

Key

This is the key to a mystical tropical paradise…. errrr… sorry but it is not, it is simply the key to some important words that you will encounter pretty often while reading my posts or watching my videos. I am after all a student of Chemistry and treat my kitchen like my personal laboratory where I create my own kitchen experiments! This is why the word ‘Key’ reminds me of my Chemistry textbook in my school years 😉

  • C.K.P stands for Chandraseniya Kayastha Prabhu a sub-section of the Maharashtrian community in India and they generally hail from the coastal regions and hence are rather partial to freshly grated coconut and amsool in their food, not to mention their love for fresh fish and mutton, oh yeah!
  • Daal is used to loosely to refer to the uncooked Lentil and AAMTI is a Marathi word meaning cooked curry.
  • Coriander for my friends from across the pond is Cilantro.
  • Phodni – Marathi for tempering, also one of my favourite words to say. Follow my hashtag on Instagram #phodnitales , please pretty please? 🙂
  • Kadhai – The Marathi pronunciation sounds like it ends in ‘ee’, while the Hindi pronunciation stretches the first ‘a’ following the ‘K’ to sound like ‘aaa’ , easy or what?!
  • Phulkas – Also called chapattis or the delightful Indian Bread soft and fluffy and fresh off the pan has ghee smeared on it to pack some punch and many, many calories 🙂

EXPLORE MORE RECIPES FROM MAHARASHTRA, INDIA

  • Valache Birdhe – C.K.P style recipe -वालाचे बिरडे
  • Konkani Pompfret Fish Curry पापलेटचं कलवण
  • Prawn Khichadi – कोळंबीची खिचडी
  • C.K.P Style King Fish Curry – सुरमई चे कालवण
  • C.K.P Style Prawn Curry

Random Thoughts

I would totally rechristen the word ‘Method’ in a recipe post with the name ‘Process ‘ Why, well once a Chemistry student and a retail employee I guess some things just stay with you forever. Also, instead of “PREPARATION” I choose the word ”Process” which is drilled into a Retail Managers brain like young parents making their kids rote learn alphabets)

Pic 1: The saucepan contains oil heated and then the asafoetida, cumin seeds, mustard seeds, then the garlic, chopped green chillies and curry leaves and last but the best one is GODA masala

Pic 2 :Chopped red onion added to the mix

Pic 3: That’s the dal cooking

Pic 4 & 5: All done , the AROMA is filling my senses and transporting me into my MIL’s kitchen , I want to HUG her nowwwwwwwwwww

P.S: Will post pictures to compare the 2 sizes of Mustard seeds at a later date , I am now going to be too busy slurping my Aamti off the plate 🙂

Filed Under: Curry - Vegetarian, Food, Indian, Recipe Index, Vegetarian Tagged With: aamsul, allergic, amsul, amti, aromatic, asafoetida, Atyamala, birund, blog, boil, Bollywood, bread, busy, butter, calories, chillies, chukra, CKP, cloves, clusiaceae, coarse, coastal, coconut, cook, corainder, curry, dal, dance, dhania, dish, dried, easy, elastic, fast, food, food blog, garcinia indica, garlic, ghee, goda masala, green, Gujrat, heeng, Hindi, hing, hot, hug, hurry, internet, itadka, jaggery, jeera, juices, Kadhai, Karnataka, kokum, konkan, laptop, leaves, lentil, lick, link, Madame Tussads, Madhuri Dixit, maharashtrian, mangosteen, Marathi, masoor, men, MIL, moi, Murgal, Murgala, mustard, mutton, Orissa, palate, paste, phodni, phulkas, piping, pour, powder, process, Punampuli, Pune, pungent, Raktapurak, ratamba, Ratnagiri, raw, recipe, red, region, rice, Sanskrit, season, seeds, slurping, song, Tamil Nadu, tasty, tease, tempering, Tintali, tintidika, tomato, tumeric, turmeric, typical, Vrikshamla, waist, water, wax, wet, white, wiki, wok

Food,travel and lifestyle writer. Photographer.

  • Email
  • Facebook
  • Instagram
  • Pinterest
  • Twitter
  • YouTube

Categories

  • Baking
  • Breads
  • C.K.P recipes
  • Cakes
  • Chutneys
  • Cocktails
  • Curry – Meat, Seafood
  • Curry – Vegetarian
  • Desserts
  • Events
  • Featured Food and Drink
  • Featured Lifestyle
  • Featured Travel Adventures
  • Food
  • Healthy
  • Home
  • India
  • Indian
  • Kitchen
  • Lifestyle
  • London and rest of U.K
  • Meat
  • Miscellaneous
  • Product Reviews
  • Quick and Easy
  • Recipe Index
  • Rest of the World
  • Restaurant Reviews
  • Salads
  • seafood
  • Sides
  • Smoothies
  • Soups
  • Travel
  • Uncategorized
  • Vegan
  • Vegetarian

Featured Blogger on Great British Chefs

GBC_blogger-badge_150x300px    

Need a New Power Blender?

13076814_10154185434898293_7387808474266473605_n

Travelsfortaste is Featured on Expats Blog

England expat blogs
Privacy & Cookies: This site uses cookies. By continuing to use this website, you agree to their use.
To find out more, including how to control cookies, see here: Cookie Policy
Squaremeal.co.uk - Restaurant Reviews

About me

Writer and Photographer. Food,Travel & Lifestyle, Blogger and Digital Marketer. Read More…

  • Email
  • Facebook
  • Instagram
  • Twitter
  • YouTube

Recent Posts

  • Diamond Jubilee Tea Salon, Fortnum & Mason – Afternoon Tea Review
  • Brown’s Brasserie and Bar celebrates 50th Anniversary with Covent Garden Grand re-opening
  • Hampton Court Palace Food Festival – Review
  • Brigit’s Bakery Afternoon Tea, Covent Garden, London – Review
  • Maplin Photo Walk around Central London

Copyright © 2025 · Foodie Pro Theme by Shay Bocks · Built on the Genesis Framework · Powered by WordPress

This website uses cookies to improve your experience. We'll assume you're ok with this, but you can opt-out if you wish.Accept Read More
Privacy & Cookies Policy

Privacy Overview

This website uses cookies to improve your experience while you navigate through the website. Out of these, the cookies that are categorized as necessary are stored on your browser as they are essential for the working of basic functionalities of the website. We also use third-party cookies that help us analyze and understand how you use this website. These cookies will be stored in your browser only with your consent. You also have the option to opt-out of these cookies. But opting out of some of these cookies may affect your browsing experience.
Necessary
Always Enabled
Necessary cookies are absolutely essential for the website to function properly. This category only includes cookies that ensures basic functionalities and security features of the website. These cookies do not store any personal information.
Non-necessary
Any cookies that may not be particularly necessary for the website to function and is used specifically to collect user personal data via analytics, ads, other embedded contents are termed as non-necessary cookies. It is mandatory to procure user consent prior to running these cookies on your website.
SAVE & ACCEPT