Spinach – Love or Hate?
I have always loved spinach and green peas in equal measure but when it comes to the hubster, well… let us just say that I have put in a lot of hard work to cultivate a growing love affair with spinach! This soup is great for fussy eaters and especially for those who do not enjoy the flavour of spinach. The gorgeous smoky bacon beautifully masks the taste of spinach by adding strong bursts of flavour. Adding oak-smoked garlic packs an additional punch and gives the soup a lovely layer of flavour.
This Spinach and Green pea soup with smoky bacon is not just healthy and wholesome, it’s really easy to make. It’s the kind that will leave those who are not spinach aficionados playing a guessing game with their taste buds!

I could almost imagine my husband in a cartoon strip with those little conversation bubbles over his head with each conversation bubble having a different ingredient scrawled inside, as all those wonderful flavours enveloped his palate one after the other!
Of all the meats out there, I really think pork is very succulent and has the capacity to really alter the taste of a dish and add a whole new dimension. I also firmly believe that simplicity is the key to creating something really tasty. Therefore, the use of everyday stuff like red onions and garlic to quickly make this soup appeals to my midweek lazy self as it can really fill you up. On the weekend though I would serve this soup with a generous portion of white fish, with a sprinkle of salt, pepper, chives and some dried herbs and a big squeeze of lime with a side of rocket dressed with olive oil and honey mustard dressing. Accompanied by a crisp white wine it is a complete meal and one that is not just quick and easy to put together but a great way to eat healthily and keep the guilt conscience at bay. Much needed after a period of indulgence I say, of course with no compromise on taste!

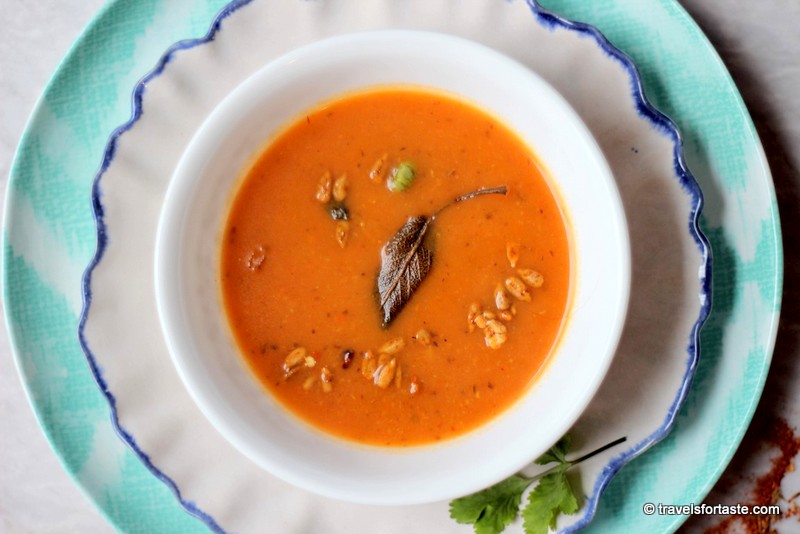
Spinach and Pea Soup
Ingredients
Equipment
Method
- In a large saucepan sautee’ the finely chopped oak-smoked garlic till it begins to sweat. Then add the red onion finely chopped and cook till it turns pink and juicy.
- Reduce the flame to a minimum and add the bite-sized pieces of smoked bacon medallions.
- Stir now and then to ensure that the bacon doesn’t stick to the saucepan and become too crisp, it must cook to a nice chewy yummy consistency and not get too crisp. Cook without a lid at this stage.
- When the bacon has cooked completely and is almost turning crisp, remove this mixture into a bowl as we will use the same saucepan for preparing the rest of the ingredients of the soup so as to retain the beautiful juicy goodness that is in the pan and that also ensures we don’t use anymore extra oil.
- Wash the baby spinach leaves and the green peas and add them into the saucepan along with the finely chopped chives and chicken stock. In case you are using stock cubes, I would say use the reduced salt variety because the smoked bacon is very salty already.
- Add 300ml water and cook with lid on a medium flame for 25 minutes.
- Puree the soup with a hand blender and add a generous amount of freshly cracked black pepper and some sea salt – I am stingy with the salt because I like to keep the salt to minimum when I am cooking anything withba bacon as an ingredient.
- When the soup has been pureed, don’t fuss if a fewstray green peas escape the blender blades, it just makes the soup that muchmore wholesome and chewy while eating.
- Now add in the garlic, red onion and bacon mixture and cook for another 7- 10 minutes.
- Serve hot topped with a big spoon of chopped spring onion and herby croutons.
- Perfect for an early supper with crusty bread and even better with a grilled white fish and white wine for a weekend meal.
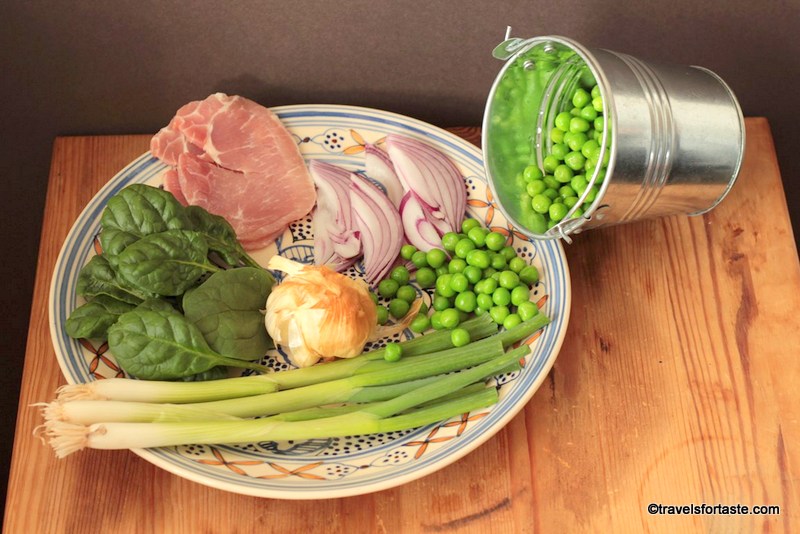
Spinach and Pea soup ingredients close-up
Make it Vegan!
Go ahead and make this recipe vegan!
- Swap Smoked bacon with smoked tempeh or pan-fried chestnut mushrooms for an earthy flavour, and throw in some cooked chestnuts for good measure.
- Swap chicken stock for vegetable stock

Recipe Notes
- Smoked Garlic and smoked bacon add layers of flavour to this humble but earthy soup.
- Make the soup as per the recipe, leaving out the part with the onions, garlic, and bacon, this part with the greens and stock can be cooked in a large batch and frozen in batches, neatly labelled.
- For a milder flavour use white onion instead of red onions or Bombay Onions.
- Need a fridge tray clear-out? All your greens going mangy can be used up – think broccoli, kale, coriander steams, cavolo nero, chard, celery sticks, a small piece of fennel, cabbage, iceberg lettuce, a small portion of cabbage leaves on their last legs – give all of these greens a new lease on life! I have even added in some boiled potatoes and half an egg yolk into my soups to use up ingredients, ummm they taste sooo fab in soup!
- Tart green apples also work wonderfully well in this soup.
Easy Swaps
- Swap fresh green peas for frozen or canned ones.
- Swap smoked bacon medallions smoked for bacon lardons.