Travels for Taste

Tales of travel and food with a touch of spice

  • Home
  • About
    • In the Press, Published Work and Interviews
    • PR and Disclosure Policy
  • Food
    • Recipe Index
      • Indian
        • C.K.P recipes
        • Curry – Meat, Seafood
        • Curry – Vegetarian
        • Sides
        • Chutneys
      • Healthy
        • Soups
        • Salads
      • Quick and Easy
      • Baking
        • Desserts
      • Meat
      • Seafood
      • Vegetarian
        • Salads
      • Vegan
    • Product Reviews
    • Events
  • Travel
    • UK
    • India
    • Around the World
  • Lifestyle
    • Home
    • Kitchen
    • Restaurant Reviews
    • Miscellaneous
  • Giveaways
  • Work with me
    • Meet interesting foodie entrepreneurs here

Paneer Firecracker Parcels

October 12, 2017 by manjirichitnis 6 Comments

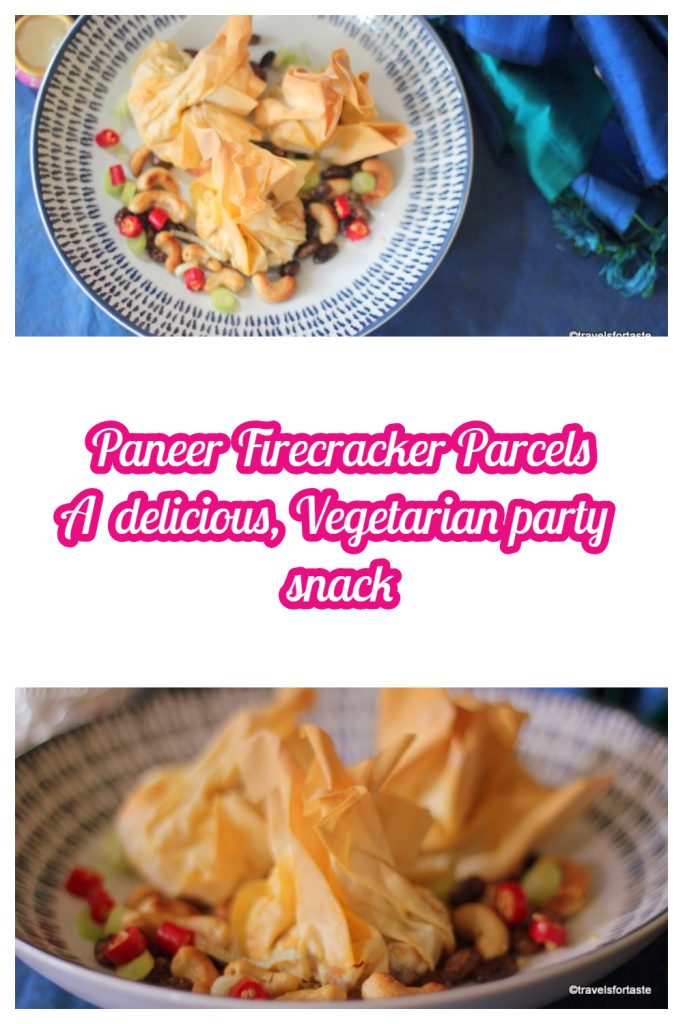
A delicious paneer starter for special occasions

 The countdown to the most opulent and bright Hindu festival of the year has begun. DIWALI – the festival of lights is knocking on our doors. Delicious spicy shredded paneer bhurji encased in a delicate filo pastry parcel and baked to just the right temperature. These bite-sized mini parcels of deliciousness pack a punch of flavour and are certain to become a crowd-pleaser in no time. These mini ‘firecrackers’ explode when bitten into engulfing one’s palate in a riot of beautiful flavours and textures.

Easy Vegetarian Party food recipe, a sure-fire crowd-pleaser

A great recipe to rustle up quickly and impress guests, perfect for both at a planned party or for surprising those guests that drop in unexpectedly. And with ASDA by my side, I can bring home all these beautiful ingredients and unleash my creative side in the kitchen. It also gives me an opportunity to save some precious time and spend it with those that matter most – my family – and celebrate this amazing and lively festival with pomp and pageantry – at home.

Paneer Firecracker Parcels

PANEER FIRECRACKER PARCELS

manjirichitnis
Delicious, Vegetraian and festive this is a great recipe torustle up quickly and impress guests, perfect for both at a planned party orfor surprising those guests that drop in unexpectedly.
Print Recipe
Prep Time 10 mins
Cook Time 25 mins
Course Appetizer
Cuisine Fusion Indian
Servings 6 people

Equipment

  • Pan, Oven

Ingredients
  

  • 250 grams Paneer
  • 2 sheets Filo pastry
  • 1 handful cashews and almonds for purée
  • 2 Red onions medium sized
  • 1.5 small juicy sweet tomatoes
  • 2 Sweet Peppers (small, sweet crunchyones)
  • 2 tbsp Tomato purée
  • 4 tbsp Oil
  • 1 small pinch Asafoetida
  • 1/2 tsp Cumin (jeera)
  • 2 Green chillies
  • 1 tsp Red chilli powder
  • 1.5 tbsp Ginger garlic paste
  • 2 tsp Garam masala
  • 2 tsp Coriander powder
  • 1/2 tsp Black pepper powder
  • 1/4 tsp Kasoori methi
  • 2 tbsp finely chopped fresh coriander leaves
  • 1/2 tsp salt or as per taste
  • 2 tbsp Ghee (clarified butter)
  • 1 handful Almonds + cashew nuts +Raisins ( for garnishing)

Instructions
 

  • Grate the paneer to get longcheese like curls, set aside
  • Soak a handful of cashews andalmonds in warm water, it becomes easier to peel off the skin, peel and leavethem to soften in lukewarm water. Once they soften, make a thick smooth pasteof the cashews and almonds. Set aside
  • Remove the seeds and thenroughly chop the tomatoes
  • In a heavy bottomed pan heat 1tbsp oil, then reduce the flame and add a pinch of asafoetida and 1/2 tspginger garlic paste, roughly chopped tomatoes, 2 tbsp tomato puree, 1/2 a green chillies chopped roughly, 1/4 tsp black pepper powder
  • Cook on a medium flame forabout 2 mins, stirring to ensure the paste doesn’t burn or overcook
  • Remove this mixture fromthe pan and allow to cool, once it has cooled down blend the mixture tomake a thick paste. Add 1 tbsp water to blend to a smooth consistency
  • Meanwhile, start on the peppers by removing all the seeds andfinely chopping the sweet peppers into tiny bite-sized cubes,similarly chop the red onions very fine. Set aside
  • In the same pan add 3tbsp oil, when the oil is hot sputter some cumin seeds and add 1/2tsp  ginger garlic paste, reduce the flame
  • Then add the chopped onions andreduce the flame to low, allow the onions to brown slightly while stirringoccasionally
  • Now add the dry powdermasalas (garam masala, 1/4 tsp black pepper powder, red chilli powder,coriander powder) and saute well until the onions are reduced and releasea strong aroma. To ensure the onions and masalas don’t burn, stir occasionallywhile they reduce
  • To this, addthis cashew-almond paste and the thick tomato mixture and mix wellThen add in the chopped sweet peppersand cook them until they begin to soften.
  • Now add in the gratedpaneer, turmeric powder, kasoori methi and finely choppedcoriander leaves. Cook on a low flame until the mixturethickens it looses all its excess moisture. Do not cook with a lid on, do notadd water and ensure that you stir occasionally
  • Allow this mixture to cool completelyand then rshapeinto tiny bround balls. On a baking sheet lay open the filopastry pack and use two sheets to make a strong outer covering
  • Cut the sheet using a pizzacutter into large rectangles. If you find this fiddly place the sheet on amuffin tray and cut using a scissor
  • Drizzle some melted butter or use anoil spray to line the inside of the sheets
  • Add one small paneer mixture ballinto each filo rectangle and gently fold to make a neat parcel, spray someoil over this and cook in a pre-heated oven at about 150 deg cel (fan oven). Keep an eye so that the outer filopastry does not burn
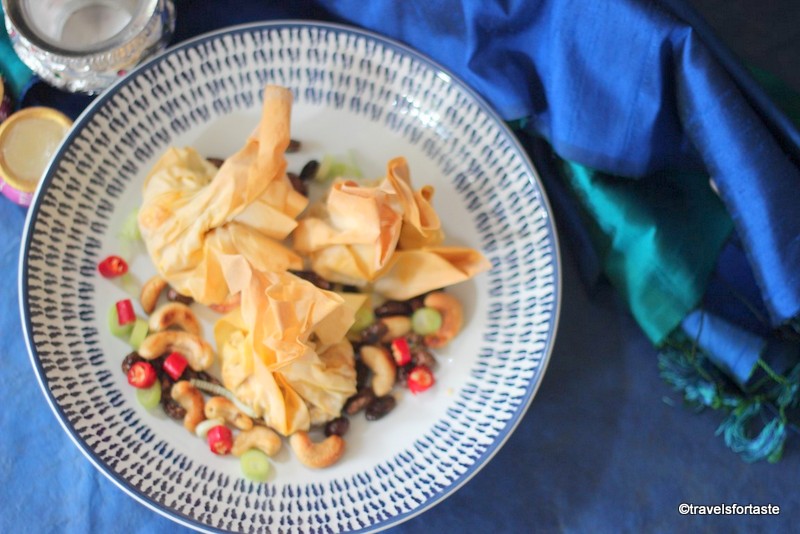
  • While this is in the oven heat gheein a small pan and add the raisins, they are ready when they begin to swell insize, then dunk in some skinless whole cashew nuts and skinless whole almondsfry them in the ghee too, once done, remove and set aside
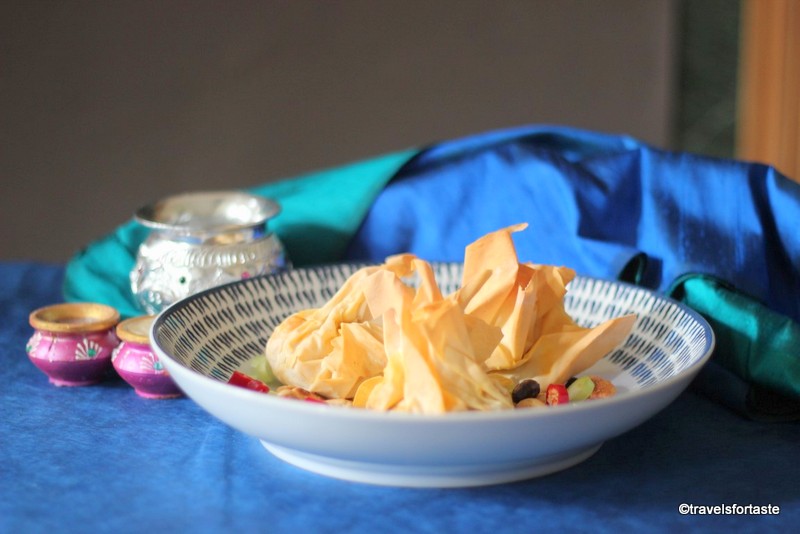
  • When the parcels turn a toasty lightbrown colour on the outside, they are done, remove and serve on a prettyplatter on a bed of chopped coriander, sprinkle ghee roasted nuts on top tomimic tiny jewels
Spicy paneer bhurji encased in delicate filo pastry parcels

This dish is meant to tease the palate before a festive meal. The vibrant spices ensure an explosion of flavour and the rich cashew-almond paste adds a regal twist which also balances the flavours ensuring those who are not partial to heaty spices can savour this dish too. Congratulations – you have in your repertoire a cracking crowd-pleaser recipe. Now all you need to do is to go stock up that list of ingredients 😉 – time crunch? No problem – shop online!

Spicy paneer bhurji encased in delicate filo pastry parcels

ASDA has some really cool offers for Diwali, why not check out the special Diwali offers here before you head out to ASDA?  I have stocked up on oil, ghee, spices and a few store cupboard essentials – after all, it helps to have time-saving tricks up our sleeve!

*With thanks to ASDA. As always, all opinions expressed are always my own.

Filed Under: Food, Indian, Recipe Index Tagged With: ASDA Diwali, autumn, celebrate, celebration recipes, cottage cheese, Deepavali, Deepawali, Diwali 2017, Diwali Food, Diwali in London, Diwali in the U.K, Diwali recipes, festive recipes, Indian Food, Indian recipes, paneer, Paneer Firecracker Parcels, spicy vegetarian starter recipe, starter recipe, the festival of lights

Basic Chocolate Cake with Frosting

August 20, 2012 by manjirichitnis Leave a Comment

What better way to celebrate a new FOODISTA Badge for my post on Shahi Khichadi than by baking a chocolate cake , I firmly believe that chocolate is the one word that instantly lifts sagging spirits and the whole baking process itself is cathartic ! So sistah’s lets BAKE !

Prep: 25 mins | Cook: 30 mins

Level :EASY PEASY !

You will Need the Following :

  1. 225g butter, softened
  2. 225g caster sugar
  3. 4 Eggs
  4. 220g Self Raising Flour
  5. 3 tsp Baking Powder
  6. 1 tbsp Cocoa Powder
  7. Half tiny spoonfull of Soda Bicarbonate

For the FILLING

  1. 100g Butter
  2. 100g Icing Sugar
  3. 1 level tbsp Cocoa Powder
  4. Chocolate for adding chocolate shavings,or crunchy choco balls or FRESH strawberries sliced – whatever suits your mood , mine says GO ALL OUT FOR CHOCOLATE !

Preparation:

  1. Lightly Grease two cake tins and line the bottoms with non stick-parchment. Perheat Oven to 180C/350F/Gas 4. I manage without parchment , it’s up to you, if your baking for the first time use it as it prevents the sides from burning.
  2. Ensure butter is completely softened or else use the old foolproof way – heat water in a pan ,place a vessel on top with the butter inside minus any packaging, watch it soften like a man melts when he looks onto the eyes’s of his dearest ,ahem …
  3. Measure the Butter and sugar into a bowl and mix well they form a creamy mix, I used a fork and gave it a good old whipping:) – think of someone you dislike – your boss , your mil, your annoying neighbour, Baba Yaga the Witch – whoever – just whip away hehehe
  4. Add 3 medium or 4 small eggs, I used 3 medium-sized eggs.
  5. Swift the self-raising flour into this mix ,followed by the baking powder, soda bicarbonate ,cocoa powder and beat till really smooth , I didn’t even need a hand blender as the butter was perfectly soft and the flour well swifted , though do go ahead and use a hand blender on low setting for about a minute , have added a picture so you know the look of consistency.
  6. Divide the mixture between the two tins and put into the oven to bake for 25-30mins.I used the foil of the butter packaging to grease the cake tins, no wastage in my kitchen !
  7. While in the oven make the icing by creaming together the butter and icing sugar and add cocoa powder, mix until smooth.
  8. Sandwich together the two cakes with the icing.Add some on the sides and sprinkle the crunchy choco balls on the top , go all crazy and add some chocolate shavings , I did !
    When you bake this and sink your teeth into the chocolately heaven , enjoy the moment and then….drop me a line ! 🙂
    PICTURES !
    Hover over the pic for a title …

Filed Under: Desserts, Food, Recipe Index Tagged With: award, badge, bake, baking powder, butter, cake tins, celebrate, choco, chocolate cake, cocoa, crunchy, delicious, easy, eggs, Foodista, icing, oven, recipe, self raising flour, sistah, soda bicarbonate, softened, swift, whip

”POSH ”Victoria Sponge Cake

August 3, 2012 by manjirichitnis 4 Comments

What better way to celebrate the excitement surrounding the Olympics happening in London than sinking my teeth into a perfectly delicious soft Victoria Sponge Cake!

It’s an easy recipe and the result left me feeling like so very happy!

I tried to read up online why it is called a ”Victoria” Sponge cake and the apt answer seems that since Queen Victoria loved this soft cake with her afternoon tea! So I am going to savour the cake and afternoon tea as I cheer myself hoarse in front of the telly whilst watching the Olympics 🙂

Lovely! So let’s get baking and when your done gobbling some of it, drop me a line and let me know how much you enjoyed creating this yummy delight!

This cake serves 8 people, takes about an hour to prepare.

I choose to call it ”POSH” because that’s Victoria Beckham’s pop name, our very own British star and this cake is modernised version of a British Classic recipe with a twist as it is layered with Creme Chantilly’ – very posh sounding indeed!

Ingredients:

  • 225 g unsalted butter, softened, plus extra for greasing
  • 4 medium-sized eggs, organic if you please
  • 225 g caster sugar
  • 225 g self-raising flour
  • 4- 5 Large tablespoons of Strawberry Jam, the traditional version uses raspberry Jam, I used strawberry conserve.
  • 250 gm fresh strawberries sliced lengthways
  • Icing Sugar for dusting on top of the cake
  • Soda Bicarbonate – 1 teaspoon
  • Baking Powder 1 Teaspoon

To make the  crème Chantilly:

  • 300 ml double cream – so sinful 😉
  • 25 g icing sugar
  • I tiny cap full of Vanilla essence, the original recipe inspired by The Good Food Channel advises to use – 1 vanilla pod, halved lengthways and seeds scraped or vanilla extract

METHOD :

  • Preheat the oven to 180C/160C fan/gas 4. Grease and line two 18cm cake tins with a removable based with baking paper. I inaugurated my brand new weighing scales and cute cake tins I purchased for all future cake making experiments!
  • Put the butter and sugar in the bowl of an electric mixer and cream well until light and fluffy – this will take at least 10 minutes to get it properly aerated. Use the 10 minutes you have to wash and clean the strawberries and slice them lengthwise. This was also a first for me in terms of using my food processor to mix the butter and sugar mix. Then empty this butter sugar mix into a large mixing bowl, I also have a NEW nice bright Orange bowl!
  • Break each egg and add one at a time, whisk the mixture well after each addition to ensure it is soft and fluffy.
  • Add the self-raising flour to the above butter, sugar and egg mixtures, I added one spoon at a times and mixed it really well each time. Add the Bicarbonate of soda and Baking Powder to this mixture, I used this as I do in every cake but the original good food channel recipe does not mention these 2 ingredients. Later I used a hand blender to really get this mixture to feel like one entity and till it felt right to pour into the ready cake tins.
  • Now pour the above cake mix in equal portions into the  2 cake tins and smooth the top with a plastic spoon, the type you get with a food processor.
  • Bake for 20 minutes, with a timer, until risen and golden. Ensure you do not go over the 20 minutes, also if you are using a fan oven as I do, use only the setting that heats from below.

For the crème Chantilly:

  • Put the cream in the food processor, add the icing sugar and the vanilla essence. Whip to the soft peak stage, using the slow speed setting then refrigerate until slightly firmed.
  • Take the strawberry jam into a small pan and warm gently whilst stirring, use low flame and do not leave on pan for tool long.
  • Remove the cakes from the cake tin, on the top of one cake spread the jam from the pan and add the chopped strawberries.
  • Then get the Creme Chantilly’ from the fridge and spread generously over this.
  • Place the second cake on this and press down ever so gently.
  • Dust the top of this lovely sponge cake with a bit of icing sugar and decorate with a blob of the Creme Chantilly’ and some sliced strawberries!

Voila, the classic British cake with a twist – Posh Victoria Sponge is ready for you to savour, impress your family and friends and enjoy baking over and over again!

Filed Under: Desserts, Food, Recipe Index Tagged With: afternoon snack, bake, beat, butter, celebrate, easy, easy recipe, eggs, fluffy, food, Good Food, icing, mixture, pipe, Queen Victoria, recipe, self, simple, soft, sponge, strrawberries, sugar, tea, tea party, Team GB, time, unsalted, Victoria, weighing scale, whisk

Food,travel and lifestyle writer. Photographer.

  • Email
  • Facebook
  • Google+
  • Instagram
  • Pinterest
  • Twitter
  • YouTube

Follow Travelsfortaste on BlogLovin

Follow on Bloglovin

Categories

  • Baking
  • Breads
  • C.K.P recipes
  • Cakes
  • Chutneys
  • Cocktails
  • Curry – Meat, Seafood
  • Curry – Vegetarian
  • Desserts
  • Events
  • Featured Food and Drink
  • Featured Lifestyle
  • Featured Travel Adventures
  • Food
  • Healthy
  • Home
  • India
  • Indian
  • Kitchen
  • Lifestyle
  • London and rest of U.K
  • Meat
  • Miscellaneous
  • Product Reviews
  • Quick and Easy
  • Recipe Index
  • Rest of the World
  • Restaurant Reviews
  • Salads
  • seafood
  • Sides
  • Smoothies
  • Soups
  • Travel
  • Vegan
  • Vegetarian

Featured Blogger on Great British Chefs

GBC_blogger-badge_150x300px    

Need a New Power Blender?

13076814_10154185434898293_7387808474266473605_n

Read Travelfortaste’s interview on Gourmandize UK & Ireland

 Sliceoffme interviewed by Gourmandize UK & Ireland

Travelsfortaste is Featured on Expats Blog

England expat blogs

Read Travelsfortaste reviews on Zomato

View my food journey on Zomato!

Travelsfortaste on Foodies 100

Foodies100 Index of UK Food Blogs
Foodies100

Travelsfortaste is part of the Mumsnet Blogger Network

mumsnet
Privacy & Cookies: This site uses cookies. By continuing to use this website, you agree to their use.
To find out more, including how to control cookies, see here: Cookie Policy
Squaremeal.co.uk - Restaurant Reviews

About me

Writer and Photographer. Food,Travel & Lifestyle, Blogger and Digital Marketer. Read More…

  • Email
  • Facebook
  • Google+
  • Instagram
  • Twitter
  • YouTube

Recent Posts

  • Vinegar Roast Chicken
  • Mohammed Ali Road, Mumbai’s fabulous Street Food Market – Ramadan Special
  • Butter chicken
  • Quick Red Lentil curry
  • Dill and yellow moong daal recipe

Copyright © 2021 · Foodie Pro Theme by Shay Bocks · Built on the Genesis Framework · Powered by WordPress

This website uses cookies to improve your experience. We'll assume you're ok with this, but you can opt-out if you wish.Accept Read More
Privacy & Cookies Policy

Privacy Overview

This website uses cookies to improve your experience while you navigate through the website. Out of these, the cookies that are categorized as necessary are stored on your browser as they are essential for the working of basic functionalities of the website. We also use third-party cookies that help us analyze and understand how you use this website. These cookies will be stored in your browser only with your consent. You also have the option to opt-out of these cookies. But opting out of some of these cookies may affect your browsing experience.
Necessary
Always Enabled

Necessary cookies are absolutely essential for the website to function properly. This category only includes cookies that ensures basic functionalities and security features of the website. These cookies do not store any personal information.

Non-necessary

Any cookies that may not be particularly necessary for the website to function and is used specifically to collect user personal data via analytics, ads, other embedded contents are termed as non-necessary cookies. It is mandatory to procure user consent prior to running these cookies on your website.