Travels for Taste

Tales of travel and food with a touch of spice

  • Home
  • About
    • In the Press, Published Work and Interviews
    • PR and Disclosure Policy
  • Food
    • Recipe Index
      • Indian
        • C.K.P recipes
        • Curry – Meat, Seafood
        • Curry – Vegetarian
        • Sides
        • Chutneys
      • Healthy
        • Soups
        • Salads
      • Quick and Easy
      • Baking
        • Desserts
      • Meat
      • Seafood
      • Vegetarian
        • Salads
      • Vegan
    • Product Reviews
    • Events
  • Travel
    • UK
    • India
    • Around the World
  • Lifestyle
    • Home
    • Kitchen
    • Restaurant Reviews
    • Miscellaneous
  • Giveaways
  • Work with me
    • Meet interesting foodie entrepreneurs here

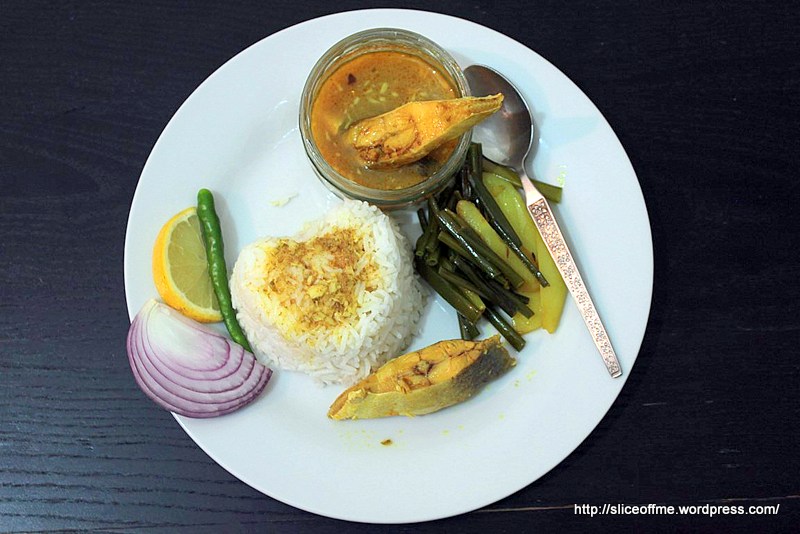
Tasty Fish Dish in £1 – ready in 10 minutes – Raising awareness about extreme poverty and hunger

September 23, 2013 by manjirichitnis 6 Comments

Hearty home-made fish dinner on a tight budget? Yes, it is possible!

Recently, I read about living below a line challenge. The challenge is to feed your family by spending not more than £1 a day for 5 days. Why? To help put conservation around poverty into perspective. How the world views hunger, extreme poverty and issues related to poverty is an important conversation to have. For example, reading a hard-hitting fact like this one helped me understand how bad the issue of global hunger really is – ‘Hunger kills more than aids, malaria and tuberculosis combined’.

Please do visit The Hunger Project website to read about the challenge in detail. You can also donate, help fundraiser and do your bit to help end world hunger. World Hunger Day is on the 28th of May.

This recipe is basically to support some blogger friends who along with their families which includes their young children took up this tough challenge. But honestly, if someone told me I could make a fish main in £1 I would laugh aloud and make them a cup of tea to help them feel normal again. But trust me on this one you really can make a very delicious side dish and serve it with a spicy rice main for 2 adults for 2 main meals. Yes, it is possible to be thrifty and yet feed your family for less without compromising on taste.

When my friend S told me the easy-peasy recipe I just had to buy myself a pack from my new fav supermarket. This is probably the easiest recipe for a side dish ever.

Total prep time: Under 10 minutes Serves:2 adults as a side for 2 main meals

Ingredients:

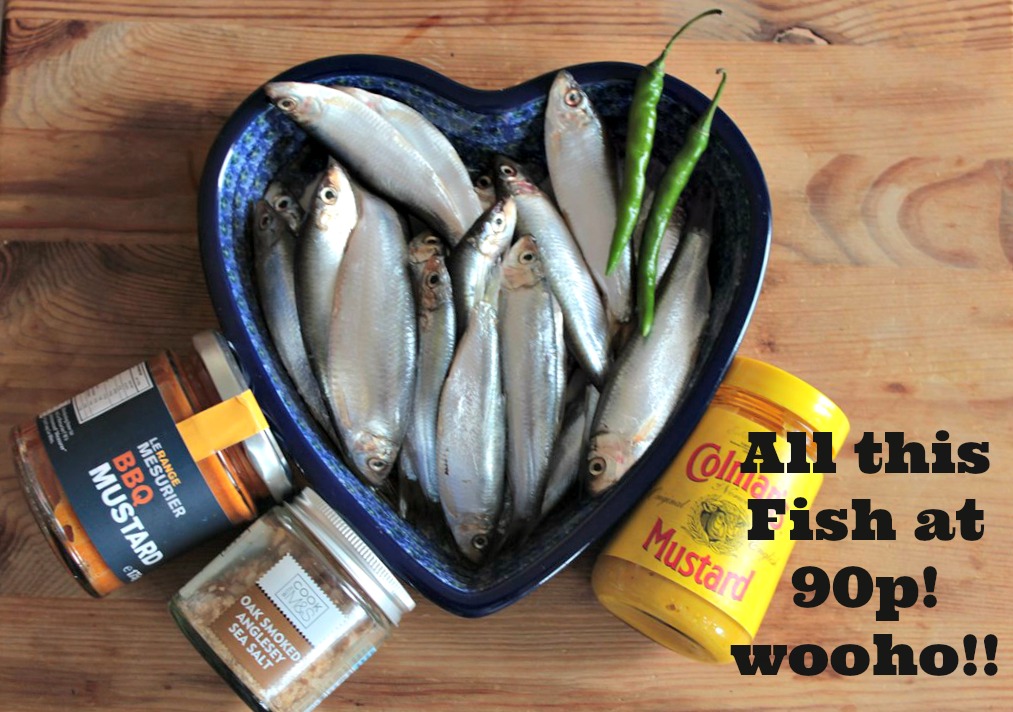
  • Sprat Fish pack – contains about 20-25 fishes and costs around 90p to 95p
  • Turmeric powder 1 tsp
  • Red Chilli Powder -1.5tsp
  • 2 small hot green chillies sliced in a slant
  • Salt to taste
  • a pinch of Asafoetida
  • Oil – 2 tsp
  • 4 tsp Colmans Mustard
  • 1 tsp hot BBQ Mustard – don’t worry if you don’t have this just add half a teaspoon of paprika to 1 tsp of any mustard that you have lying around and mix half tsp of  BBQ sauce into this for a smoky flavour.

IMG_4734 with text

Recipe:

  • Wash the fish well under tap water and handle gently as it’s a small delicate creature and needs some fawning over but hey not much fuss I tell ya! But its all worth it because even my hubby apprehension that this fish has loads of tiny bones were all gone as he clicked his fingers after the meal 🙂
  • Heat a saucepan and  add 1sp oil, add asafoetida and the turmeric powder and salt and then the washed Sprat fish
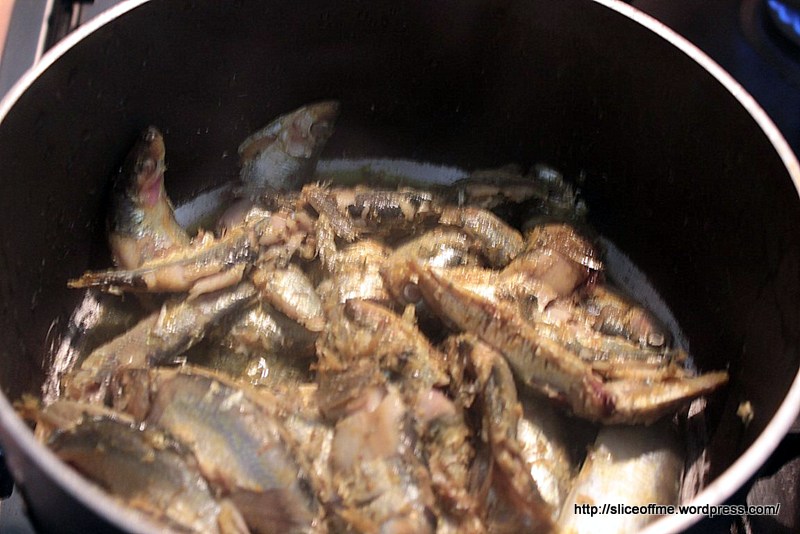
  • Gently sautee them for about 1 minute or until you see the skin start to come off, don’t overdo it as they need to cook with the mustard in the next step.

Sprat has been sauteed

  • Remove the fish into a clean bowl and in the same sauce on a very low flame add another tsp oil, both the mustards pastes, chopped green chillies, red chilli powder and then the fish.
  • As it is a delicate fish it will cook quickly and as it does the big bone that runs lengthwise inside this tiny fish will be easy to remove and so you can get the head off to, I am not squeamish but my husband is and he refuses to eat the eyes but they are supposed to be packed with iron and fish itself is high on Omega 3 fatty acids, the good stuff your body needs. Mothers who breastfeed and consume fish are said to help give the baby better eyesight which is due to the high content Omega 3 fatty acids. Not only that as this recipe contains turmeric it has a heap of health benefits especially the fact that it helps people struggling to cope with psoriasis. If anyone has seen that episode of The Food Hospital on Channel 4 where a young mother and her son struggled with psoriasis, one of the big changes that they did to their diet was adding turmeric to even stuff like scrambled eggs.
  • A word here about the Le Range Mesurier BBQ Mustard, it’s one of the few things I purchased at the Cake & Bake Show 2013 apart from the sweet stuff. I also got a jar of zesty lime mayo from the same brand, they had a super offer of 4 jars at a great price!
  • I slant the green chillies slanted just because it looks posh 🙂
  • Ok, so I managed to remove most of the big middle bone with the heads and the fish cooks very easily in under 3 minutes.
  • Add a small helping of very finely chopped coriander for garnish.
  • Serve hot with steaming hot rice or khichadi, click here for a posh khichadi recipe from one of my older posts.
  • Do leave comments below and let me know what you thought of this recipe!

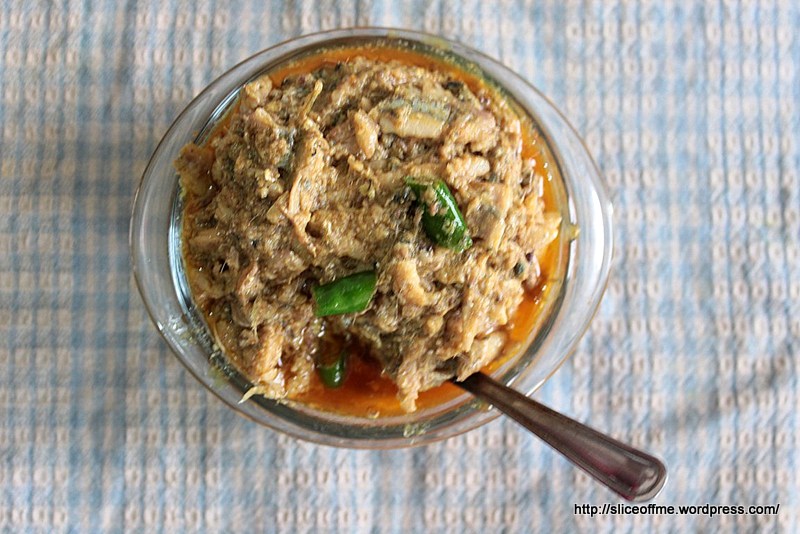
Sprat fish side is ready to serve!

I am entering this dish into a wonderful linky challenge called £1 or less recipe challenge started by Michelle Rice who blogs at Utterly Scrummy , with so much fresh and yummy fish made into a delicious dish and served with plain steamed rice its a thrifty budget dream dish full of flavour and ready without too much of labouring in the kitchen. Do link up and help spread the good cheer around in times of gloom when many families are struggling to make ends meet and feeding families with healthy food on a shoestring budget is a very real challenge for many.

one pound or less logo

Tasty Fish Dish in £1 – ready in 10 minutes !

Filed Under: Food, Recipe Index, seafood Tagged With: breast feeding mothers, Brit Mums, Channel 4, child safe food, easy, easy-peasy, eat well for less money, England, fish, food that is good for you, green chilly, health benefits of turmeric, healthy recipe, improve eyesight, kitchen karma, london, low oil recipes, non oily, non spicy, oil, omega-3 fatty acids, one pound fish, one pound fish dish, PSORIASIS, psoriasis treatments, quick, ready in under 20 minutes, recession proof cooking, salt, save moeny, side dish under £1, sprat, The Food Hospital, turmeric, U.K, wiki, wikipedia

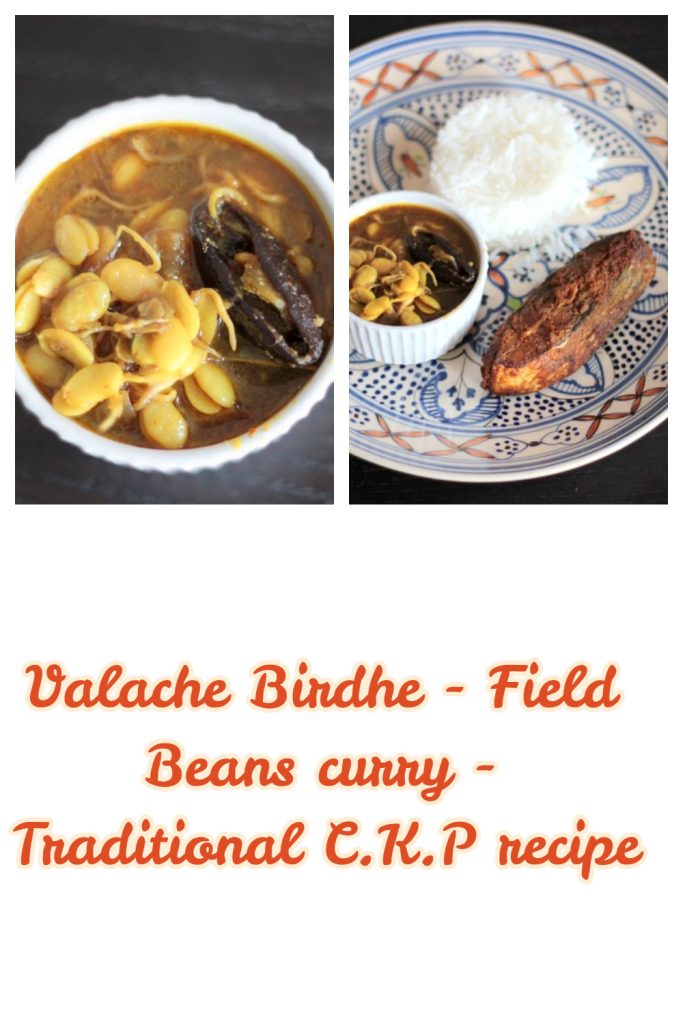
C.K.P Valache Birdhe (वालाचे बिरडे) – Field bean curry

September 22, 2013 by manjirichitnis 19 Comments

Valache Birdhe or field beans curry – a Regional delicacy from the state of Maharashtra, West coast of India

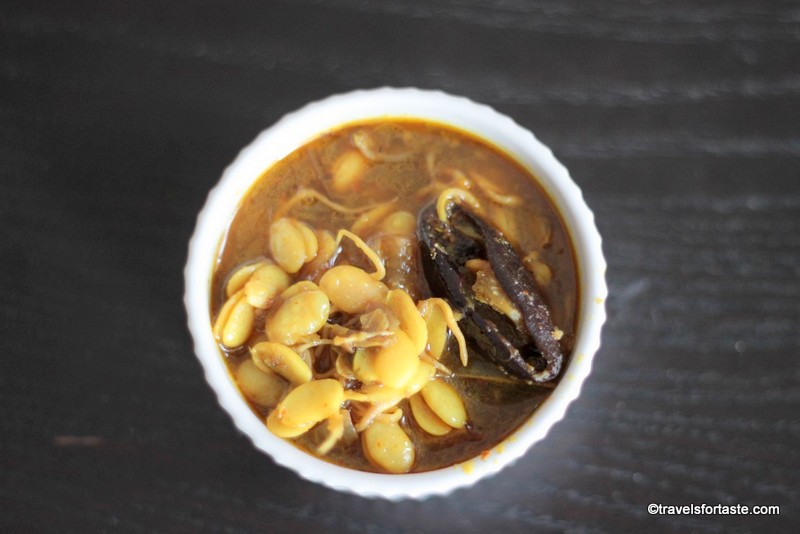
Valache Birdhe or field beans curry, is an extremely popular bean gravy and has helped soothe many aching hearts and settle ruffled feathers after long gruelling work days.I managed to procure a few packets of these beautiful field beans with brown skin after a lot of searching!Hubs goes completely mental at the mere mention of this dish and insisted on me uploading the recipe and help all the other hungry hubbies out there..ahem ..so without further ado ladies and gents I present to you yummyscrummy recipe.

Valache Birdhe or field beans curry

Valache Birdhe or field beans curry

Valache Birdhe or field beans curry

वालाचे बिरडे

ThisValache Birdhe or field beans curry recipe is a typical C.K.P way of making a rather traditional legume curry. Vaal or kadve vaal (kadve meaning bitter in Marathi) are generically referred to as Field Beans in English.

Traditional regional cuisine and a beautiful heirloom C.K.P recipe

Manjiri Chitnis

Valache Birdhe or field beans curry

5 from 1 vote
Hieloom recipe from the CKP community from the western coast of Maharashtra, India
Print Recipe
Prep Time 2 days d
Cook Time 20 minutes mins
Servings: 2 people
Course: Main Course
Cuisine: Indian
Ingredients Equipment Method

Ingredients
  

  • 1.5 Cup Vaal/ Field Beans – soaked, sprouted and skin removed – takes a few days
  • 3 -4 Cloves Lasun/Garlic with skin
  • 1 pinch Hing/Asafoetida
  • 1 Kanda/Red onion – one small finely chopped for the pan
  • 2 -3 tsp Dried Kokum 2 pieces or Tamarind (Chinch/ Imli) -tamarind paste OR dried tamarind soaked in water -remove the pips and use the gooey thick bits
  • 1/2 tsp Jaggery
  • 1 tiny pinch Mohri/Mustard Seeds
  • 1 Pinch Cumin/Jeera
  • 1.5 tbsp Oil
  • 1 tsp Laal Mirchi / Red Chilli Powder
  • 1/2 tsp Halad / Turmeric powder
  • 1 tsp Coriander powder
  • 1 tsp Jeere/Cumin powder
  • 1/2 fistful Fresh Coriander finely chopped to garnish
  • 3 – 4 tbsp Grated coconut paste * see notes
  • Salt as per taste

Equipment

  • Pan to cook the curry
  • Blender to make a paste from the garted coconut
  • Kitchen cloth to tie up beans for sporuting

Method
 

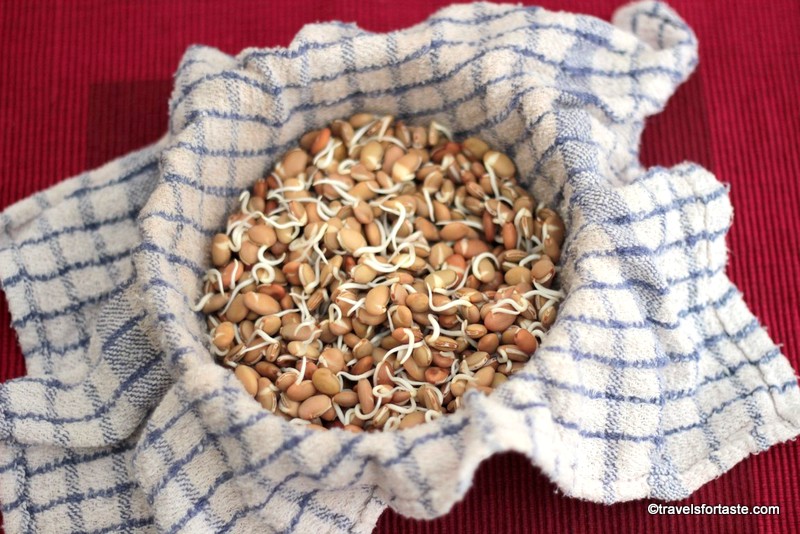
  1. Soak the Vaal overnight, change the water in the morning and by evening if they appear puffed then wrap them in a damp cloth and set aside in a vessel with a lid to create an environment warm enough to allow them to sprout
  2. Remove sprouted vaal into a bowl and pour like warm water on them, stir with your palms to loosen the skin and many will float to the top, decant the water and remove all the rest of the skins and discard
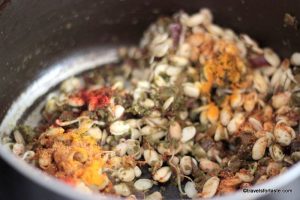
  3. Heat the oil in a saucepan and dust some asafoetida and throw in the mustard and cumin.
  4. When the cumin seeds begin to pop, throw in the garlic with their skin on and smashed to flatten them and as they turn colour and release their aroma, add the chopped onion.
  5. When the onion turns a delicate pink add turmeric powder, red chilli powder and then add the vaal/field beans.
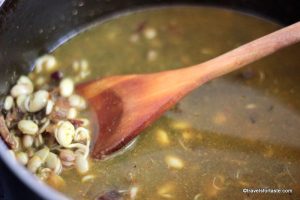
  6. Now add the turmeric, red chilli, coriander and cumin powders and quickly stir in enough water to cover the beans
  7. On a low flame cook with lid
  8. When the vaal is almost done, add the jiggery, coconut paste and the tamarind paste or the water from the dried tamarind which has been soaked or dried kokum soaked in water and when the vaal are done add salt and garnish with finely chopped coriander.
  9. Valache Birdhe or field beans curry is best enjoyed with steaming hot rice
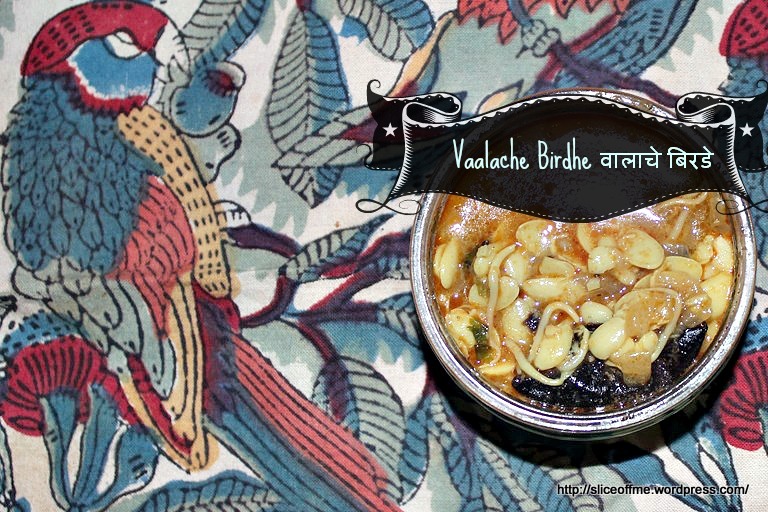
Vaalache Birdhe with text resized
Valache Birdhe or field beans curry

Food pairing

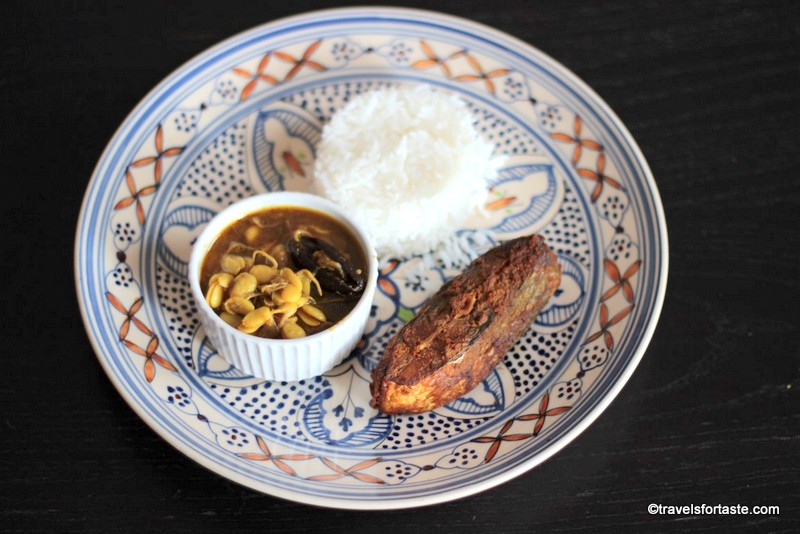
This Valache Birdhe or field beans curry is a delicacy pairs best with a portion of pressure-cooked rice of the Ambemohar variety, Basmati will do too. Always remember, a generous dollop of home-made sajuk tup or pure ghee is a must.

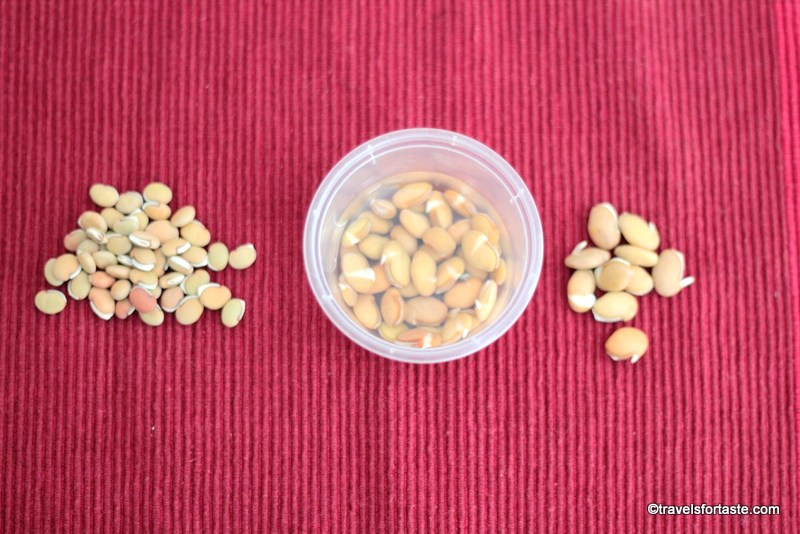
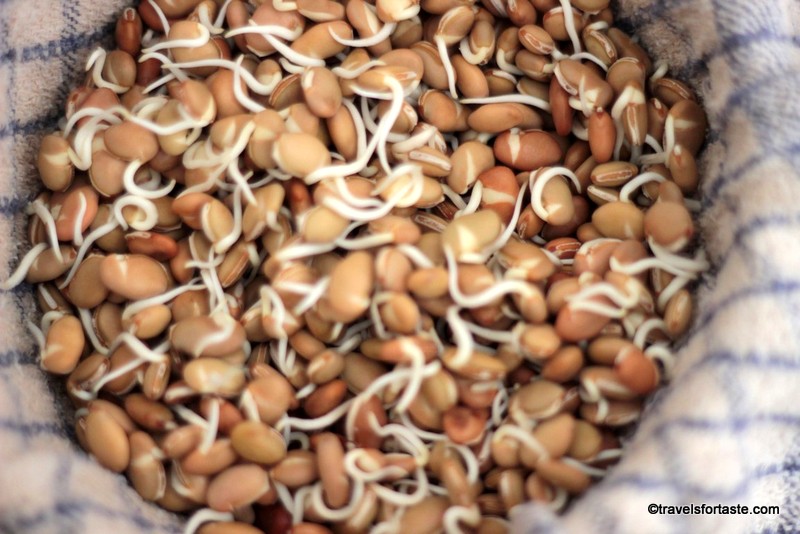
Stages of Vaal sprouting in photos

Sprouting of Vaal or field beans
Sprouted Vaal / Field Beans
Close-up – Sprouted Vaal or Field Beans

Notes:

  • Grated coconut paste: made by running fresh grated coconut or frozen grated coconut through a mixer/blender. Add 1 green chilli and 1 clove of garlic. My Aai (mum in Marathi) also prefers to also add 1/2 a finely chopped red onion which has been tossed on a pan with the coconut and green chilli – must admit it lends a toasty warmth to the gravy but I skip this step simply because the I compensate for it by using the onion in the pan!
  • Making Chinche cha kool ( usually, a block of tamarind is available packaged in any well-stocked Indian grocery store here in London, if not major spice brands now do tamarind paste in a bottle, find these online or any leading supermarket) – remove some in a bowl – add lukewarm water and gently ease the flesh of the tamarind loose from the seed. Use this thick mix to add to the curry. If you have fussy eater then maybe you want to strain this before adding into the curry. I would avoid straining as the gara – the thick flesh of the tamarind – is flavour packed so embrace it – fibres and all. 🙂
Valache Birdhe or field beans curry

I do know this process for cooking Valache Birdhe or field beans curry, sounds rather labor-intensive and complex but believe you me, its easy-peasy, and the main bit of hard work is only getting rid of the field bean skins.

Do leave me a comment of you make this dish and also any variations to the recipe that you may have heard of, any anecdotes, happy memories are always welcome. And if you do cook to my recipe do snap a picture of your creations and use the hashtag #travelsfortasteblogrecipe and share it to Twitter, Instagram, and Facebook and I will re-post it.

Bon Appe’tit !

P.S: coming soon a Valachi Khichadi ( Field Beans Pulav) recipe that’s another firm family fav!

Learn how to cook western coastal Indian cuisine from the C.K.P community with my easy to follow recipes.

Find below a list of Indian recipes on my blog, some traditional, some fusion, and many regional favourites!

  • Fresh dill and yellow moong daal recipe
  • Goda sheera/ sooji ka halwa/ Indian dessert
  • CKP Surmai curry
  • Pompfret fry
  • Konbichi khichadi – Prawn khichadi
  • Vaangayche Bharit/ Smoked stuffed Aubergine ( Eggplant/Brinjal) in a thick gravy/ Baingan ka bharta
  • Valache Birdhe – (वालाचे बिरडे) – MADE IN A TYPICAL C.K.P WAY
  • Kairi Panhe/ Aam ka panha – Raw mango summer drink
  • Cauliflower- vatana bhaji – cauliflower and green peas vegetarian side dish
  • Podhnichi khichadi
  • Akkha masoor aamti CKP style / Whole red lentils with skin curry recipe
  • Achari Mutton curry
  • Spicy Chicken curry
  • Egg curry
  • Kadhi – fusion of Punjabi and Gujrati kadhi recipes with vadi’s
  • Upma
  • Gujrati Kadhi
  • Shahi Khichadi
  • Sweetcorn and paneer bhaji/sabzi (vegetable side dish)
  • Tomato and coconut chutney
  • Steamed Idli batter
  • Ragi (Finger Millet) and blueberry pancakes
  • Masala egg omlette
  • Chicken tikka masala
  • Tikka masala curry paste
  • Tawa chicken Frankie roll
  • Chai concentrate
  • Grated carrot salad
  • Strawberry flavoured shrikhand
A typical C.K.P meal

Filed Under: C.K.P recipes, Curry - Vegetarian, Food, Indian, Recipe Index, Vegetarian Tagged With: asfoetida, C.K.P kitchen recipes, C.K.P recipes, coconut, coriander powder, cumin, eat, field beans, fresh, fresh coriander, grated, green chilli, Indian Food, Indian recipes, jeera, kokum, konkani food, Maharastrian food, Marathi, mohri, mustard, oil, pan, red chilli powder, saucepan, sautee, season, seeds, tamarind, traditional marathi recipes, turmeric powder, vaal, vaalache birdhe, yum

Spicy Grilled Chicken Bites With a Cooling Avocado Dip

September 5, 2013 by manjirichitnis 2 Comments

With an obvious change in the weather, we all are living in fear that this year’s glorious summer is coming to an end. I was lucky enough to get a few invites to barbecue parties in the past few months and had my share of some really divine meats and grills and some rather lumpy or burnt bits too!!!

Lucky because I live in a tiny rented flat with a small open plan kitchen. I try all sorts of tricks to fool myself into thinking that I am cooking in the fresh open outdoors. One of my favourite tricks to fool myself and get some tasty tidbits on my plate is by using a grid pan and earthy spices with smoked sea salt, delicious dips and of course washing these down with chilled beer.

Since I always seem to have some basic purees and pastes frozen and hiding in some corner of my tiny freezer I try and use them up quickly to ensure I always have place for some frozen desserts. One such favourite spicy green paste is made with one medium sized bunch of fresh coriander and 2 bright green chillies. Coriander is expensive and a regular feature in my kitchen so I try and freeze it after chopping it fine or better still making this paste and just adding large spoons to curries which gives them an instant face lift!

For a spicy twist on grilled chicken I decided to make these easy to pick and pop in the mouth pieces of chunky chicken making it a more fun way to share your food on the table. I love that it’s easy to just throw things on the pan and even the dip is a no fuss 3 step recipe which is a brilliant companion to the heat of the chillies on the chicken. The fact that the dip has zero oil is a big bonus.

You can make the coriander paste and store it in the freezer and even with the dip recycle it as a quick spread on sandwiches and use up any leftover meats the next day for a packed lunch. So convenient, especially on a Monday morning after a lazy weekend!

Placing the chicken on chunky cabbage leaves smeared with some mustard paste is another inexpensive alternative to posh salad leaves and helps finish of the last of that quarter portion of cabbage which lies neglected in your veggie tray and faces the threat of going into the bin soggy and spoilt, not a pleasant thought at all.

Guaranteed to tickle your taste buds this original recipe from my tiny kitchen is a food adventure in itself. Here’s how you can make this quick grilled chicken in easy steps:

Spicy grilled chicken bites with cooling avocado dip

(Serves: 4, Cooking Time: including 40 mins for marination is 1 hour):

Ingredients:

  • 4 chicken breasts
  • 4 large tbsp coriander and green chilli paste (proportion of 1 bunch of coriander with 2 green chillies)
  • Himalayan Pink Salt for seasoning
  • 2 tbsp refined oil
  • 1 tsp mustard paste
  • 4 cloves of garlic finely chopped
  • ½ tsp red chilli flakes
  • 4-5 leaves of fresh cabbage washed
  • ¼ medium sized red onion cut lengthwise
  • Toothpicks with little flags

For the dip

  • 2 avocados
  • 1 stalk fennel with few leaves
  • ½ medium sized red onion finely chopped
  • Himalayan pink salt for seasoning

Method:

Marinate the chicken breasts with coriander and green chilli paste, salt as per taste and 3 cloves of finely chopped garlic. Make small cuts on the chicken breasts with a knife and rub in the marinade. Add one tbsp oil to this mixture allowing the garlic to marry with the coriander and chilli paste. Marinate for 40 minutes

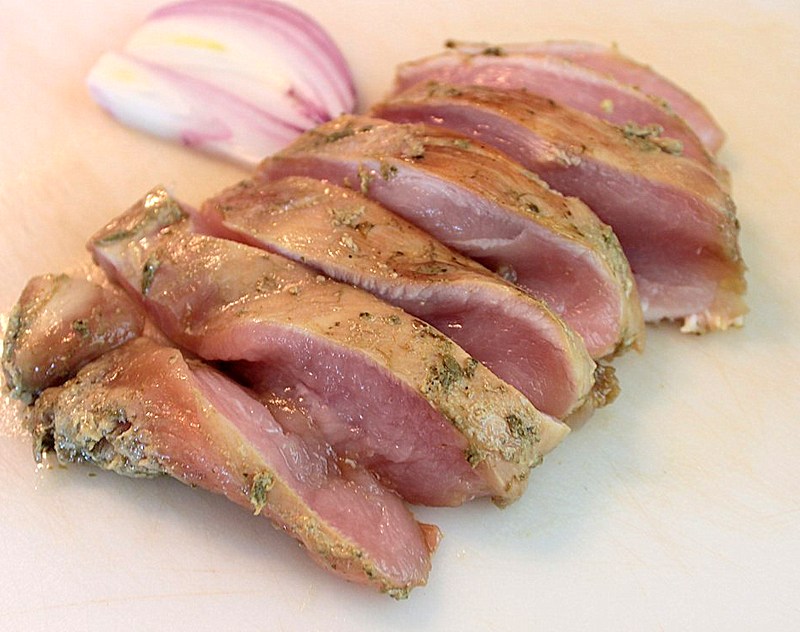
Cutting the chicken into thick cut style bites

On a grid pan spritz enough oil to coat the pan. Pan fry the breasts turning the sides over when they begin to change colour. When both sides appear to have changed colour remove the chicken breasts on a chopping board and let them cool for a while.

Meanwhile, smear the cabbage leaves with a small amount of mustard paste and place on a wooden board which will be used to serve the dish.

Now prepare the dip – Halve the avocados and scoop out the fleshy part. Take the thin green stalk and tender leaves of the fennel and put them together through a blender to make a coarse paste. Chop ½ a red onion fine and to the avocado and fennel paste, season some Himalayan salt. The dip is now ready.

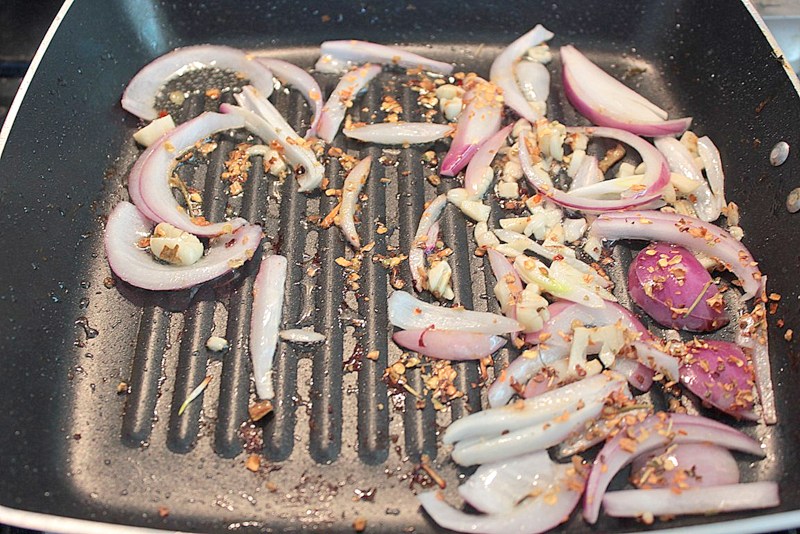
Pan Grill red onion ,garlic and red chilli flakes close up shot

Now get back to cooking the chicken. In the same grid pan add a 1 ½ tbsp oil with some red onion cut lengthwise and sauté for a while for a caramelise finish. Now cut the pieces of the chicken into “thick cut home-made potato-chip” like sizes and place them on the grid pan along with the onions.

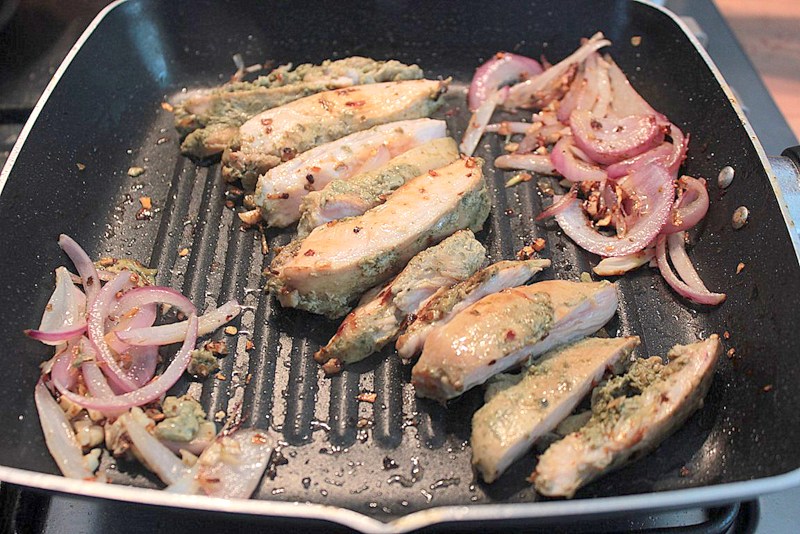
Chicken on pan being grilled with the spices

Sprinkle the red chilli flakes .Cook on low flame till done and flip over using tongs, a bit of charring is allowed to add more flavour. Place the chicken strips with toothpicks on the fresh cabbage leaves in a flat plate.

The chunky avocado and red onion dip will offset the grilled chicken bites.

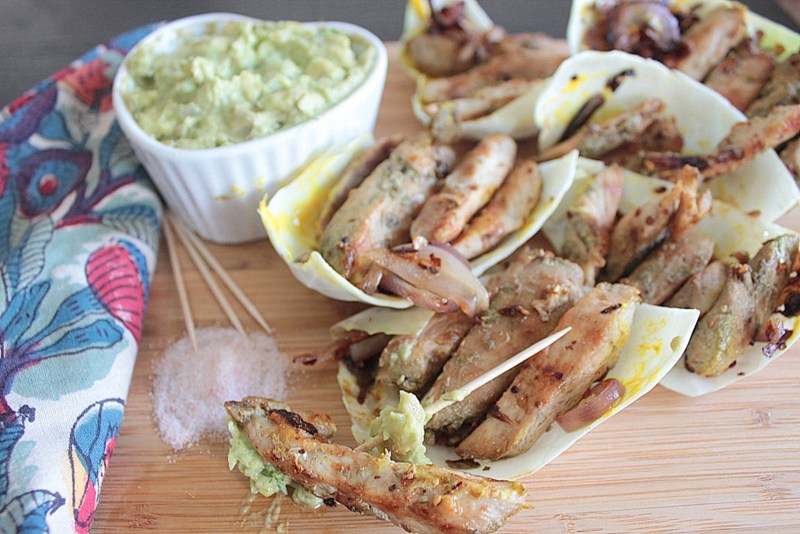
close up with all elements of display

Serve with garlic bread on the side and some chilled drinks and soak up all the sun you can before the leaves turn auburn.

chicken on a toothpick with dip close up


This was my first post for the Great British Chefs community and can be found here

Filed Under: Food, Meat, Recipe Index Tagged With: avocado, bbq, cabbage, chilled beer, chilli flakes, community, cook, cooling dip, delicious, eat, Great British Chefs, grid pan, mustard, original recipe, spicy chicken, summer, tasty, toothpick, yummy

Pomfret Fish Curry

August 18, 2013 by manjirichitnis 12 Comments

Flavours of Konkan

When anyone asks me what I would like as my LAST meal,I always say I’d like some fried pomfret so naturally, when I go Indian grocery shopping I always check for this fish. Though I must admit, nothing beats the flavours one gets from fresh fish. But well, just have to make do with frozen fish as the one I love is a Pomfret local to waters of the Indian Ocean.

This is a relatively simple recipe and does not require much effort but the marination is key as it can really give depth of flavour which is what we need.

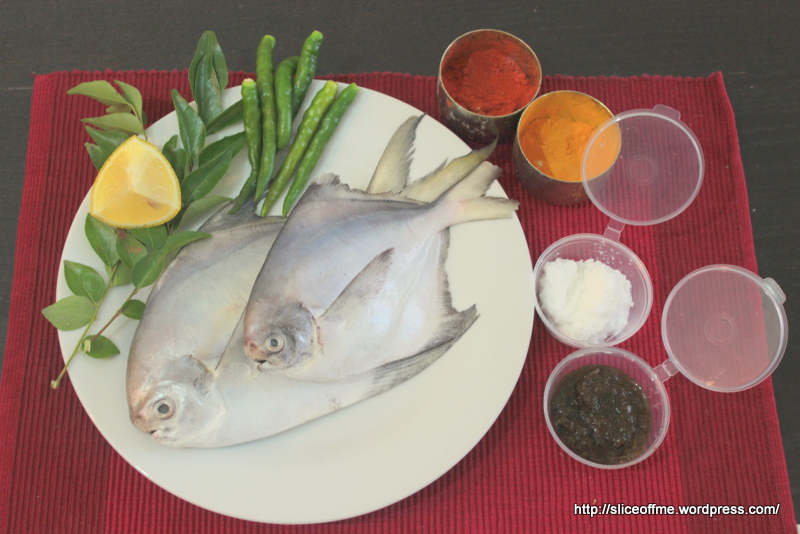
I had 3 of these beauties to cook and couldn’t resist getting them to pose for my camera all dressed with the dangerously delicious spices that I rubbed into the fillets.

Pomfret with all the spices that are used in the curry.

Okay, it’s relatively easy making fillets after this fish has thawed thoroughly as it has very few bones, I like to remove the bit in the front with the eyes and the tail and also remove the fins then make fillets the size fit for a curry or fry.

Pompfret Fish Curry

5 from 1 vote
Heirloom recipe, a traditional CKP style fish curry
Print Recipe
Servings: 4
Course: Main Course
Cuisine: Indian
Ingredients Method

Ingredients
  

  • 3 medium-sized Silver Pomfret
  • 2 tbsp Coriander and green chillipaste
  • 1 tsp Ginger-Garlic paste
  • 1.5 tsp Red Chilli powder
  • 1 tsp Turmeric
  • 3 – 4 Cloves Garlic withskin on
  • 2 tbsp Grated coconut
  • 1 small pinch Asafoetida/Hing
  • 2 tbsp Refined oil
  • 1/4 Lime – juiced
  • Salt to taste

Method
 

  1. Wash thoroughly and marinate with redchilli powder, turmeric,salt ,ginger- garlic paste,coriander-green chilli paste and set aside for at least 40 minutes.
  2. After the marination is done,heat oilin a saucepan,add asafoetida just a tiny spritz and throw in the crushedgarlic cloves with their skins on. As soon as they start to brown add the marinatedfish n toss it around for about half a minute.
  3. Add enough water to cover the fishand cook on a low flame.
  4. As the water begins to boil add inthe finely grated fresh coconut and stir in well till the curry is nice andthick.
  5. Simmer till the fish is cooked andsqueeze the lime into it.
  6. Serve with steaming hot riceand allow yourself to enjoy this simple yet classic fish curry, an everydayfare in the houses along the coast of Konkan and a great treat in ours.

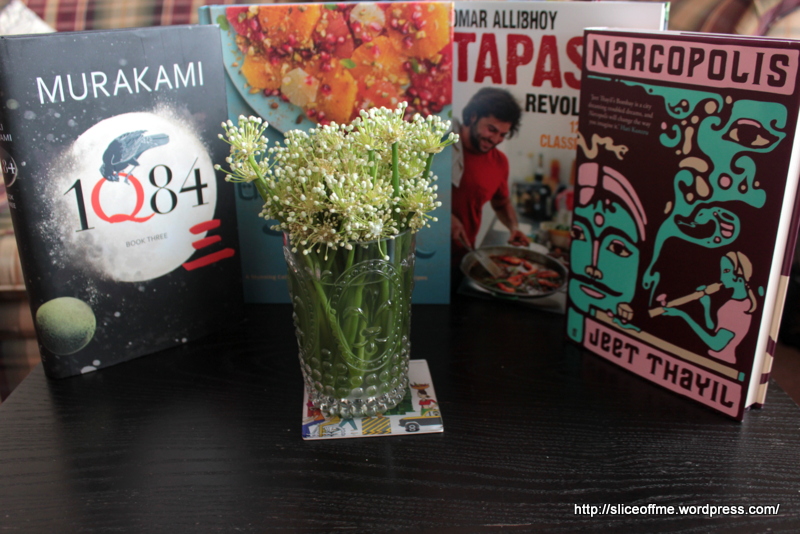
These beautiful flowers are on stalks of fresh spring onion!! Unexpected, I know right?!! My ma (in-law) very patiently chopped these stalks and created this cute little spring onion floral display and the whole idea of this photograph with books we are currently reading is hers.

Spring Onion Bouquet

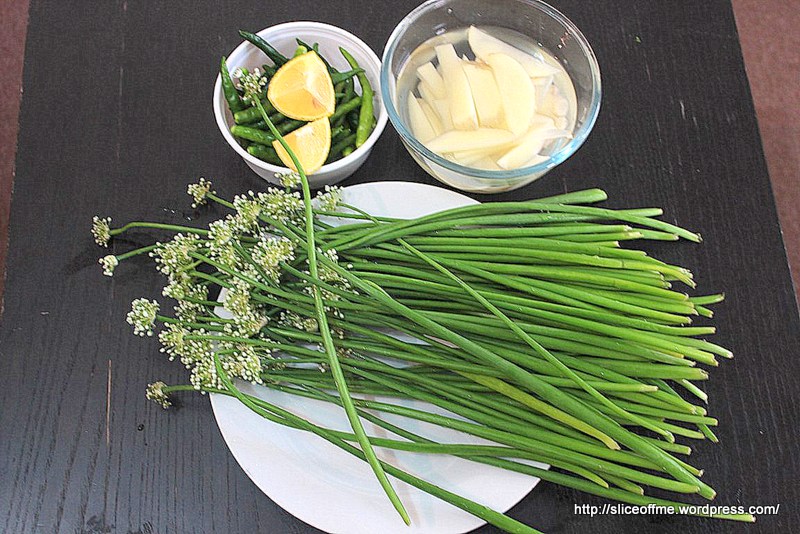
Bengali Bhaja with spring onions and potatoes

I was so excited to see them and had to buy myself two bunches and look for a Bengali Bhaja or bhaji (Marathi) sabji/sabzee (Hindi). Found a lovely food blog called ‘Hamaree Rasoi’.

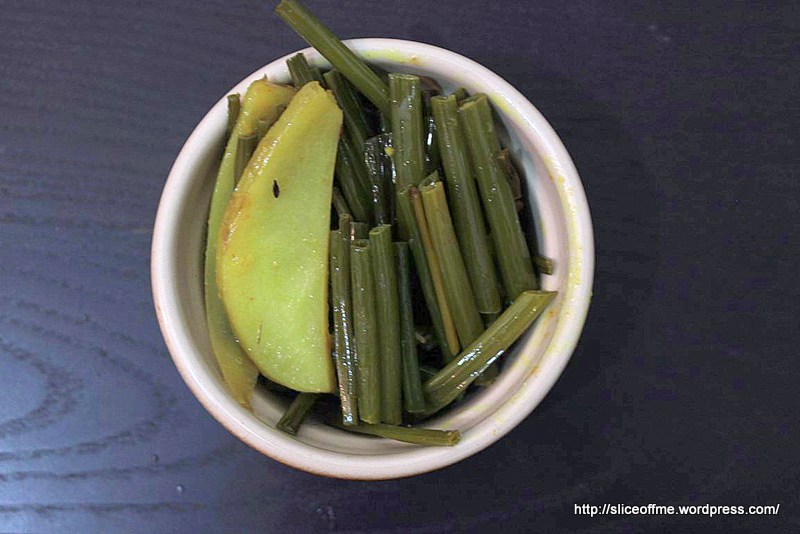
Peyajkoli Batata bhaja
Spring Onion and Potato Bhaji

Needless to say, the meal was supremely satisfying and we all slept with gentle snoring now and then …TMI- oh yes, totally 😉

Pomfret curry with steamed rice and pejaykoli bhaja

LEARN HOW TO MAKE INDIAN FOOD FROM SCRATCH WITH MY EASY TO FOLLOW RECIPES

  • Fresh dill and yellow moong daal recipe
  • Goda sheera/ sooji ka halwa/ Indian dessert
  • CKP Surmai curry
  • Pompfret fry
  • Konbichi khichadi – Prawn khichadi
  • Vaangayche Bharit/ Smoked stuffed Aubergine ( Eggplant/Brinjal) in a thick gravy/ Baingan ka bharta
  • Valache Birdhe – (वालाचे बिरडे) – MADE IN A TYPICAL C.K.P WAY
  • Kairi Panhe/ Aam ka panha – Raw mango summer drink
  • Cauliflower- vatana bhaji – cauliflower and green peas vegetarian side dish
  • Podhnichi khichadi
  • Akkha masoor aamti CKP style / Whole red lentils with skin curry recipe
  • Achari Mutton curry
  • Spicy Chicken curry
  • Egg curry
  • Upma
  • Punjabi Kadhi
  • Gujrati Kadhi
  • Shahi Khichadi
  • Sweetcorn and paneer bhaji/sabzi (vegetable side dish)
  • Tomato and coconut chutney
  • Steamed Idli batter
  • Ragi (Finger Millet) and blueberry pancakes
  • Masala egg omlette
  • Chicken tikka masala
  • Tikka masala curry paste
  • Tawa chicken Frankie roll
  • Chai concentrate
  • Grated carrot salad
  • Strawberry flavoured shrikhand

Filed Under: C.K.P recipes, Curry - Meat, Seafood, Food, Indian, Recipe Index, seafood Tagged With: basmati, batayachi bhajee, batayachi bhaji, C.K.P, C.K.P kitchen recipes, corainder, garlic, ginger garlic paste, grated fresh coconut, green chillies, ilovesabji, kalvan bhaat, Marathi, pejaykoli aloo bhaja, peyajkoli bhaja, potatoes, Proud to be C.K.P, red chilli powder, sabji, sabzee, salt, sarangachye kalvan, spring onion with flowers, steamed rice, turmeric, white pomfret

Grated Carrot salad

August 6, 2013 by manjirichitnis 4 Comments

This simple salad is a favourite at my mum’s .You can impress your guests with this simple and quick recipe that would look like you have really slaved to get it right. Nothing better I say 😉

Serves: 2

Prep Time: 15 minutes including the grating

You will need:

  • 3 fresh medium-sized organic carrots
  • 1 tsp small size black mustard seeds
  • Salt to taste
  • ½ teaspoon oil
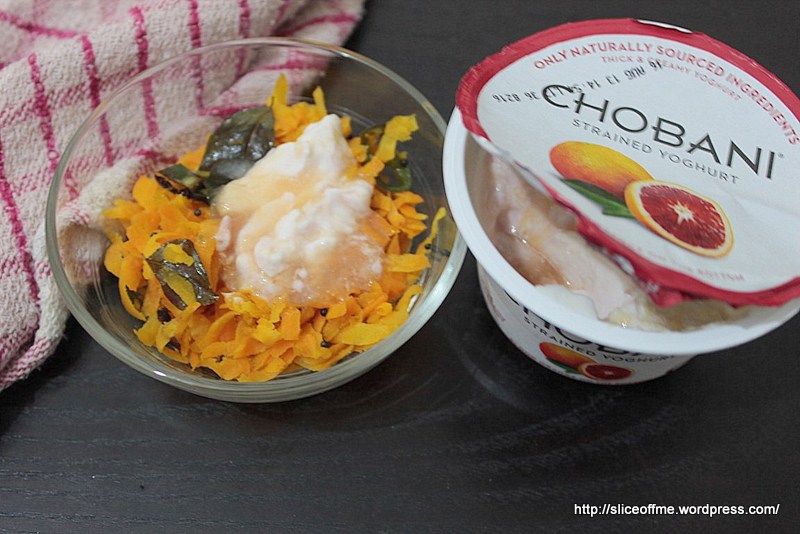
  • 1 Large heaped tbsp Chobani Blood Orange yogurt

Method:

  • Peel and grate the carrots after beheading them – Ha! I wanted to write that just to reinforce the morbid tone here that the word ‘’Blood Orange’’ .Wonder why such a delicious fruit has such a murderous sounding name 😉
  • Heat 1 tsp oil in a saucepan and pop in the mustard seeds and the finely chopped green chilli
  • When the mustard seeds begin to explode like miniature heat bombs, add the grated carrot and stir lightly.
  • Add salt to taste and take off the heat. We don’t want to overcook the carrot here and need to ensure it stays nice and crunchy!
  • Serve in small portions with a large blob of the yogurt on top ensuring you use a spoon that goes to the BOTTOM of the pot of yogurt as the fruity bit and heavenly fruity yogurt likes at the BOTTOM of these pots, like a secret hidden treasure, ummm!

I hope you enjoy making these FAT free yogurt recipes and feel good about lowering the overall calorie count of these dishes.

Grated Carrot Salad with Chobani Blood Orange Yogurt

Filed Under: Food, Indian, Product Reviews, Recipe Index, Sides Tagged With: carrots, cumin seeds, easy salad recipe, eat healthy, Grated Carrot salad recipe, Grated Carrot salad with Chobani Blood Orange Yogurt recipe, healthy low cal salad, Indian cuisine, Indian Food, indian food blog, oil, salt, totally fat free, zero % fat

Pomegranate Chicken Curry

August 5, 2013 by manjirichitnis 4 Comments

For my next recipe using Chobani Yogurt, I made a spicy chicken curry  main dish, the curry can be made less spicy as per taste by reducing the quantity of red chilli powder and garam masala used.

I have used Chobani Pomegranate Yogurt as it lends a subtle but noticeable tangy twist on the palate.

Serves: 2

Prep Time: 35 minutes including the chopping and slaving bit

You will need:

  • 4 chicken breast fillets chopped into chunks which are curry pieces, yet not totally bite sized.
  • 2 large tablespoons Chobani Pomegranate yogurt
  • 1 large green chilli chopped into big pieces
  • 1 large red spicy red chilli chopped into big pieces
  • Salt to Taste
  • 1 tsp Turmeric powder
  • 2  heaped tsp red chilli powder
  • 1 tsp Garam Masala
  • A pinch of Pepper powder
  • 2 tbsp tamarind paste
  • 3 small red onions finely chopped
  • 1 heaped tsp fresh ginger garlic paste

Method:

  • Heat a sauce on a medium flame and add 2 large tablespoons of sunflower oil
  • Sautee the chopped onions and the ginger garlic paste till the onion changes colour
  • Then add the chicken pieces and reduce the flame , when the chicken changes colour reduce the flame to the bare minimum and stir in the Pomegranate favoured Chobani yogurt. Do this before the chicken begins to cook to run juices as at that stage the yogurt will not be able to lend it flavours to the cooked meat.
  • Then add in this order the red chilli powder, the chopped red and green chillies, the garam masala and the pepper powder, mix well and stir ,then add enough water for the chicken to cook and to allow for some thick gravy . Add just enough or else much will dilute the whole curry and make it will become one big mess- just in case it does, take a deep breath and add 2 small completely boiled or 1 medium-sized potato mashed well into the curry ,it will soak up the excess water but then one needs to adjust the salt and red chilli proportion as well.
  • Now add the salt and mix well. Adding salt before the rest of the ingredients somehow alters taste to a large extent. Cook the chicken on a low flame with lid on checking occasionally and stirring as well. Yes one needs to fawn over the pot like one would over a pesky but adorable toddler. Humm, well now this should cook fairly quickly, check by jabbing a piece of chicken with a blunt knife.
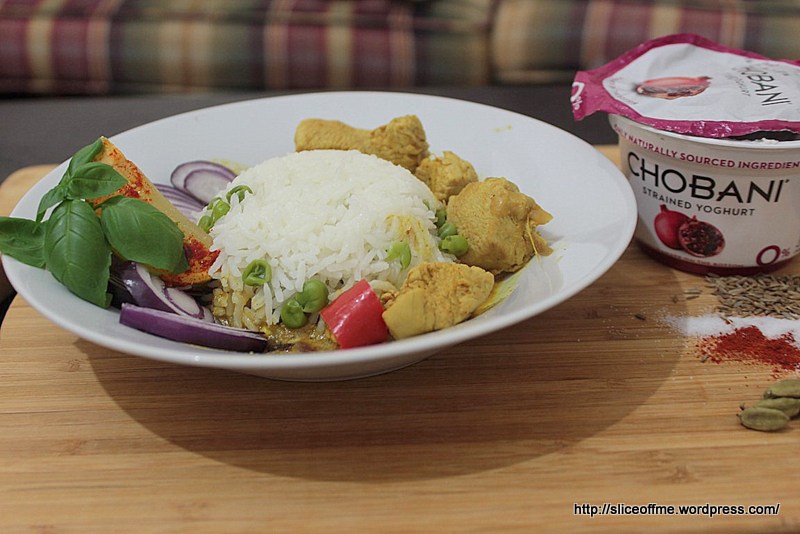
  • I choose to serve this Pomegranate Chicken with boiled basmati rice cooked with garden fresh green peas.
  • Serve with some red onion by the side and freshly chopped coriander (cilantro) for that fresh and tasty garnish.
  • Serving suggestion – serve with boiled basmati peas pilaf/pulav/poolav lightly flavoured with cinnamon and bay leaves – again made with just a tiny drop of oil to sautee the bay leaf and cumin seeds.So good ummm

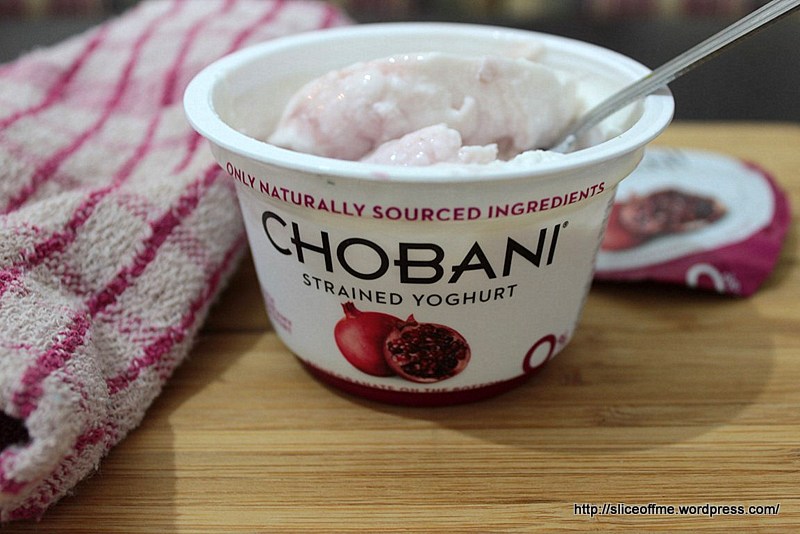
Chobani Pomegranate


Pomegranate Chicken - Chobani

*Thanks to Chobani for sending me some flavoured yoghurt samples to review. As usual, all opinions are my own. No monetary compensation was provided for this post and I was not expected to write a positive review.

Filed Under: Food, Meat, Product Reviews, Recipe Index Tagged With: basmatic rice, bayleaves, chicken breasts, chicken curry recipe, chobani pomegranate flavoured chocken, Chobani Uk, cinnamon, cook to impress, coriander, cumin, easy indian chicken curry recipe, finely chopped, ginger garlic paste, green chillies, green peas, Indian cuisine, indian food blog, lemon, lime, main dish recipe, marinate, pilaf, poolav, Pulav, red chilli powder, red chillies, red onion, salt, spicy indian curry rceipe, tadka, tumeric

Strawberry flavoured Shrikhand

August 5, 2013 by manjirichitnis Leave a Comment

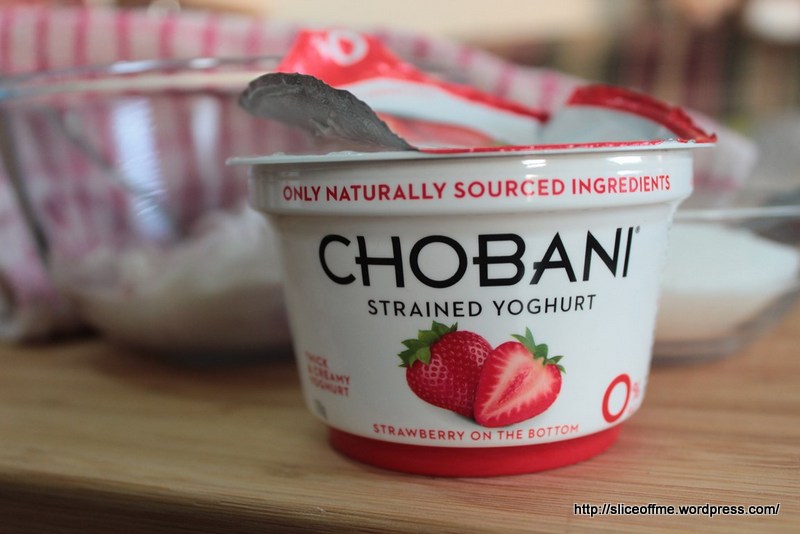
It was love at first bite for me with Chobani yogurts! Difficult to imagine that such deliciously thick and creamy yogurt can be TOTALLY FAT FREE, yes you heard that right – 0% fat!

Well then after gobbling several pots over the 3 days of Food Blogger Connect I had major withdrawal symptoms and needed a ‘’pot’’ of Chobani asap. When I wrote to them asking if I would like to experiment with some Indian Recipes with Chobani thick strained yogurt, they sent me a whole box! Golly!

So here I am with so many pots of deliciousness it took me a few days to gather my senses and get cooking 😉

I know a dessert recipe is like ‘’leave the best for the last’’ sort of a thing but darlings this one is such a traditional yet simple one that my fingers won’t let me type any of the others so here it is :

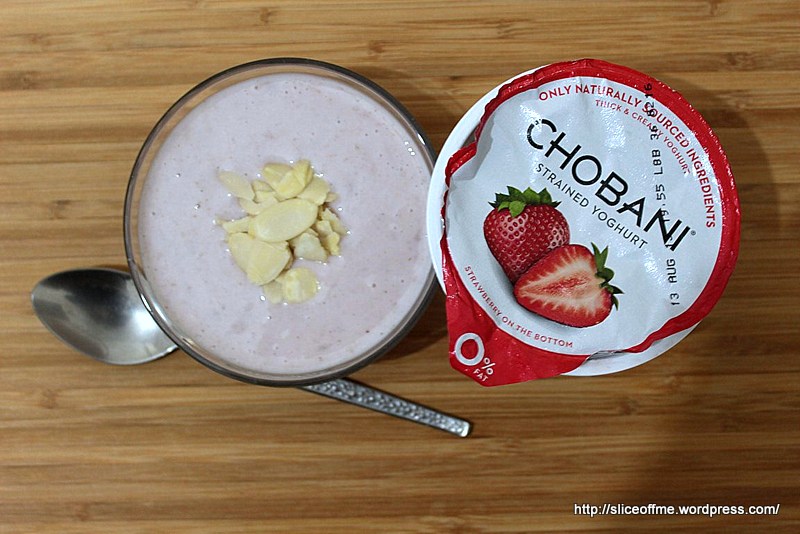
Strawberry Shrikhand

Ok So Shrikhand has cult status amongst us Maharashtrian so much so that it is a must-have in our wedding menus back home. Oh yes Shrikhand and Puri is a like a treat fit for a king…err and a queen – of course 😉

So the whole trick lies in making the best possible perfectly strained thick set yogurt, tied in muslin and left in a refrigerator overnight to get what is also known as ‘Chakka’. It is NOT easy. But with Chobani since it ALREADY is so THICK and Strained it is the best yogurt to just spoon out of a pot and start making this dessert with.

Serves: 4

 Prep Time: 5 minutes

 Chill Time: 1 hour for the mixture and then to be kept chilled before serving

You will Need:

  • 1 whole pot of Chobani Strawberry yogurt 170gm, do not take all the juicy bit if you like Shrikhand very thick (but truly great Shrikhand is creamy and not too thick , it has got to be – well – perfect like Chobani!)
  • 150gm sugar
  • 1 heaped tsp cardamom powder
  • A tiny pinch of saffron
  • Toasted blanched almonds to garnish

Method:

  • Gently fold in sugar into the yogurt in a glass bowl, taking care not to ‘’beat’’ the mix
  • Leave to chill in the refrigerator for an hour, this way the sugar completely dissolves into the yogurt and does not affect the consistency of the mixture.
  • To this mixture now add the cardamom powder and saffron.
  • The shrikhand will now have a thick consistency and fall off a spoon in thick folds.
  • Serve chilled in a generous dollop of a portion with toasted almonds to garnish.

The traditional process involves passing the sugar and yogurt mix through a sieve to ensure any big bits of cream are removed to allow a smooth as silk feeling on the tongue. But again since Chobani has done all this for you there is no need, with the 3 biggest steps eliminated making this dish is a doddle!

(The 3 big steps we have eliminated are: making the set yogurt, straining it using a muslin cloth to remove all the water and the part where the sugar and yogurt chilled mix is strained)

Chobani Strawberry Close up shot

Traditionally either plain Shrikhand which is a pale yellow colour due to saffron food colour being added or then Mango flavoured Shrikhand which contains mango pulp and bits of mango is served. But of course there’s nothing to beat the taste of homemade creamy Shrikhand.

Strawberry Shrikhand final shot

Filed Under: Food, Indian, Product Reviews, Recipe Index, Sides Tagged With: 0% fat, amrakhand recipe, C.K.P recipes, chakka, chill, Chobani, Chobani Strawberry flavour yogurt dessert recipe, curd, dessert recipe, easy India dessert recipe, easy shrikhand recipe, healthy desserts, hung curd, Indian Fro Yo recipe, Maharastrain wedding menu, Marathi, no cooking required, overnight, quick easy recipes, refrigerate, shedki recipe, shrikhand recipe, strained yogurt, sugar, toasted almonds, totally fat free, yogurt

Smoky spicy Lamb with Wild Rice and gravy

July 23, 2013 by manjirichitnis 7 Comments

What better way to celebrate the news of #Royalbaby than with a grand dinner at home? Aptly for a royal announcement, I got some ”Duchy Originals” Welsh Organic Lamb Loin Chops. I had some long grain wild rice with me and had been meaning to use it for a while now.

I must admit I did cheat on the gravy though but intend to make my own gravy and store it in the fridge to be used in batches soon. But that is a discussion for later.

So this Gran Luchito smoked chilli paste came as part of the Goody Bag at FBC5 and I couldn’t wait to use it as their Smoked Chilli Honey is absolutely to die for! One taste at the Street Party at FBC5 and I was hooked. So here’s a simple easy peasy recipe that needs only less than 10 minutes to put together and about 35 minutes in the oven for the lamb.

Ingredients:

  • 4 lamb loin chops
  • salt to taste
  • 2 tbsp smoked chilli paste Gran Luchito
  • 1 measure (160 ml is the capacity of my rice measure which came with the rice cooker) long grain wild rice or enough for 2 people.
  • Oil for greasing the pan
  • 2-3 sprigs of fresh thyme

Method:

  • Wash the lamb loin chops under running cold tap water and season with salt rubbing it well on the meat, generously apply the Gran Luchito smoked chilli paste to the lamb.
  • Preheat the oven and while it’s heating up grease a baking tray with some oil.
  • Place the marinated lamb chops on a baking tray and roast in the oven for about 30 minutes, since it’s only 4 chops and soft fresh lamb meat cooks very quickly give one check after 20 minutes. If you plan to add any small new baby potatoes with skin, parboil them first and slice in half and then throw them around the meat tray.
  • While the meat cooks, wash the wild rice and add 2 measures of water to 1 measure of rice. Salt to taste cover and cook till done.
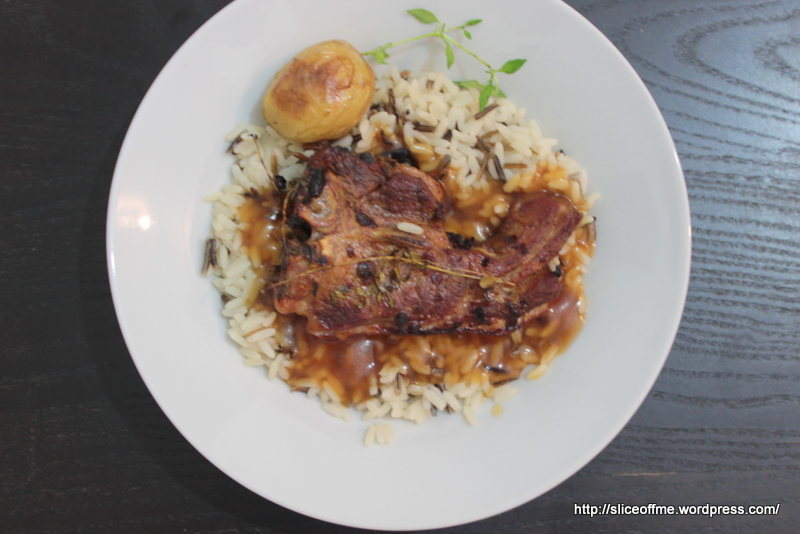
  • Serve the succulent lamb chop on a bed of steaming hot wild rice, and surround the meat with a generous serving of gravy
  • If you also do the roast potatoes it just adds that much more crunch.

If you have time go the whole hog  and add chopped carrots and red onions to the meat. Chop the carrots lengthwise and the onions too.2 carrots and one large red onion should be enough to bulk this meal for 2.

Gran Luchito chilli paste is a hit with the hubby now, so those Oaxacan smoked chillies they use certainly give a deep smokey and rich taste to the meat.

Lamb Chops being marinated in Gran Luchito smoked chilli paste and thyme
Wild Rice,Roast Lamb and roast potatoes with gravy

Filed Under: Food, Meat, Recipe Index Tagged With: easy dinner recipe, FBC5, Gran Luchito smoked chilli paste, lamb loin chops, marinate, mexican chillies, Oaxacan smoked chillies, organic meat, quick dinner, ready in under 30 minutes, Smoked Chilli Honey, wild rice

Peach Melba with Vanilla Ice Cream

July 20, 2013 by manjirichitnis Leave a Comment

This recipe of Peach Melba is a favourite with my mum in law.On one of the days when I wasn’t feeling too bright she decided to set the mood right with one of her sweet fixes.She disappeared into the kitchen and 20 minutes later appeared with a tray with this gorgeous dessert topped with vanilla ice cream begging to be devoured!

A bit of history about how this dessert came into being should be shared here I guess as it makes me appreciate the recipe so much more.This is a brainchild of French Chef Auguste Escoffier who created this in honour of Australian Soprano Dame Nellie Melba, known as the ”first Australian Diva” to quote from the website of a museum dedicated to her. When she was performing in London, The Duke of Ore’lans hosted a dinner party to celebrate Dame Nellie Melba‘s triumph and  Chef Auguste Escoffier gave the world what we now know as the Peach Melba – peaches served on a bed of ice cream, he later created various versions of which the one topped with raspberry sauce is most popular now.

Serves:4 Prep Time :20 minutes + cooling for few hour in the refrigerator

Ingredients:

  • 4 fresh juicy peaches
  • Plain everyday white sugar
  • The best vanilla ice cream you can lay your hands on
  • Toasted blanched almonds to garnish

Method:

  • Heat water in a pan,when it has boiled,gently lower the washed peaches into it  and blanch them.When you remove them the skin should readily come off. Test for how ripe your fruits are before you blanch ,over ripe fruits will not take well to being dunked in hot water!
  • Remove the skin and remove the seed and halve, if you are unable to do that just get of as much of the fleshy bit from around the seed as you can.
  • In another saucepan add enough water to hold these peaches in a pool of sugary syrup approx 250ml .
  • Add 4 heaped tablespoons of sugar and stir continuously on a low flame til the sugar is totally dissolved and you have a proper sugar syrup,nice and thick and of course sweet!
  • Dunk the peaches into this syrup and on a very low flame let them soften , do not allow the sugar syrup to turn dark in colour and a maximum of 5-7 minutes should do the trick as the peaches will ”cook” quickly”
  • Thoroughly cool the fruit+syrup mix and decant into a bowl and place in the refrigerator.
  • Serve on a bed of your best vanilla ice cream and top off with the toasted almonds.
  • Smile when your guests praise you and regale them with the story of how this lovely dessert was created or how much you enjoyed reading this blog and creating the dessert, ok all right all right, won’t show off 😉

This dessert was something I had drafted quite some time back and thankfully as I made this yum dessert to finish off my Caribbean themed summer party menu, it will now finally appear on my blog!That’s why you must make the most of the summer days and have as many parties and barbecues and picnics as you can!Wooohooo!

Peach Melba with Vanilla Ice Cream

Filed Under: Desserts, Food, Recipe Index Tagged With: dessert recipe, easy, fruit dessert, fruity, gorgeous, Peach Melba, peaches, ready in under 20 minutes, ripe, summer dessert recipe, toasted blanched almonds

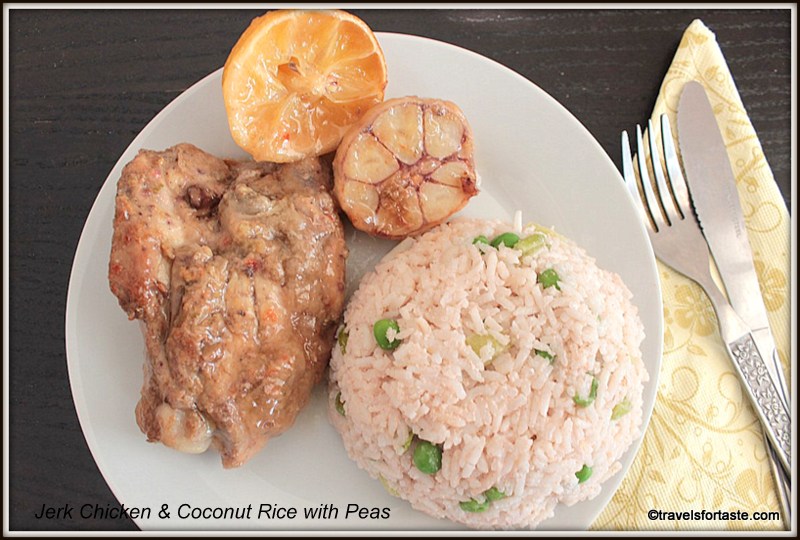
Jerk Chicken and Coconut Rice

July 20, 2013 by manjirichitnis Leave a Comment

The first time I ate Jerk Chicken, was at a pop up Caribbean food stall near Haymarket Station, it was served with some tasty rice with red kidney beans and the most deliciously sweet plantain. Ever since I have been waiting to experiment and make this spicy chicken at home. Please resist the temptation of using a jerk sauce out of a bottle, it’s almost a crime because in the recipe I used from the BBC Good Food guide, it makes preparing the marinade a thing of joy. Not only will you learn how each ingredient lends its individual flavour but you can learn how to adjust the ”heat” in this amazing marinade. An advance warning, if you have sensitive skin PLEASE use gloves to marinate the chicken as Scotch Bonnet peppers are PACKED with heat. Ensure you THOROUGHLY wash your hands after you handle these ”hot babies” too! Humm now for the recipe, it’s essentially what was in the original but of course, I have added my own touches and I think they make quite an impact 🙂 So read on folks.

Manjiri Chitnis

Jerk Chicken

Caribbean Jerk chicken is an all-time favourite and tastes even better with a home-mademarinade
Print Recipe
Prep Time 20 minutes mins
Cook Time 45 minutes mins
Total Time 1 hour hr 5 minutes mins
Servings: 4 people
Course: Main Course
Cuisine: Caribbean
Ingredients Method

Ingredients
  

For Jerk Chicken:
  • 12 chicken thighs with bone
  • 1 garlic sliced through the middle to go in the oven
  • 2 lemons halved to go in the baking tray
  • 1 pair of clean gloves if you have sensitive skin – to marinate the chicken
For the Jerk marinade:
  • 4 Garlic Cloves de-skinned
  • 1 small red onion
  • 1 bunch fresh spring onion roughly chopped
  • 1 portion ginger size that fits inside your closed fist washed, skinned and roughly chopped
  • 1 tbsp thyme – I had none so I used 1 tbsp of Mixed Italian herb powder
  • 3 scotch bonnet chillies de-seeded if you cannot handle very spicy
  • 2 tbsp soy sauce
  • 2 tbsp oil – I used sunflower
  • 4 heaped tbsp brown sugar – I used dark muscovado sugar
  • 1 tbsp ground allspice powder
  • 1 lime Juiced

Method
 

  1. Blitz all the ingredients for the marinade in the mixer/food processor/blender and make a thick paste, do not add water as far as possible to ensure a thick puree like grainy paste
  2. Wash and deskin the chicken thighs and make cuts using a knife
  3. Then generously apply the marinade paste all over rubbing into the cuts made to ensure the flavour really seeps into the chicken
  4. Marinate overnight in the fridge. Cover vessel with cling film
  5. Keep about 2 tbsp marinade aside for adding in the baking tray
  6. When you are ready to prepare the chicken pre-heat the oven to 180 – 200 degree Celsius, I have a fan oven
  7. Prepare the baking tray by greasing with some oil, place the marinated chicken pieces and surround them with the lime slices and place the garlic halved
  8. Cook in the oven for about 45 minutes or until juices run clear
  9. When the chicken is in the oven start with the rice

Coconut Rice with Peas

Print Recipe
Prep Time 5 minutes mins
Cook Time 10 minutes mins
Total Time 15 minutes mins
Servings: 4 people
Ingredients Method

Ingredients
  

  • 200 g Basmati Rice
  • 400 g Coconut Milk can
  • 1 bunch fresh spring onion finely chopped
  • 2 large sprigs of fresh thyme
  • 2 large cloves of garlic skinned and chopped very fine
  • 1 tbsp ground allspice
  • 200 g green peas

Method
 

  1. Wash the Basmati rice under cold running tap water
  2. In a heavy-bottomed vessel, add the washed rice and coconut milk, chopped spring onions, thyme, garlic chopped and allspice
  3. Add 300 ml water, mix and add salt to season
  4. Cook with lid on a medium flame till water begins to boil
  5. Stir with a wooden spatula and then add the green peas
  6. Reduce flame and do not cover completely, leave a bit of space for the steam to pass
  7. Cook until done

Although the recipe I followed, uses red kidney beans since I was already using them in my Caribbean Sweet Mini Pepper Salad, I choose green peas for my Coconut Rice. I made my own homemade replacement for allspice powder too, it’s very easy and I intend to make it fresh each time I need instead of the store-bought one, simply because it is so quick and easy to prepare! Actually allspice is a spice by itself but it tastes similar to a mixture of cinnamon, cloves, nutmeg, and pepper.

Also Known as: Jamaican Pepper or New spice

Home made all-Spice Powder recipe

Manjiri Chitnis

Home made all-spice seasoning

Try myeasy to prepare and store home-made all-spice seasoning
Print Recipe
Prep Time 2 minutes mins
Cook Time 5 minutes mins
Total Time 7 minutes mins
Servings: 1 portions
Ingredients Method

Ingredients
  

  • 1 tbsp Cinnamon powder or cinnamon stick – thumb-sized
  • 1 small tbsp pepper powder
  • 1 heaped tbsp of cloves
  • 1 full nutmeg grated

Method
 

  1. In a pestle and mortar mix the ingredients and grate the nutmeg into it
  2. Then smash together to makes a grainy powder
  3. Some bits of the clove you may not be able to grind fine, I wouldn’t worry about it unless you want a fine powder then the smallest attachment on your mixer. I have an Indian mixer which I use for my coconut chutneys and it has 3 jars I used the one with 3 blades. Or else just use the pestle and mortar it should work.
  4. Store away the remaining homemade allspice replacement powder in a tiny airtight container

A note about the brown sugar vs. dark muscovado sugar

Dark Muscovado sugar is the unrefined form of brown sugar ,its stickier ,heavier,has a longer shelf life than refined sugars and adds a more intense flavour to marinades and since it is stable at high temperatures is great for baking.If you do not have brown sugar its ok to replace it with dark Muscovado sugar. Although as the water content dark muscovado holds is higher one should accordingly taper the use of water in the recipe.

Brown sugar is white sugar and molasses and hence the colour and soft texture. It has the light and dark brown sugar varieties and the lighter it is the milder the flavour.

Muscovado,White & Light Brown Sugar

Filed Under: Food, Meat, Recipe Index Tagged With: allspice powder, bake, basmati rice, BBC Good Food Guide, can, caribbean, caribbean jerk chicken recipe, caribbean recipes, chicken thighs, cinnamon, coconut milk, coconut rice recipe, cook, cooking, delicious, easy home-made all-spice seasoning recipe, easy home-made caribbean jerck seasoning recipe, easy meals, eat, fiery, finely chopped, food, food blogger, foodblogger, garlic, green peas, homestyle jerk chicken recipe, hot, ingredient list, italian herbs, jerk chicken recipe, lemon, lime, marinate, muscovado sugar, nutmeg, oven, pepper, quick and easy recipes, red onion, roast, roughly chopped, scotch bonnet chillies, scotch bonnet peppers, simple jerk chicken recipe, sliceoffme, spicy, spicy lunch recipes, sprig f thyme, spring onion, summer party menu, sunflower oil, tarvelsfortaste blog, tasty, temper, tin, wikipedia, yum, yummy

  • « Previous Page
  • 1
  • …
  • 6
  • 7
  • 8
  • 9
  • 10
  • 11
  • Next Page »

Food,travel and lifestyle writer. Photographer.

  • Email
  • Facebook
  • Instagram
  • Pinterest
  • Twitter
  • YouTube

Categories

  • Baking
  • Breads
  • C.K.P recipes
  • Cakes
  • Chutneys
  • Cocktails
  • Curry – Meat, Seafood
  • Curry – Vegetarian
  • Desserts
  • Events
  • Featured Food and Drink
  • Featured Lifestyle
  • Featured Travel Adventures
  • Food
  • Healthy
  • Home
  • India
  • Indian
  • Kitchen
  • Lifestyle
  • London and rest of U.K
  • Meat
  • Miscellaneous
  • Product Reviews
  • Quick and Easy
  • Recipe Index
  • Rest of the World
  • Restaurant Reviews
  • Salads
  • seafood
  • Sides
  • Smoothies
  • Soups
  • Travel
  • Uncategorized
  • Vegan
  • Vegetarian

Featured Blogger on Great British Chefs

GBC_blogger-badge_150x300px    

Need a New Power Blender?

13076814_10154185434898293_7387808474266473605_n

Travelsfortaste is Featured on Expats Blog

England expat blogs
Privacy & Cookies: This site uses cookies. By continuing to use this website, you agree to their use.

To find out more, including how to control cookies, see here: Cookie Policy
Squaremeal.co.uk - Restaurant Reviews

About me

Writer and Photographer. Food,Travel & Lifestyle, Blogger and Digital Marketer. Read More…

  • Email
  • Facebook
  • Instagram
  • Twitter
  • YouTube

Recent Posts

  • Diamond Jubilee Tea Salon, Fortnum & Mason – Afternoon Tea Review
  • Brown’s Brasserie and Bar celebrates 50th Anniversary with Covent Garden Grand re-opening
  • Hampton Court Palace Food Festival – Review
  • Brigit’s Bakery Afternoon Tea, Covent Garden, London – Review
  • Maplin Photo Walk around Central London

Copyright © 2025 · Foodie Pro Theme by Shay Bocks · Built on the Genesis Framework · Powered by WordPress

This website uses cookies to improve your experience. We'll assume you're ok with this, but you can opt-out if you wish.Accept Read More
Privacy & Cookies Policy

Privacy Overview

This website uses cookies to improve your experience while you navigate through the website. Out of these, the cookies that are categorized as necessary are stored on your browser as they are essential for the working of basic functionalities of the website. We also use third-party cookies that help us analyze and understand how you use this website. These cookies will be stored in your browser only with your consent. You also have the option to opt-out of these cookies. But opting out of some of these cookies may affect your browsing experience.
Necessary
Always Enabled
Necessary cookies are absolutely essential for the website to function properly. This category only includes cookies that ensures basic functionalities and security features of the website. These cookies do not store any personal information.
Non-necessary
Any cookies that may not be particularly necessary for the website to function and is used specifically to collect user personal data via analytics, ads, other embedded contents are termed as non-necessary cookies. It is mandatory to procure user consent prior to running these cookies on your website.
SAVE & ACCEPT