Travels for Taste

Tales of travel and food with a touch of spice

  • Home
  • About
    • In the Press, Published Work and Interviews
    • PR and Disclosure Policy
  • Food
    • Recipe Index
      • Indian
        • C.K.P recipes
        • Curry – Meat, Seafood
        • Curry – Vegetarian
        • Sides
        • Chutneys
      • Healthy
        • Soups
        • Salads
      • Quick and Easy
      • Baking
        • Desserts
      • Meat
      • Seafood
      • Vegetarian
        • Salads
      • Vegan
    • Product Reviews
    • Events
  • Travel
    • UK
    • India
    • Around the World
  • Lifestyle
    • Home
    • Kitchen
    • Restaurant Reviews
    • Miscellaneous
  • Giveaways
  • Work with me
    • Meet interesting foodie entrepreneurs here

Christmas Pudding

December 31, 2012 by manjirichitnis Leave a Comment

Last year we had a supermarket pudding , the intense flavours, the dry fruits steeped in alcohol the soft delicious feeling of putting a spoon through a perfectly set pudding on christmas night ummmm… I decided that the next time I MUST make one at home !After sifting through a few recipes I knew it had to be Nigella’s Ultimate Christmas pudding.

I have now promised myself that I shall plan months ahead and soak the sultanas much in advance but well this year I soaked the sultanas and a nut mix for 2 nights in sherry. The variations in ingredients recommended by Nigella are my use of a regular apple, supermarket sherry and a currant and dry fruit mix off a shelf. But the resultant mixture and the process of slow steaming gave me a deep rich colour, a lovely texture and 2 yes two puddings instead of one and that is what was the MOST satisfying part of this process! Landing up with 2 awesome well set perfect puddings , one to eat at home and one to share with a special close pal made christmas special 🙂

Oh yes and a big thank you to Lakeland for making such an awesome product, my pudding steamer with a lid that fits so well and is really easy to clean. The pudding just slipped out after a gentle tap and sigh…. I couldn’t stop admiring the perfect shape, the dark colour …I almost burst into song !

Well now for the list of Ingredients:

  1. 150 grams prunes – mine were soaked in syrup and came from a cam but they served the purpose just the same, I squeezed the syrup out before adding them to the sultanas.If yours are out of a packet they need to be snipped into smaller bits.
  2. 150 grams sultanas
  3. 150 grams currants or a currants and nut mix for puddings available in all leading supermarkets.
  4. 175 ml sherry of your choice
  5. 100 grams plain flour
  6. 125 grams white breadcrumbs
  7. 150 grams suet – I used beef suet, if you are considering a vegetarian option I haven’t used vegetable suet , if anyone has tried it please share your experience.
  8. 1/4 ground cloves
  9. 1 teaspoon ground cinnamon – I used a ready-made powder
  10. 3 medium eggs
  11. 150 grams dark muscovado sugar
  12. 1 teaspoon baking powder
  13. 1 lemon large zest and juice
  14. 1 cooking apple (ideally) peeled and grated , I used 2 small red apples.
  15. 2 tablespoons honey
  16. 125 ml Vodka

Method:

  • This mixture gives 2 full-sized puddings , I have a 1 litre pudding steamer with lid from Lakeland and I had enough to make two full-sized puddings.
  • I must say our pudding is still sitting on a plate as I type this on the last day of 2012 , it’s asking to be microwaved and gobbled with some Remy Martin laced cream lying in fridge left over from Christmas, we had it Champagne cream on Christmas day and I assure you we had a feast and some very sleepy house guests after that …yes made me chuckle with satisfaction too.
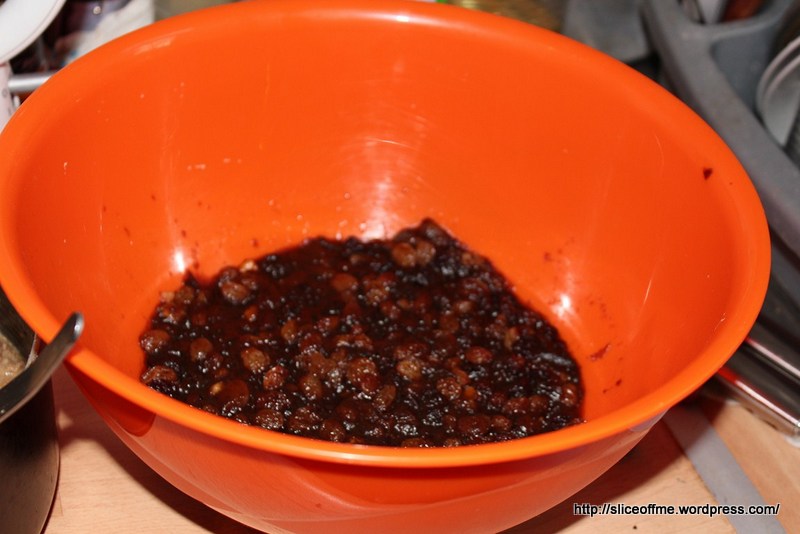
  • Mix the sultanas,prunes and currants into a large bowl and let them steep in sherry overnight or upto a week. I let them soak for 2 nights.
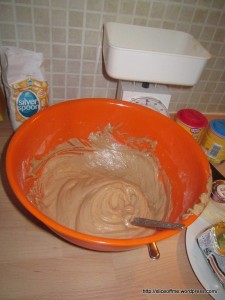
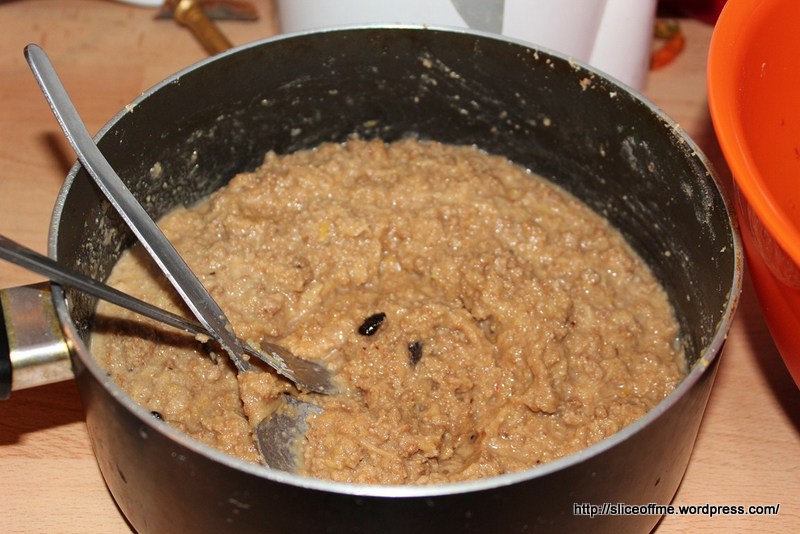
  • When you are to start making the pudding mix take another large bowl and add all the ingredients in any order and then stir in the soaked sultana mix, scooping all of it off from the bowl.
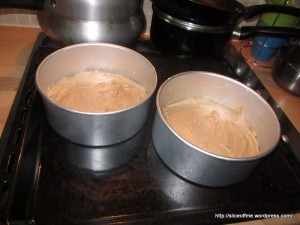
  • Fill a large saucepan with enough water such that your pudding basin is soaked in it and use butter to grease the pudding bin and the lid as well.
  • Add the mixture into the basin and steam for 5 hours, checking ever so often and add some water to the saucepan. I must add that my pudding basin lid fits real well and after 5 hours were done it was quite easy to remove the basin from the saucepan and leave it aside to cool . No tying of strings , no foil and no danger of burning, besides like I mentioned cleaning is a breeze.
  • Keep aside your wonderful pudding which is done now, I peaked inside and it looked so good I had to really take a deep breath and stop myself from turning it onto a plate and start digging right it, but NO it’s meant for the Big Day!
  • Ok so now on D-day, steam the pud in its basin for 3 more hours, yes I trust Nigella’s recipes and hence the success for me a first time pudding maker 🙂
  • Well after it has had its steam and had cooled to an extent when you can open it and turn it on to a serving dish , it needs a gentle tap this basin and Viola! a rich dark well set pudding is there for you to admire and show off.
  • I did not add any charm before I started to steam it and I did not flambe’ it either but by all means use vodka and flambe’ to impress your guests !

Do leave your comments !

The sultana currant and prune mix in sherry Ground some CinnamonThe SuetThe mix is almost ready to go into the basinTa - Dah ! Here it is !Sigh, Pudding Perfection , I loveeed making this !Thanks Nigella!


Filed Under: Desserts, Food, Recipe Index Tagged With: apple, breadcrumbs, christmas, currants, easy food, flambe', follow me, food pictures, foodblog, grate, honey, Lakeland, Merry Christmas, Nigella Lawson, pudding basin, sherry, suet, sultanas, tasty, Ultimate Christmas Pudding, vodka, well set, yummy

Baked Salmon and a crunchy vegetable salad

December 21, 2012 by manjirichitnis 1 Comment

This is probably my simplest ,fastest and yet very tasty AND healthy meal option. All you need is 2 slices of salmon some salad leaves and a hotch potch collection of any thing that can yumm up a salad! Few Minutes in the oven and hey Presto ! a healthy meal is ready to tuck in.

What I love about the after feel of this kind of a lunch or dinner is that it leaves me full and satiated and not feeling bloaty or heavy or drowsy for that matter!

So my ingredient list goes like this , but honestly for the salad just use any combination of leafy stuff and spices that you have in your fridge and cupboard and slam them together to make your own accompaniment!

  1. 2 slices of salmon fresh
  2. 2 thick slices of lime to wedge into the fish and a large slice to splash over the salad.
  3. one spoon olive oil
  4. Mixed italian herbs to season the fish – better if you have fresh herbs
  5. crushed black pepper and rock salt to sprinkle
  6. some capers for seasoning
  7. Salad leaves of your liking I use the mix leaves packets from the supermarket – rocket,spinach,lettuce mixed with some peppers and red onion sliced  for some colour, crunch and taste.
  8. Cherry Tomatoes
  9. A cheese slice – anything that you fancy
  10. Some onion flakes to dust over the salad

This meal takes lesser time to cook than it took me to write this blog post 🙂

Method:

  1. place the salom piece on a foil, lightly drizzle olive oil , wedge a slice of lime in between and sprinkle sea salt and crcaked black pepper and a generous sprinkle of italian herbs, mine came out of a bottle.
  2. Give the Salmon just enough time in the oven to cook, fish cooks fairly fast and these 2 slices took less that 7 minutes in a pre heated oven.
  3. Once done serve the salmon alongside a generous helping of salad leaves and juicy cherry tomatoes,toss a few capers , tear some cheese to season, give another drizzle of olive oil and a big squeeze  of lime ,finally add some crispy fried onion bits, finish off with sea salt.
  4. Dig in and feel full inside and light and skippity on a full stomach.

P.S: of the time you save when you choose this light, easy and quick dish , grab that novel you have been waiting to get done with enjoy a relaxed afternoon curled up on the sofa…I did…:)

The salmon is ready for the ovenThe salad is all done!Dig into crunchy wholesome goodness and juicy fish

Filed Under: Food, Quick and Easy, Recipe Index, seafood Tagged With: capers, cheese, cherry tomatoes, chop, cook, easy food, easy recipe, eat healthy, fast, fried onion, Healthy, italian herbs, lime, no cooking required, olive oil, oven, quick, quick recipe, salmon, save time, slice, squeeze, super food, wholesome

Vintage Frittata recipe inspired by ”Angel”

October 23, 2012 by manjirichitnis 2 Comments

Well as my previous blog post mentioned I am quite besotted with my latest cookbook – The Vintage Tea Party by Angel. She is such a talented lady and anyone with orange hair,a vivid imagination, a vast collection of Vintage odds and ends and a great cook to top is all is my kind of hero!

So I first ate a Frittata at my workplace where it was served during tea time,anything remotely associated with eggs and I simply must try it, I could live on fried eggs ,omelettes ,scrambled eggs and yes Frittatas!

I surfed up info about the origin of Frittata because that’s the beauty of food and recipes, they start from someplace and then suddenly are popular world cuisine and everyone’s making their own versions. Some food blogs have really well researched posts about the Frittata and I do recommend reading them:

http://www.delallo.com/articles/la-frittata-egg-dish-endless-possibilities

http://www.theoldfoodie.com/2008/12/i-have-change-and-treat-for-you-today.html

http://www.thefoodadvicecentre.co.uk/reference/recipes/frittata/

Wikipedia defines a Frittata as : The Italian word frittata derives from fritto, the past participle of “to fry” (friggere),[1] and was originally a general term for cooking eggs in a skillet, anywhere on the spectrum from fried egg, through conventional omelette, to an Italian version of the Spanish tortilla de patatas, made with fried potato. Outside Italy, frittata was seen as equivalent to “omelette” until at least the mid-1950s.

Well,Angel’s recipe is an antithesis to this logic,why? well because it’s OVEN BAKED not fried and secondly is rather basic yet tasty,her recipe recommends using flower petals to decorate and also cutting it into shapes to make it more visually delightful and intriguing. Ofcourse what I’ve cooked isn’t a patch on the beautiful Angel’s creation but it’s a sort of a tribute to her, in a demi god,fan like behaviour sort of a way…!!

By all means if any one of you does create one anything close to Angel’s original, please do share your feedback and pictures !

I have scaled down the ingredients for 2 people and added a few twists here and there for experimental touches of my own!

Ingredient list to whip up a mean frittata- Vintage and all that 🙂 remember to roll up ur hair in a bun while making it and think Vintage :),Angel style !

  1. 1 tablespoon vegetable oil
  2. Half a white onion sliced
  3. 1 Courgette  finely sliced into half-moon slice
  4. 5 large free range eggs
  5. Salt
  6. cracked black pepper
  7. Goats cheese crumbled

Method

  1. Pre Heat the oven to 220° C /Fan 200° C/ Gas mark 7. Line a baking tin with non-stick baking paper.
  2. Heat oil in a small frying pan and fry the onions until soft for about 2 minutes, stir in the chopped courgette bits,fry on a higher flame for about 4 minutes till it’s goldenish. Angel advises not stirring or tossing this too much in her book and I do agree.
  3. Beat eggs in a bowl,season with salt and add the onion and courgette mixture.

4. Crumble some goats cheese and  then transfer above mixture to a baking tin of your choice, I simply used my small cake tin. Bake for about 15 minutes.
Cool on a wire rack and serve hot.Season with cracked black pepper sprinkled on top.

I think this makes for a really delicious and filling tea time snack and is really easy to make when time is a constraint,which is almost always in our busy lives.

Of course,Angel’s recipe differs and requires some more cooking as there is cheese and is seasoned with edible gerbera petals, I will try it once am able to lay my hands on those delicate beauties.

To check out Angel’s website click here

Trust if me if you already haven’t, her books are a MUST HAVE in everyone’s personal collection of recipe books, I for one am totally smitten!

Filed Under: Food, Quick and Easy, Recipe Index Tagged With: Angel, cheese, cook, courgette, cracked black pepper, easy food, eggs, frittata, fry, goats, goats cheese, italian food, kitchen, recipe, Vintage Tea Party

Healthy Kale Smoothie

September 9, 2012 by manjirichitnis 3 Comments

Hearing of the contest for winning one of 2 free passes to the Food Blogger Connect UK 2012 sponsored by  Vitamix UK, I had to think up of some unique tasty, and healthy smoothie recipe, Lucky for me that I have sampled this smoothie created by Brian the host of London Real TV!

Vitamix is helping two lucky winners get a free ticket to FBC12 + an opportunity to feature the recipe and participate in the Vitamix Total Nutrition Centre with Chef Bev Shaffer at the FBC12 Market.

This blender can create fresh smoothies, refreshing frozen desserts, and even hot soups – it is a kitchen essential that lets you perform more than 50 tasks quicker, easier, and faster. The entries will be judged by Vitamix Chef Bev Shaffer, and the two winners will get to make their recipes with her at the FBC12 Market! Also, all five Vitamix Total Nutrition Centre machines will be given away to #FBC12 attendees during the closing ceremonies.

This is his special recipe and he drinks it every single day and is FIT as a fiddle, I say! And guess what he USES VITAMIX to make this smoothie, cool I say!

Here are the ingredients, give them a whirr in your VITAMIX and drink up folks! Thank Brian in your mind and me for sharing it!

  1.  1 Apple
  2. 1 Pear
  3. 1 Carrot
  4. Ginger
  5. A lot of Kale
  6. 1 Beetroot
  7. 1 Cucumber
  8. Natural apple juice

Am keeping my fingers crossed for winning a free  Food Blogger Connect full weekend access ticket to FBC12!

Cheers!

Visit Food Blogger Connect, connect to the event via Twitter – @BloggerConnect, Post one of the cute badges from the site to promote the conference to fellow food bloggers. Like the VitamixUK & FBC Facebook pages, announce your submission on the official VitamixUK Facebook and Food Blogger Connect Facebook pages, follow @VitamixUK, and @BloggerConnect and your tweets include all the following:  #FBC12, @VitamixUK, @BloggerConnect.

P.S: London Real TV hosted by Brian and Nick, is a weekly talk show dedicated to challenging the status quo, exploring the human experience, and exchanging ideas and perspectives with a full range of eclectic guests from Miss Universe to Members of Parliament. Check them out on YouTube, and add some zest to your week!

Filed Under: Food, Healthy, Recipe Index Tagged With: apple, blogger, carrot, conference, contest, europe, food, free, kale, original, pass, pear, recipe, smoothie, UK, Vitamix

Simple Pasta with Homemade PESTO

September 5, 2012 by manjirichitnis Leave a Comment

This is again one of those recipes that has languished in my draft folder collecting virtual cobwebs for pete’s sake!

I even had a lot of positive response on Facebook when I uploaded a battered looking pic to my Facebook foodie album  ”Food and how much I love it” 🙂

So here’s to finally sharing it on my blog,yay,cheers !Bring on the bubbly…err ok

Here’s what you will need:

  1. Fusili enough for 2 people
  2. Fresh basil one small bunch
  3. Olive Oil 2 teaspoons
  4. 2-3 Garlic Cloves
  5. Pine Nuts
  6. Salt to taste
  7. 2 medium-sized potatoes skinned and sliced
  8. French Beans about a handful

Method:

  1. For the pesto – Mix the Fresh basil , olive oil,pine nuts ,fresh garlic cloves 2-3, salt and green chillies to taste,give them a spin in the mixie ,all done!
  2. Boil the fusilli in water and salt to taste with the beans , when it’s almost done add the potatoes.
  3. Mix the pesto once the pasta and veggie mix is boiled and excess water has been drained.
  4. Grate some mozzarella and serve!
  5. Top tip from readers of this recipe was to replace the mozzarella with parmesan for lesser calories 🙂

Filed Under: Food, Quick and Easy, Recipe Index, Vegetarian Tagged With: basil, french beans, fusili, mozzarella, nuts, oil, olive, pine, potato, salt

Cauliflower ani vatanyachi bhaji, Gobi Vatana Sabzi, Cauliflower side dish with green peas

September 5, 2012 by manjirichitnis 8 Comments

Cauliflower green peas Sabzi

I love cauliflower as a vegetable for its taste and sheer possibilities in the kitchen, my fav everyday vegetable to be eaten with chapatis is a mix of cauliflower and green peas in a spicy, semi-dry sabzi form. I used biryani masala to add a twang to my usual taste and the result was worth sharing:)

फ्लॉवर वाटाणा मसाला भाजी

Skill level beginner, basic

Serves :2 with rotis and curd to make a light meal

Manjiri Chitnis

Cauliflower and Green peas Masala Sabzi

5 from 2 votes
Easy, delicious vegetarian sabzi, an everday dish in a Maharashtrian home
Print Recipe
Prep Time 5 minutes mins
Cook Time 10 minutes mins
Servings: 2 people
Course: Main Course
Cuisine: Indian
Ingredients Equipment Method

Ingredients
  

  • 1 medium-sized Cauliflower
  • 4 tbsp Green peas
  • 1 pinch Asafoetida/hing
  • 1-2 Red Onions very finely sliced
  • 3 – 4 Curry leaves
  • 2 Green chillies
  • 2 tbsp Biryani masala
  • 1/2 Red juicy tomato
  • 1 tsp Ginger paste
  • 2 cloves Garlic very finely sliced
  • 2 tsp Oil for tadka
  • 1/4 tsp Mustard seeds
  • 1/4 Cumin seeds
  • Salt to taste
  • 1/2 tsp each of Turmeric n Red Chilli powders
  • 1 tsp Coriander powder
  • 1 tsp Jeera Powder
  • Few Sprigs Fresh Coriander leaves finely chopped to garnish
  • 1 tsp Lime Juice

Equipment

  • Kadhai or Work or saucepan
  • Chopping Board
  • Sharp Knife
  • Spatula

Method
 

  1. Heat cooking oil in a Kadhai/wok/ saucepan
  2. When the oil is hot, add the asafoetida and mustard seed, when the seeds start to pop add cumin seeds and the finely chopped garlic bits
  3. Ensure the cumin seeds turn a toasty brown and then swiftly move on to the next ingredients
  4. Next, go in with the fresh green curry leaves and green chillies followed by the finely chopped onion
  5. Add the coriander powder, ginger and garlic pastes and stir well and allow it to become a sticky sort of paste
  6. Then add the biryani masala and feel the explosion in the aroma as it marries well with the onion and spice paste
  7. Then go in with the cauliflower florets and the green peas
  8. Turn off the heat for a bit, sprinkle turmeric powder, red chilli powder, cumin powder
  9. Season with salt as per taste
  10. Turn the heat back on, ideally a low flame on the hob and a really low setting on the electric cooker
  11. Sprinkle some water enough to wet the veggies and allow for some steam to form, this will allow the cauliflower to cook
  12. Stirring occasionally, cook with a lid for about under 5 minutes
  13. Check after first 3 minutes to ensure the cauliflower does not overcook
  14. To serve, garnish with fresh coriander leaves, chopped fine and a tiny squeeze of lime juice to add an extra twang
  15. Best enjoyed served with hot puffy Polya (Marathi for Chapatis or Rotis ) off the hob!

Gobi Vatana Sabzi

I am linking my recipe, which happens to be my favourite fusion-Maharashtrian vegetarian recipe for Cauliflower and Green Peas Sabzi with In My Veg Box for May 2014 hosted by me for Nayna who Blogs at Simply. Food and Citrus Spice.

In my veg box cauliflower

Filed Under: Food, Indian, Recipe Index, Sides Tagged With: asafoetida, biryani, chilly, coriander, cumin, curry, easy, food, garlic, ginger, green, green peas, Indian, lime, masala, oil, original, recipe, red onion, sabzee, saji, salt, squeeze, tadka, tumeric, twsit, veg

Angel Hair Pasta and Prawns in Thai Red Curry and white wine sauce

August 29, 2012 by manjirichitnis 6 Comments

I loved the name of this recipe by Chef Delia and hubby was also so excited about eating that we went to supermarket that she endorses and got us some really nice White Cooking wine and vermicelli pasta which I used as ”Angel Hair”. The other thing about this recipe that I found appealing was that it was easy to make, serves 2 as a main meal if prepared with suggested quantities and is a really satisfying dish to both cook and eat!

Why is it called Angel Hair ? Capellini Pasta literally means Angel Hair – because this pasta is the finest, thinnest… and when boiled it opens up and is so delicate , almost like how an Angel’s hair would be! Since it is a very light pasta it pairs well with sea food and is sold in nest like shapes that open up into silky strands on boiling …ummm perfect !

Ok my cheat sheet for this recipe , I used Thai red curry paste from a bottle but you can make your own too.As with other types of pasta, it is generally cooked until it is al dente, or firm to the teeth.

I love this angel hair pasta as it cooks really fast and the sauces are taken up so well by the strands.

Serves:2

Marination Time: 4 hours Preparation Time: 15 Minutes Cooking Time:25 Minutes

Ingredients:

  1. 175gm Angel Hair Pasta.
  2. 2 packets of prawns.
  3. 2 tablespoons light olive oil.
  4. 4 large tablespoons Thai Red Curry Past.
  5. 4- 5 large garlic cloves skinned and very finely sliced.I love the skins so I kept them, they add a diferent twist and crackle that I cannot resist!,
  6. 2 large tomatoes skinned,de-seeded and chopped.This was the first time in my life I skinned tomatoes and must say it was fun 🙂
  7. Grated zest and juice of 1 lime
  8. 200ml dry white wine
  9. For the garnish – 3 tablespoons fresh coriander finely chopped,fresh lime thinly sliced.

Method:

  1. Marinate the deveined prawns in the Thai Red Curry Paste and set aside for as long as you can before cooking the meal, as suggested by Delia for 4 hours in a fridge is ideal.
  2. To start with the sauce ,add oil in a pan and the chopped garlic, fry till i is a beautiful golden brown and the kitchen starts to give away a delicious aroma that tantalises your senses…ummm , then go in the pan the lime zest and juice , the tomatoes and wine  and on a high heat cook and eventually reduce  for about  8 minutes.
  3. Now add the prawns and mix well on a high heat, then reduce to a low flame and let this bubble again for 3- 5 minutes.
  4. Turn off the heat once prawns are well cooked and cover and keep warm till the pasta is done as we have to be ready to serve this immediately when the pasta is ready , being thin it does not stay very easy to scoop out and handle once boiled.
  5. In a large vessel boil water with salt and cook the pasta , it is done in 3 minutes precisely.
  6. In bowls ready for serving spoon out the pasta ,whatever water comes with it , wil be soaked up by the pasta and the sauce.
  7. Serve the prawns in the Thai red curry paste and white wine sauce on top of the Angel Hair Pasta.
  8. In one word – Perfect !

Finito;)

Now for some pics- hover over each pic for a description, pics are followed by credits to the sites which inspired this blog post,Cheers Folks and do drop me a line if you liked this recipe and made it for your family 🙂

And last but not the least my sweetheart, my patient hubby for buying me the ingredients and for being my time keeper for this dish, I am eternally in love with you …..

Filed Under: Food, Recipe Index, seafood Tagged With: angle, bubble, capellini, chop, cook, dinner, flame, garlic, garnish, oil, olive, one dish, pan, pasta, paste, prawns, red curry, sauce, stir, tatsyy, thai, white wine

Spicy Chicken curry

August 20, 2012 by manjirichitnis 12 Comments

Sunday Special Lunch – A Family Tradition

What a Sunday Roast is to a traditional English Family Sunday Lunch is what the combination of Spicy Chicken Gravy and Jeera rice or layered Chicken Biryani is to my family. My sister and I, have been brought on such wholesome, hearty, home-made totally from scratch – delicious food.

All these divine yet easy to recreate dishes, which my parents have always cooked with great passion and a lot of effort are what fuel my desire to share them with all of you.

My Aai and Baba ( Mum and Dad in Marathi) who wake up early every Sunday morning and work as a team to produce this brilliantly tasty chicken curry. Saturday morning my Baba would take me with him to te butcher to buy fresh chicken curry pieces. After coming home he would very patiently explain to us how he marinates the bird using all the freshly ground pastes and purees that Aai used to prepare while he was out shopping. On Sunday morning they would again team up to cook us the most amazing lunch. My best memories of Sunday morning are of waking up to the aromas of food wafting through the house.

Keeping the tradition alive

Few years ago when my husband and I moved to London, I was determined to keep this Sunday family tradition alive. I cooked the chicken adding my own twists and trying my best to recreate the same flavour that my parents seem to get spot-on every single time! So, when they came to London to visit us shortly after we had moved here, I was super delighted that they would cook this special Sunday family meal for us. As promised they cooked us their Sunday special while hubby and I eagerly took notes, clicked pictures and took in the whole energy they bring to this whole process.

This recipe is a spicier version of our traditional Sunday Chicken curry. The bord is cooked in thick gravy bursting with flavour. My Baba loves serving this with Jeera Rice and a beautifully simple Maharahstian Kakdichi Koshimbir in Dahi – Cucumber yoghurt raita. I hope you will enjoy cooking up this dish and hopefully creating happy family memories of your own.

Spicy Chicken – Chitnis Family Sunday Special recipe

manjirichitnis

My family’s Sunday Special Chicken curry recipe

5 from 4 votes
A spicy and easy traditional Indian chicken curry recipe
Print Recipe
Cook Time 25 minutes mins
Servings: 4
Course: Main Course
Cuisine: Indian
Ingredients Equipment Method

Ingredients
  

For marinating overnight
  • 1.25 Kilos Chicken – curry pieces / 1 medium sized whole
  • 25 gm fresh coriander
  • 1 tbsp toasted Dhane/coriander seeds
  • 1 tsp Toasted Jeere/ Cumin
  • 3 cloves Lasun/Garlic
  • 15 gms Aale/Ginger
  • 2 Dry Laal Mirchya/ Red Chillies
  • 2 Dry Kashmiri Laal Mirchya/ Red Chillies
  • 2 Hirvya Mirchya/ Spicy Green chillies
  • 2.5 tsp Halad/Turmeric powder
  • 2 tsp Meeth/Salt
  • 1 tbsp Tel/ Cooking Oil
Tomato-Onion Mix for the gravy
  • 1 tbsp from the marinade above
  • 2 medium Ripe Tomatoes
  • 2 medium Kaande/Red Onions/ Bombay Onions
  • 2 cloves Lasun/Garlic
  • 10 gm Aale/Fresh Ginger
  • 5 gm Fresh coriander leaves
For the Phodni/ Tadka
  • 2 tbsp Tel/ Oil
  • 1 tbsp Sajuk Tuj/ Pure ghee
  • 2 Tamalpatra/Bay Leaves
  • 1 small piece of Dalchini/Cinnamon stick
  • Pinch Hing/Asafoetida
  • 3 tbsp Garam Masala
  • 2 tsp Coriander powder
  • 2 tsp Halad/ Turmeric powder
  • 3 tsp Laal Tikhat/ Extra Hot Red chilli powder
  • 1 tsp Meeth/ Salt – or as per taste
Garnish
  • One dry red Kashmiri chilli and one green chilli sautéed insome oil /ghee
  • Few fresh leaves of coriander to tear and scatter on top

Equipment

  • Large heavy bottomed pot with Lid/Pressure cooker/ Instant Pot / slow cooker
  • Spice grinder
  • Blender
  • Knife
  • Chopping Board

Method
 

  1. Wash the chicken curry pieces and place in a large mixing bowl. I always use chicken without skin
    Whole chicken before marination
  2. Make a thick paste in the mixer-grinder/ blender using all theingredients , asfmentionedabove for the marinade.Ensure the consistency is that of a thick paste and not a watery mixture
    Marinade for chicken
  3. Using a sharp knife make small cuts to the chicken flesh to allow the marinade to really penetrate inside the chicken, this will ensure that each piece is flavourful and not just from the outside
  4. Apply the marinade onto the washed chicken curry pieces, season with some salt and a splash of oil. Mariante overnight in the refigerator
    Marinade for chicken ready
  5. The next day get the marinated chicken out of the refrigerator about an hour before cooking
  6. While the chicken is coming to room temperature, make the puree usingall the ingredients as mentioned above for the tomato and onion mixture. Ensure this mixture it is not watery. Set aside.
  7. Heat oil in a heavy-bottomed pan or a pressure cooker
  8. When the oil is hot, add the asafoetida, sauté the bay leaf and cinnamon stick (dry red kashmiri chilli at this stage is optional)
  9. Add the garam masala, coriander powder and sauté
  10. Then add the onion-tomato mixture and cook for under two minutes until the mixture thickens
  11. Now add in the marinated chicken stir and some water, mix well. Add the red chilli powder turmeric powder and salt
    Chicken gravy consistency
  12. Add just enough water to allow for a thick gray. Stir , cover and cook on a medium flame until the gravy begins to boil
  13. Cover and cook until the chicken is totally cooked through and the oil seperates, this shoud take approximately 20 minutes on a low flame. Stir occasionaly to ensure the gravy does not dry out In the pressure cooker this takes two whistles – for a large bird three whistles
  14. Garnish with roughly chopped fresh coriander leaves and the fried red kashmiri chilli and green chilli
  15. Serve hot with a side of pipping hot jeera rice and some cucumber raita

Loved this recipe? For more chicken recipes try some more of my creations:

  • Chicken noodle soup
  • Chicken Tikka Masala – Air-fryer recipe
  • Easy one-pot Moroccan Chicken
  • Minty Chicken Kadhai Masala
  • Tawa Chicken Frankie Roll
  • Chicken and Red lentil one-pot Stew
  • Spicy grilled chicken bites with an avocado dip
  • Spicy Mexican Chicken Wings
  • Pomegranate Chicken curry
  • Jerk Chicken and coconut rice
  • Easy and healthy one-pot Chicken noodles

Filed Under: C.K.P recipes, Curry - Meat, Seafood, Food, Indian, Meat, Recipe Index Tagged With: chicken, coriander, cucumber, curd, curry, family favourite, flavoured, grated coconut, green chillies, jeera rice, love, oil, onions, parents, puree, red, salt, sunday roast, tomato, tradition

Kadhi – Punjabi Kadhi meets the sweet Gujrati kadhi

August 20, 2012 by manjirichitnis 2 Comments

Kadhi is another of my favourite dishes to be made when I want a Typically Indian meal with steaming hot rice fluffy and begging to be eaten with a bowl of home-made kadhi with crunchy pakoras(potato and onion fritters)

Kadhi is basically a spicy gravy made with curd and Bengal gram flour and there are two versions, this one made in the Northern part of India called ”Punjabi Kadhi” or the Gujarati Version – where the garnishing is done using long red chillies and it is a delicacy served in most weddings – well traditionally at least, nowadays weddings have ”world cuisine” another dilution of tradition … There is also another version called Sindhi Kadhi where tamarind pulp is added and so are few chopped veggies !

This is another recipe that I should have uploaded eons ago! It was much liked when I uploaded the pic on my Facebook album ”Food and How much I love it” Humm, how much more ”foodie” can one get, I wonder… 😉

Manjiri Chitnis

Punjabi Kadhi with a twist

Punjabi Kadhi meets the sweet Gujrati kadhi
Print Recipe
Prep Time 5 minutes mins
Cook Time 8 minutes mins
Course: Main Course
Cuisine: Indian
Ingredients Equipment Method

Ingredients
  

  • 2 tbsp Besan (Bengal gram flour)
  • 1.5 cups Curds/ Yoghurt /Dahi
  • 1 tsp Ginger-Green chilli paste
  • 5-6 Curry leaves (kadi patta)
  • 2 tsp Chopped Fresh coriander leaves (Cilantro)
  • Salt to taste
For the pakoras/fritters
  • 1/4 cup Chopped onion
  • 1/4 cup Chopped potato
  • 1 tsp Ajwain / Carom seeds/ Bishop's weed / Caraway seeds
  • 1 tsp Red chili powder
  • Oil to fry
  • salt to taste
  • 2 tbsp Besan (Bengal gram flour)
  • Water to mix Gram flour batter

Equipment

  • 1 Knife
  • 1 Chopping Board
  • 1 Saucepan with Lid
  • 1 Spatula

Method
 

  1. Mix all Chopped onion &potato in the besan and water mix , ensuring there are no lumps . Add ajwain, salt and chilli powder
  2. Heat oil in a Kadhai and deepfry vegetable and gram flour mixture after making into small balls. Fry tillpakoras are golden brown
  3. Beat Curd/Yogurt and mix gramflour in it. Blend thoroughly so as to ensure that there are no lumps. Addturmeric powder, salt and 3 cups of water
  4. Add the chilli-ginger paste,curry leaves, sugar and salt and put to boil
  5. Boil whilst stirring for a while
  6. Prepare the tempering byheating the ghee and frying the cumin and mustard seeds until they turn brown. Add the asafoetida and red chilli
  7. Add the tempering to the kadhiand boil for a few minutes
  8. Add the cooked pakoras
  9. Sprinkle coriander on top andserve hot with boiled rice

Inspired? Would you like to try my Gujarati Kadhi recipe? Check it out here:


  • Gujrati Kadhi


LEARN HOW TO MAKE INDIAN FOOD FROM SCRATCH WITH MY EASY TO FOLLOW RECIPES

  • Fresh dill and yellow moong daal recipe
  • Goda sheera/ sooji ka halwa/ Indian dessert
  • CKP Surmai curry
  • Pompfret fish curry
  • Pompfret fry
  • Konbichi khichadi – Prawn khichadi
  • Vaangayche Bharit/ Smoked stuffed Aubergine ( Eggplant/Brinjal) in a thick gravy/ Baingan ka bharta
  • Valache Birdhe – (वालाचे बिरडे) – MADE IN A TYPICAL C.K.P WAY
  • Kairi Panhe/ Aam ka panha – Raw mango summer drink
  • Cauliflower- vatana bhaji – cauliflower and green peas vegetarian side dish
  • Podhnichi khichadi
  • Akkha masoor aamti CKP style / Whole red lentils with skin curry recipe
  • Achari Mutton curry
  • Spicy Chicken curry
  • Egg curry
  • Upma
  • Gujrati Kadhi
  • Shahi Khichadi
  • Sweetcorn and paneer bhaji/sabzi (vegetable side dish)
  • Tomato and coconut chutney
  • Steamed Idli batter
  • Ragi (Finger Millet) and blueberry pancakes
  • Masala egg omlette
  • Chicken tikka masala
  • Tikka masala curry paste
  • Tawa chicken Frankie roll
  • Chai concentrate
  • Grated carrot salad
  • Strawberry flavoured shrikhand

Filed Under: Curry - Vegetarian, Food, Indian, Recipe Index, Vegetarian Tagged With: bengal gram, besan, comfort food, coriander, facebook album, Foodie, fritters, onion, potato, Punjabi Kadhi, salt

Basic Chocolate Cake with Frosting

August 20, 2012 by manjirichitnis Leave a Comment

What better way to celebrate a new FOODISTA Badge for my post on Shahi Khichadi than by baking a chocolate cake, I firmly believe that chocolate is the one word that instantly lifts sagging spirits and the whole baking process itself is cathartic! So sistahs let’s BAKE!

Manjiri Chitnis

Basic Chocolate Cake with Frosting

Delicious, easy must-have Chocolate cake recipe with frosting
Print Recipe
Prep Time 25 minutes mins
Cook Time 30 minutes mins
Course: Dessert
Cuisine: Fusion
Ingredients Equipment Method

Ingredients
  

  • 225 gms Butter softened
  • 225 gms Caster Sugar
  • 4 Eggs
  • 220 gms Self-Raising Flour
  • 3 tsp Baking Powder
  • 1 tbsp Cocoa Powder
  • 1/2 tsp Soda-Bicarbonate
For the frosting
  • 100 gms Butter
  • 100 gms Icing Sugar
  • 1 tbsp CocoaPowder
  • Shaved Chocolate for garnish
  • Fresh Strawberries for garnish
  • Granish of choice

Equipment

  • Cake tin
  • Whisk
  • Hand-Blender or Stand-Mixer
  • Wire-rack to cool the cake
  • Probe to test cake
  • Spatula to frost the cake
  • Measuring spoons
  • Baking Parchment

Method
 

  1. Lightly Grease two cake tins and line the bottoms with non stick-parchment. I manage without parchment , it's up to you, if yo are baking for the first time use it as it prevents the sides from burning.
  2. Preheat Oven to 180C/350F/Gas 4.
  3. Ensure butter is completely softened or else use the old foolproof way – heat water in a pan ,place a vessel on top with the butter inside minus any packaging, watch it soften like a man melts when he looks onto the eyes's of his dearest ,ahem …
  4. Measure the Butter and sugar into a bowl and mix well they form a creamy mix, I used a fork and gave it a good old whipping:) – think of someone you dislike – your boss , your mil, your annoying neighbour, Baba Yaga the Witch – whoever – just whip away,hehehe
  5. Add 3 medium or 4 small eggs, I used 3 medium-sized eggs.
  6. Swift the self-raising flour into this mix ,followed by the baking powder, soda bicarbonate ,cocoa powder and beat till really smooth , I didn’t even need a hand blender as the butter was perfectly soft and the flour well swifted , though do go ahead and use a hand blender on low setting for about a minute , have added a picture so you know the look of consistency.
  7. Divide the mixture between the two tins. I used the foil of the butter packaging to grease the cake tins, no wastage in my kitchen !
  8. Bake in a pre-heated oven for approximately 25-30mins.
  9. While in the oven make the icing by creaming together the butter and icing sugar and add cocoa powder, mix until smooth.
  10. Cover frosting and set aside
  11. Allow the baked cakes to cool down completely on a wire-rack before frosting
  12. Sandwich the frosting in-between the two cakes
  13. Add some on the sides and sprinkle the crunchy choco balls on the top , go all crazy and add some chocolate shavings , I did !


Looking for more inspiration to get baking?

Why not have a look at my other recipes:

  • Choco-chip cookies to kill insomnia and cure heartache
  • Sundried tomato and chilli spiced bread  
  • Chocolate coconut cake with coconut-flavoured icing
  • Banana Loaf – Mary Berry’s recipe
  • Cinnamon-pecan Gluten-free coffee cake
  • Halloween forgotten-graveyard cake


Filed Under: Desserts, Food, Recipe Index Tagged With: award, badge, bake, baking powder, butter, cake tins, celebrate, choco, chocolate cake, cocoa, crunchy, delicious, easy, eggs, Foodista, icing, oven, recipe, self raising flour, sistah, soda bicarbonate, softened, swift, whip

  • « Previous Page
  • 1
  • …
  • 8
  • 9
  • 10
  • 11
  • Next Page »

Food,travel and lifestyle writer. Photographer.

  • Email
  • Facebook
  • Instagram
  • Pinterest
  • Twitter
  • YouTube

Categories

  • Baking
  • Breads
  • C.K.P recipes
  • Cakes
  • Chutneys
  • Cocktails
  • Curry – Meat, Seafood
  • Curry – Vegetarian
  • Desserts
  • Events
  • Featured Food and Drink
  • Featured Lifestyle
  • Featured Travel Adventures
  • Food
  • Healthy
  • Home
  • India
  • Indian
  • Kitchen
  • Lifestyle
  • London and rest of U.K
  • Meat
  • Miscellaneous
  • Product Reviews
  • Quick and Easy
  • Recipe Index
  • Rest of the World
  • Restaurant Reviews
  • Salads
  • seafood
  • Sides
  • Smoothies
  • Soups
  • Travel
  • Uncategorized
  • Vegan
  • Vegetarian

Featured Blogger on Great British Chefs

GBC_blogger-badge_150x300px    

Need a New Power Blender?

13076814_10154185434898293_7387808474266473605_n

Travelsfortaste is Featured on Expats Blog

England expat blogs
Privacy & Cookies: This site uses cookies. By continuing to use this website, you agree to their use.
To find out more, including how to control cookies, see here: Cookie Policy
Squaremeal.co.uk - Restaurant Reviews

About me

Writer and Photographer. Food,Travel & Lifestyle, Blogger and Digital Marketer. Read More…

  • Email
  • Facebook
  • Instagram
  • Twitter
  • YouTube

Recent Posts

  • Diamond Jubilee Tea Salon, Fortnum & Mason – Afternoon Tea Review
  • Brown’s Brasserie and Bar celebrates 50th Anniversary with Covent Garden Grand re-opening
  • Hampton Court Palace Food Festival – Review
  • Brigit’s Bakery Afternoon Tea, Covent Garden, London – Review
  • Maplin Photo Walk around Central London

Copyright © 2025 · Foodie Pro Theme by Shay Bocks · Built on the Genesis Framework · Powered by WordPress

This website uses cookies to improve your experience. We'll assume you're ok with this, but you can opt-out if you wish.Accept Read More
Privacy & Cookies Policy

Privacy Overview

This website uses cookies to improve your experience while you navigate through the website. Out of these, the cookies that are categorized as necessary are stored on your browser as they are essential for the working of basic functionalities of the website. We also use third-party cookies that help us analyze and understand how you use this website. These cookies will be stored in your browser only with your consent. You also have the option to opt-out of these cookies. But opting out of some of these cookies may affect your browsing experience.
Necessary
Always Enabled
Necessary cookies are absolutely essential for the website to function properly. This category only includes cookies that ensures basic functionalities and security features of the website. These cookies do not store any personal information.
Non-necessary
Any cookies that may not be particularly necessary for the website to function and is used specifically to collect user personal data via analytics, ads, other embedded contents are termed as non-necessary cookies. It is mandatory to procure user consent prior to running these cookies on your website.
SAVE & ACCEPT