Travels for Taste

Tales of travel and food with a touch of spice

  • Home
  • About
    • In the Press, Published Work and Interviews
    • PR and Disclosure Policy
  • Food
    • Recipe Index
      • Indian
        • C.K.P recipes
        • Curry – Meat, Seafood
        • Curry – Vegetarian
        • Sides
        • Chutneys
      • Healthy
        • Soups
        • Salads
      • Quick and Easy
      • Baking
        • Desserts
      • Meat
      • Seafood
      • Vegetarian
        • Salads
      • Vegan
    • Product Reviews
    • Events
  • Travel
    • UK
    • India
    • Around the World
  • Lifestyle
    • Home
    • Kitchen
    • Restaurant Reviews
    • Miscellaneous
  • Giveaways
  • Work with me
    • Meet interesting foodie entrepreneurs here

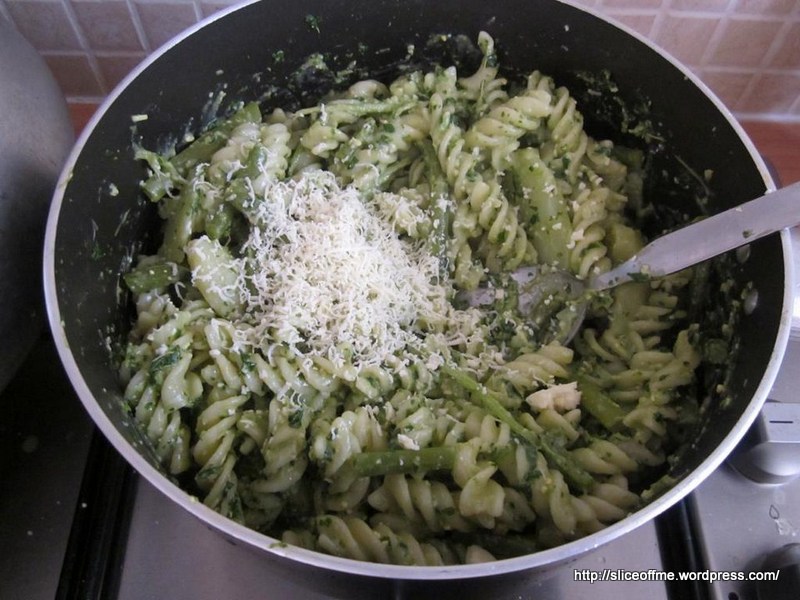
Simple Pasta with Homemade PESTO

September 5, 2012 by manjirichitnis Leave a Comment

This is again one of those recipes that has languished in my draft folder collecting virtual cobwebs for pete’s sake!

I even had a lot of positive response on Facebook when I uploaded a battered looking pic to my Facebook foodie album  ”Food and how much I love it” 🙂

So here’s to finally sharing it on my blog,yay,cheers !Bring on the bubbly…err ok

Here’s what you will need:

  1. Fusili enough for 2 people
  2. Fresh basil one small bunch
  3. Olive Oil 2 teaspoons
  4. 2-3 Garlic Cloves
  5. Pine Nuts
  6. Salt to taste
  7. 2 medium-sized potatoes skinned and sliced
  8. French Beans about a handful

Method:

  1. For the pesto – Mix the Fresh basil , olive oil,pine nuts ,fresh garlic cloves 2-3, salt and green chillies to taste,give them a spin in the mixie ,all done!
  2. Boil the fusilli in water and salt to taste with the beans , when it’s almost done add the potatoes.
  3. Mix the pesto once the pasta and veggie mix is boiled and excess water has been drained.
  4. Grate some mozzarella and serve!
  5. Top tip from readers of this recipe was to replace the mozzarella with parmesan for lesser calories 🙂

Filed Under: Food, Quick and Easy, Recipe Index, Vegetarian Tagged With: basil, french beans, fusili, mozzarella, nuts, oil, olive, pine, potato, salt

Cauliflower ani vatanyachi bhaji, Gobi Vatana Sabzi, Cauliflower side dish with green peas

September 5, 2012 by manjirichitnis 8 Comments

Cauliflower green peas Sabzi

I love cauliflower as a vegetable for its taste and sheer possibilities in the kitchen, my fav everyday vegetable to be eaten with chapatis is a mix of cauliflower and green peas in a spicy, semi-dry sabzi form. I used biryani masala to add a twang to my usual taste and the result was worth sharing:)

फ्लॉवर वाटाणा मसाला भाजी

Skill level beginner, basic

Serves :2 with rotis and curd to make a light meal

Cauliflower and Green peas Masala Sabzi

Manjiri Chitnis
Easy, delicious vegetarian sabzi, an everday dish in a Maharashtrian home
5 from 2 votes
Print Recipe
Prep Time 5 mins
Cook Time 10 mins
Course Main Course
Cuisine Indian
Servings 2 people

Equipment

  • Kadhai or Work or saucepan
  • Chopping Board
  • Sharp Knife
  • Spatula

Ingredients
  

  • 1 medium-sized Cauliflower
  • 4 tbsp Green peas
  • 1 pinch Asafoetida/hing
  • 1-2 Red Onions very finely sliced
  • 3 – 4 Curry leaves
  • 2 Green chillies
  • 2 tbsp Biryani masala
  • 1/2 Red juicy tomato
  • 1 tsp Ginger paste
  • 2 cloves Garlic very finely sliced
  • 2 tsp Oil for tadka
  • 1/4 tsp Mustard seeds
  • 1/4 Cumin seeds
  • Salt to taste
  • 1/2 tsp each of Turmeric n Red Chilli powders
  • 1 tsp Coriander powder
  • 1 tsp Jeera Powder
  • Few Sprigs Fresh Coriander leaves finely chopped to garnish
  • 1 tsp Lime Juice

Instructions
 

  • Heat cooking oil in a Kadhai/wok/ saucepan
  • When the oil is hot, add the asafoetida and mustard seed, when the seeds start to pop add cumin seeds and the finely chopped garlic bits
  • Ensure the cumin seeds turn a toasty brown and then swiftly move on to the next ingredients
  • Next, go in with the fresh green curry leaves and green chillies followed by the finely chopped onion
  • Add the coriander powder, ginger and garlic pastes and stir well and allow it to become a sticky sort of paste
  • Then add the biryani masala and feel the explosion in the aroma as it marries well with the onion and spice paste
  • Then go in with the cauliflower florets and the green peas
  • Turn off the heat for a bit, sprinkle turmeric powder, red chilli powder, cumin powder
  • Season with salt as per taste
  • Turn the heat back on, ideally a low flame on the hob and a really low setting on the electric cooker
  • Sprinkle some water enough to wet the veggies and allow for some steam to form, this will allow the cauliflower to cook
  • Stirring occasionally, cook with a lid for about under 5 minutes
  • Check after first 3 minutes to ensure the cauliflower does not overcook
  • To serve, garnish with fresh coriander leaves, chopped fine and a tiny squeeze of lime juice to add an extra twang
  • Best enjoyed served with hot puffy Polya (Marathi for Chapatis or Rotis ) off the hob!
Keyword cauliflower

Gobi Vatana Sabzi

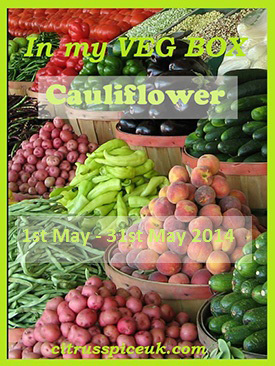
I am linking my recipe, which happens to be my favourite fusion-Maharashtrian vegetarian recipe for Cauliflower and Green Peas Sabzi with In My Veg Box for May 2014 hosted by me for Nayna who Blogs at Simply. Food and Citrus Spice.

In my veg box cauliflower

Filed Under: Food, Indian, Recipe Index, Sides Tagged With: asafoetida, biryani, chilly, coriander, cumin, curry, easy, food, garlic, ginger, green, green peas, Indian, lime, masala, oil, original, recipe, red onion, sabzee, saji, salt, squeeze, tadka, tumeric, twsit, veg

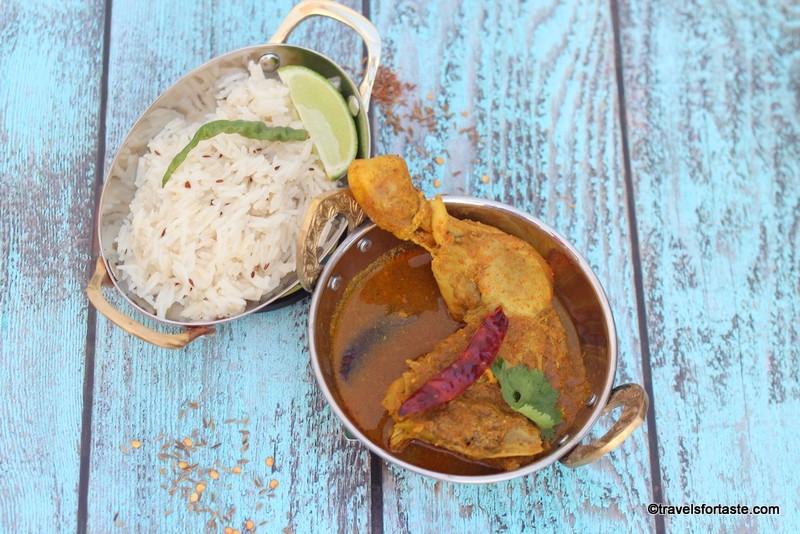
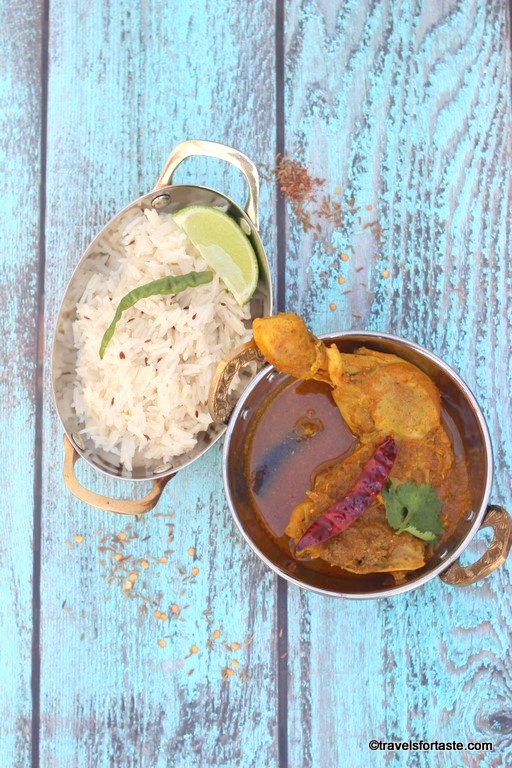
Spicy Chicken curry

August 20, 2012 by manjirichitnis 12 Comments

Sunday Special Lunch – A Family Tradition

What a Sunday Roast is to a traditional English Family Sunday Lunch is what the combination of Spicy Chicken Gravy and Jeera rice or layered Chicken Biryani is to my family. My sister and I, have been brought on such wholesome, hearty, home-made totally from scratch – delicious food.

All these divine yet easy to recreate dishes, which my parents have always cooked with great passion and a lot of effort are what fuel my desire to share them with all of you.

My Aai and Baba ( Mum and Dad in Marathi) who wake up early every Sunday morning and work as a team to produce this brilliantly tasty chicken curry. Saturday morning my Baba would take me with him to te butcher to buy fresh chicken curry pieces. After coming home he would very patiently explain to us how he marinates the bird using all the freshly ground pastes and purees that Aai used to prepare while he was out shopping. On Sunday morning they would again team up to cook us the most amazing lunch. My best memories of Sunday morning are of waking up to the aromas of food wafting through the house.

Keeping the tradition alive

Few years ago when my husband and I moved to London, I was determined to keep this Sunday family tradition alive. I cooked the chicken adding my own twists and trying my best to recreate the same flavour that my parents seem to get spot-on every single time! So, when they came to London to visit us shortly after we had moved here, I was super delighted that they would cook this special Sunday family meal for us. As promised they cooked us their Sunday special while hubby and I eagerly took notes, clicked pictures and took in the whole energy they bring to this whole process.

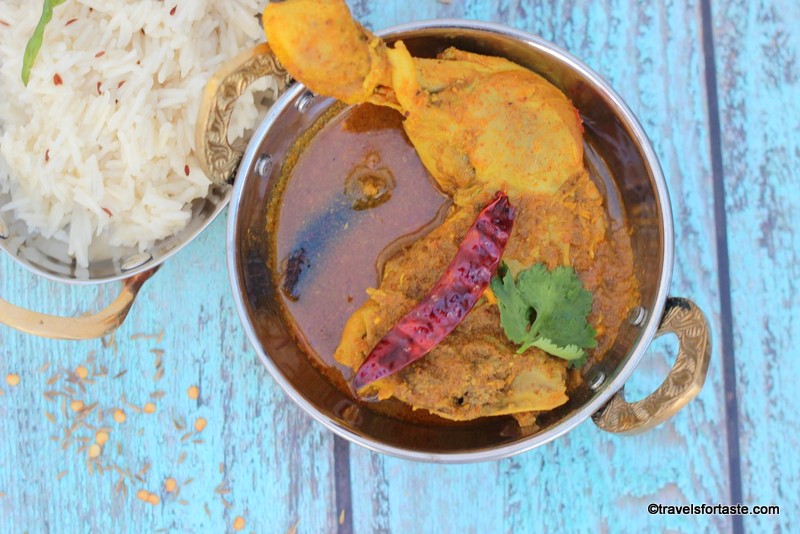
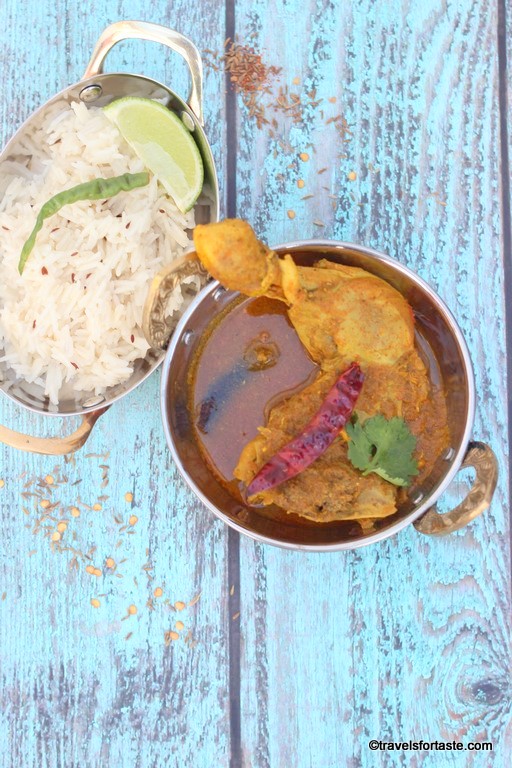
This recipe is a spicier version of our traditional Sunday Chicken curry. The bord is cooked in thick gravy bursting with flavour. My Baba loves serving this with Jeera Rice and a beautifully simple Maharahstian Kakdichi Koshimbir in Dahi – Cucumber yoghurt raita. I hope you will enjoy cooking up this dish and hopefully creating happy family memories of your own.

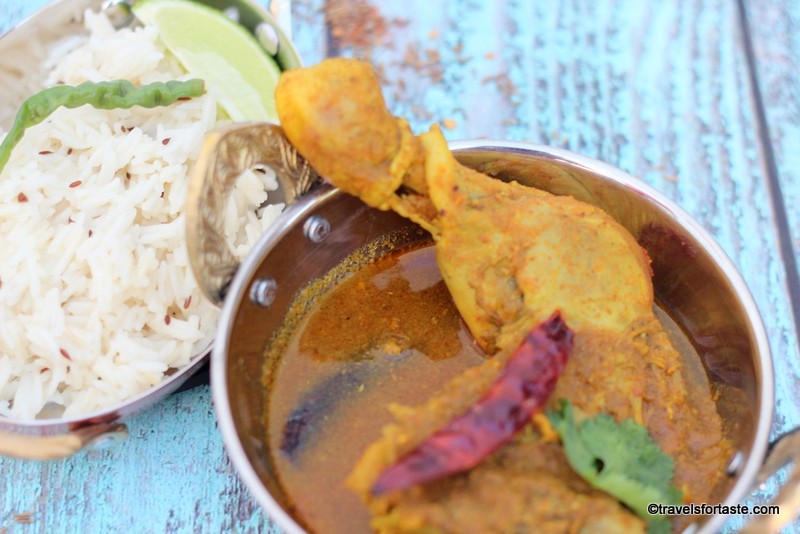
Spicy Chicken – Chitnis Family Sunday Special recipe

My family’s Sunday Special Chicken curry recipe

manjirichitnis
A spicy and easy traditional Indian chicken curry recipe
5 from 4 votes
Print Recipe
Cook Time 25 mins
Course Main Course
Cuisine Indian
Servings 4

Equipment

  • Large heavy bottomed pot with Lid/Pressure cooker/ Instant Pot / slow cooker
  • Spice grinder
  • Blender
  • Knife
  • Chopping Board

Ingredients
  

For marinating overnight

  • 1.25 Kilos Chicken – curry pieces / 1 medium sized whole
  • 25 gm fresh coriander
  • 1 tbsp toasted Dhane/coriander seeds
  • 1 tsp Toasted Jeere/ Cumin
  • 3 cloves Lasun/Garlic
  • 15 gms Aale/Ginger
  • 2 Dry Laal Mirchya/ Red Chillies
  • 2 Dry Kashmiri Laal Mirchya/ Red Chillies
  • 2 Hirvya Mirchya/ Spicy Green chillies
  • 2.5 tsp Halad/Turmeric powder
  • 2 tsp Meeth/Salt
  • 1 tbsp Tel/ Cooking Oil

Tomato-Onion Mix for the gravy

  • 1 tbsp from the marinade above
  • 2 medium Ripe Tomatoes
  • 2 medium Kaande/Red Onions/ Bombay Onions
  • 2 cloves Lasun/Garlic
  • 10 gm Aale/Fresh Ginger
  • 5 gm Fresh coriander leaves

For the Phodni/ Tadka

  • 2 tbsp Tel/ Oil
  • 1 tbsp Sajuk Tuj/ Pure ghee
  • 2 Tamalpatra/Bay Leaves
  • 1 small piece of Dalchini/Cinnamon stick
  • Pinch Hing/Asafoetida
  • 3 tbsp Garam Masala
  • 2 tsp Coriander powder
  • 2 tsp Halad/ Turmeric powder
  • 3 tsp Laal Tikhat/ Extra Hot Red chilli powder
  • 1 tsp Meeth/ Salt – or as per taste

Garnish

  • One dry red Kashmiri chilli and one green chilli sautéed insome oil /ghee
  • Few fresh leaves of coriander to tear and scatter on top

Instructions
 

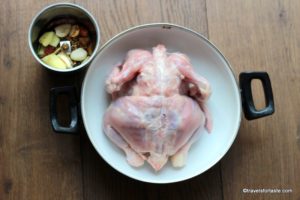
  • Wash the chicken curry pieces and place in a large mixing bowl. I always use chicken without skin
    Whole chicken before marination
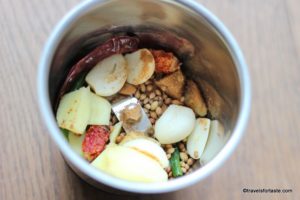
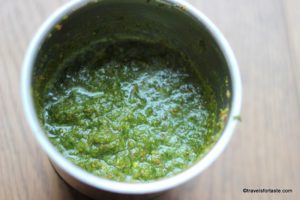
  • Make a thick paste in the mixer-grinder/ blender using all theingredients , asfmentionedabove for the marinade.Ensure the consistency is that of a thick paste and not a watery mixture
    Marinade for chicken
  • Using a sharp knife make small cuts to the chicken flesh to allow the marinade to really penetrate inside the chicken, this will ensure that each piece is flavourful and not just from the outside
  • Apply the marinade onto the washed chicken curry pieces, season with some salt and a splash of oil. Mariante overnight in the refigerator
    Marinade for chicken ready
  • The next day get the marinated chicken out of the refrigerator about an hour before cooking
  • While the chicken is coming to room temperature, make the puree usingall the ingredients as mentioned above for the tomato and onion mixture. Ensure this mixture it is not watery. Set aside.
  • Heat oil in a heavy-bottomed pan or a pressure cooker
  • When the oil is hot, add the asafoetida, sauté the bay leaf and cinnamon stick (dry red kashmiri chilli at this stage is optional)
  • Add the garam masala, coriander powder and sauté
  • Then add the onion-tomato mixture and cook for under two minutes until the mixture thickens
  • Now add in the marinated chicken stir and some water, mix well. Add the red chilli powder turmeric powder and salt
    Chicken gravy consistency
  • Add just enough water to allow for a thick gray. Stir , cover and cook on a medium flame until the gravy begins to boil
  • Cover and cook until the chicken is totally cooked through and the oil seperates, this shoud take approximately 20 minutes on a low flame. Stir occasionaly to ensure the gravy does not dry out In the pressure cooker this takes two whistles – for a large bird three whistles
  • Garnish with roughly chopped fresh coriander leaves and the fried red kashmiri chilli and green chilli
  • Serve hot with a side of pipping hot jeera rice and some cucumber raita

Loved this recipe? For more chicken recipes try some more of my creations:

  • Chicken noodle soup
  • Chicken Tikka Masala – Air-fryer recipe
  • Easy one-pot Moroccan Chicken
  • Minty Chicken Kadhai Masala
  • Tawa Chicken Frankie Roll
  • Chicken and Red lentil one-pot Stew
  • Spicy grilled chicken bites with an avocado dip
  • Spicy Mexican Chicken Wings
  • Pomegranate Chicken curry
  • Jerk Chicken and coconut rice
  • Easy and healthy one-pot Chicken noodles

Filed Under: C.K.P recipes, Curry - Meat, Seafood, Food, Indian, Meat, Recipe Index Tagged With: chicken, coriander, cucumber, curd, curry, family favourite, flavoured, grated coconut, green chillies, jeera rice, love, oil, onions, parents, puree, red, salt, sunday roast, tomato, tradition

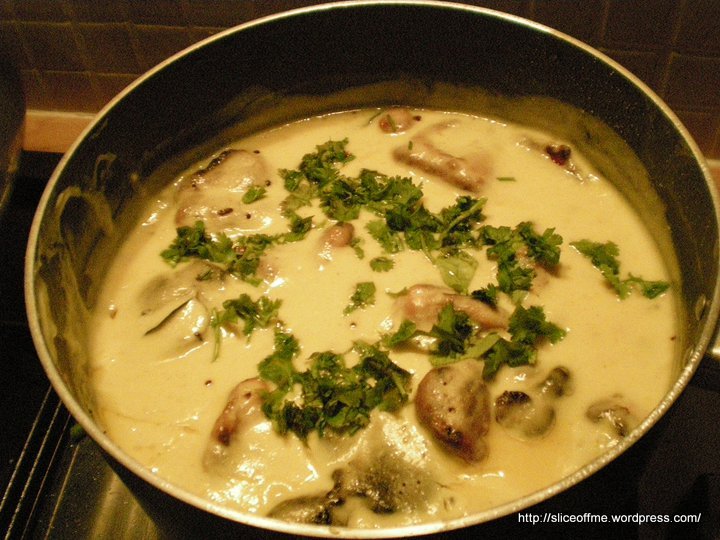
Kadhi – Punjabi Kadhi meets the sweet Gujrati kadhi

August 20, 2012 by manjirichitnis 2 Comments

Kadhi is another of my favourite dishes to be made when I want a Typically Indian meal with steaming hot rice fluffy and begging to be eaten with a bowl of home-made kadhi with crunchy pakoras(potato and onion fritters)

Kadhi is basically a spicy gravy made with curd and Bengal gram flour and there are two versions, this one made in the Northern part of India called ”Punjabi Kadhi” or the Gujarati Version – where the garnishing is done using long red chillies and it is a delicacy served in most weddings – well traditionally at least, nowadays weddings have ”world cuisine” another dilution of tradition … There is also another version called Sindhi Kadhi where tamarind pulp is added and so are few chopped veggies !

This is another recipe that I should have uploaded eons ago! It was much liked when I uploaded the pic on my Facebook album ”Food and How much I love it” Humm, how much more ”foodie” can one get, I wonder… 😉

Ok, now for the Ingredient list :

Ingredients for the Kadhi

  1. 2 heaped tbsp besan (Bengal gram flour)
  2. 1 1/2 cups curds (dahi)
  3. 1 tsp ginger-green chilli paste
  4. 2 curry leaves (kadi patta)2 tbsp chopped coriander (dhania)
  5. salt to tasteIngredients for the pakoras/fritters
    1/4 cup Chopped onion
    1/4 cup Chopped potato
    1 tsp Ajwain.
    1 tsp Red chili powder.
    salt to taste
    Oil
    about 2 spoons Besan (Bengal gram flour) & Water
    Preparation:
    -Mix all Chopped onion & potato in the besan and water mix , ensuring there are no lumps . Add ajwain , salt and chilli powder .
    – Heat oil in a Kadhai and deep fry vegetable and gram flour mixture after making into small balls. Fry till pakoras are golden brown.
    -Beat Curd/Yogurt and mix gram flour in it. Blend thoroughly so as to ensure that there are no lumps. Add turmeric powder, salt and 3 cups of water.
    – Add the chilli-ginger paste, curry leaves, sugar and salt and put to boil.
    – Boil whilst stirring for a while.
    – Prepare the tempering by heating the ghee and frying the cumin and mustard seeds until they turn brown. Add the asafoetida and red chilli.
    – Add the tempering to the kadhi and boil for a few minutes.
    – Add the cooked pakoras
    – Sprinkle coriander on top and serve hot with boiled rice .

Inspired? Would you like to try my Gujarati Kadhi recipe? Check it out here:

  • Gujrati Kadhi
  • LEARN HOW TO MAKE INDIAN FOOD FROM SCRATCH WITH MY EASY TO FOLLOW RECIPES

    • Fresh dill and yellow moong daal recipe
    • Goda sheera/ sooji ka halwa/ Indian dessert
    • CKP Surmai curry
    • Pompfret fry
    • Konbichi khichadi – Prawn khichadi
    • Vaangayche Bharit/ Smoked stuffed Aubergine ( Eggplant/Brinjal) in a thick gravy/ Baingan ka bharta
    • Valache Birdhe – (वालाचे बिरडे) – MADE IN A TYPICAL C.K.P WAY
    • Kairi Panhe/ Aam ka panha – Raw mango summer drink
    • Cauliflower- vatana bhaji – cauliflower and green peas vegetarian side dish
    • Podhnichi khichadi
    • Akkha masoor aamti CKP style / Whole red lentils with skin curry recipe
    • Achari Mutton curry
    • Spicy Chicken curry
    • Egg curry
    • Upma
    • Gujrati Kadhi
    • Shahi Khichadi
    • Sweetcorn and paneer bhaji/sabzi (vegetable side dish)
    • Tomato and coconut chutney
    • Steamed Idli batter
    • Ragi (Finger Millet) and blueberry pancakes
    • Masala egg omlette
    • Chicken tikka masala
    • Tikka masala curry paste
    • Tawa chicken Frankie roll
    • Chai concentrate
    • Grated carrot salad
    • Strawberry flavoured shrikhand

    Filed Under: Curry - Vegetarian, Food, Indian, Recipe Index, Vegetarian Tagged With: bengal gram, besan, comfort food, coriander, facebook album, Foodie, fritters, onion, potato, Punjabi Kadhi, salt

    Shahi Khichadi

    April 9, 2012 by manjirichitnis 9 Comments

    I have decided to finally upload some of the recipes which received a lot of comments on my Facebook food album and I ended up sending out the recipe by email to many of contacts. Here is one of the easier and more popular ones . When I was a kid when my mother said ”khaichadi” in response to what’s for dinner ? it usually meant that one of us feverish and needed something gentle on the tummy or one of us was trying to recover from an upset tummy .Of course the taste of the boiled rice and green gram halved and with skin on or the yellow version without skin , is ultimately satisfying a great comfort food when served piping hot with a dollop of ghee and some warm milk ,a good night’s sleep guaranteed !

    But my version is spicy ,with a tasty twist and a lot of fun to cook and even more fun to eat .

    I adopted this recipe from the way my mother makes khichadi and also from how my pal S of www.jainfoodie.com makes Jain Dal Khichadi . I choose to call it Shahi meaning Regal or Royal here because it is rather a posh version of the humble boiled version. Khichadi meaning an Indian for a slurpalicious RICE and lentil dish cooked like a pulav /pulao/pilau /pilaf.

    Ingredients (enough to serve 2 with second and maybe a third helping !)

    • Rice 1 cup
    • A Mix of the following in equalish parts in the same cup used to measure the rice – Massor Dal also called Red Lentils-split and skinless, Moong Dal also called Green Gram yellow we will use the  spilt skinless variety and the split green moong dal with green skin on , Urid Dal also called Black Gram halved with skin ,some Toor Dal also called pigeon peas – yellow spilt and skinless .
    • 1 large red Onion
    • 1 medium tomato
    • 2-3 Bay leaves
    •  Bits of Cinnamon bark
    • 2 cloves of garlic smashed with skin on
    •  2 green chillies
    •  Jeera / Cumin
    •  Hing / Asafoetida
    • Salt to taste
    • Red Chilli Powder
    • Turmeric Powder
    •  2 small potatoes
    •  Few Curry leaves
    •  Few Cloves
    •  Few black whole peppercorns
    • 18. Oil for sauteing
    • Some Ghee – maybe 2 spoons – Clarified Butter

    Method :

    • Wash the rice and lentils and place them in a pressure cooker ,add 4 cups (use same cup as the one used to measure the rice and the dals) of water and another to make it a little softer than regular rice ,pressure cook till 4 whistles are done.
    • Once the steam slowly releases from the cooker , you can open the lid and it will look like the picture below but a bit different in colour because when I made this I was short on red lentils so didn’t add them . Actually even you make this dish with rice and only yellow moong dal it will taste just as good 🙂
    • While the cooker is cooling down ,chop the potatoes into longish strips and stir fry them in hot oil till they turn brown, add some salt, sprinkled over them just as they get done, these potato fries are our garnishing to add that REAL REGAL or SHAHI touch to the dish . Once done keep them aside and STOP yourself from munching on them before your dish is ready , my husband managed to gobble quite a few ,pretending he was helping me ”stir” the onions while I clicked pictures ..grrrrr
    • Now Lets prepare the tadka /tarka or the tempering. First slice the onion and the tomato vertically into thinish slices .
    • Add oil about 2 large tablespoons into a pan and one teaspoon of ghee just for flavour and aroma , when this mix is hot add some hing , then add the jeera and the crushed garlic and the 2 green chillies spilt along the middle lengthwise as it opens them up and allows the pungent seeds to spread through the tempering , one kick ass way to add that hotttt KICK to the dish ,trust me this one is explosive spicy HOTT as it has all the ingredients to help the taste explode in your mouth, saute till the garlic is brown and the garlic’s skin starts to crackle , then add the cloves, the whole black peppercorns , bits of the barks of Cinnamon ,curry leaves, bay leaves and keep stiring this mixture to prevent charring or over heating ,it will look like in the picture below :
    • Then add the chopped onion, It should look like the picture below:
    • Then after a while when the onion has begun to turn a lovely pinkish ,brownish colour and looks the picture below it’s time to add the tomato .
    • Now add the vertically sliced tomato slices , I can assure you that now the potent aroma of all those lovely spices and the onion are stirring up quite an appetite inside you and making you hungrier every passing minute .
    • I dislike chunky bits of tomato floating in my mouth while I gobble up the khichadi so I jus a flat wooden spatula and gently ensure that the tomatoes are totally mashed  in a way that allows the mixture to become one entity, it should look like in the picture below :
    • Add just a bit of red chilli powder and some turmeric powder to the mixture above and add salt to taste ,Now add the cooked rice and lentil mixture to the above tempered mix of spices ,onions and tomatoes ,mix well stirring well, add salt again enough to flavour the rice and lentil mix .
    • It’s almost done , just keep this on a low flame for about a minute or two to allow the flavours of the spices to penetrate deep inside the rice and lentils .
    • The SHAHI KHICHADI is now ready to be garnished! Yay 🙂
    • WOW now doesn’t that look awesome ? I am quite proud about this creative production from my kitchen , hope you relish it as much as I did errr we did , hubby had to agree 🙂
    • If you fear that all the spices may be a bit too much for your sensitive palate prepare a quick cooling cucumber and curd accompaniment . Beat 2 spoons of set yogurt or thick flowing yogurt and add tiny square bits of fresh cucumber , season with a bit of salt ,some sugar and some jeera powder to taste .

    Enjoy !

    Filed Under: Food, Indian, Recipe Index, Vegetarian Tagged With: bay leaves, chilli, chop, cinnamom, cloves, cooker, cucumber, cumin, curd, curry leaves, dal, flame, fry, garlic, ghee, green chilly, hot, jeera, khichadi, kitchen, lentils, masoor, moong, oil, onion, peppercorns, pictures, pilaf, Pilao, potatoes, powder, pressure, pulao, Pulav, recipe, red, regal, rice, royal, salt, shahi, spicy, sugar, tempering, tomato, toor, turmeric, urid, yogurt

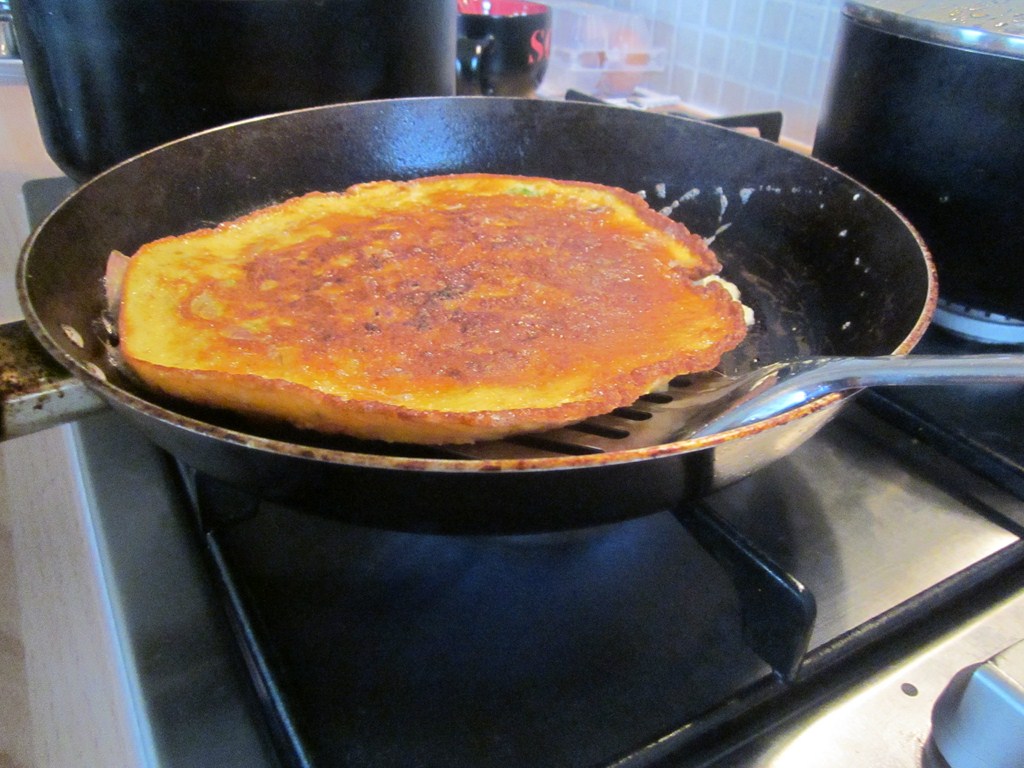
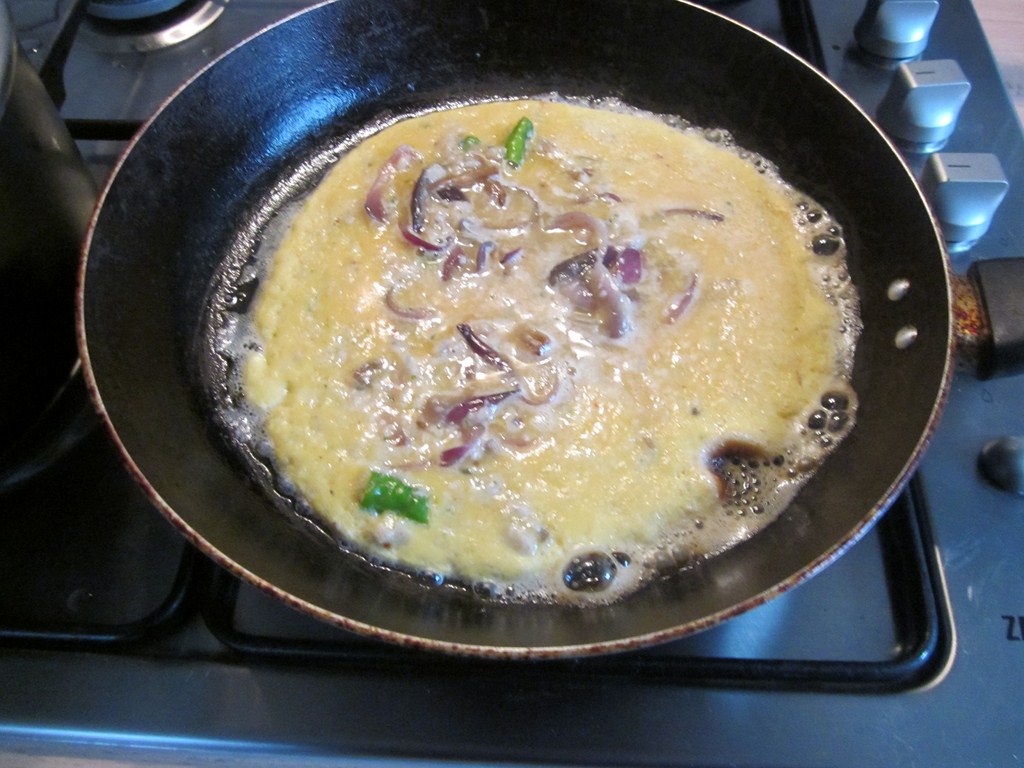
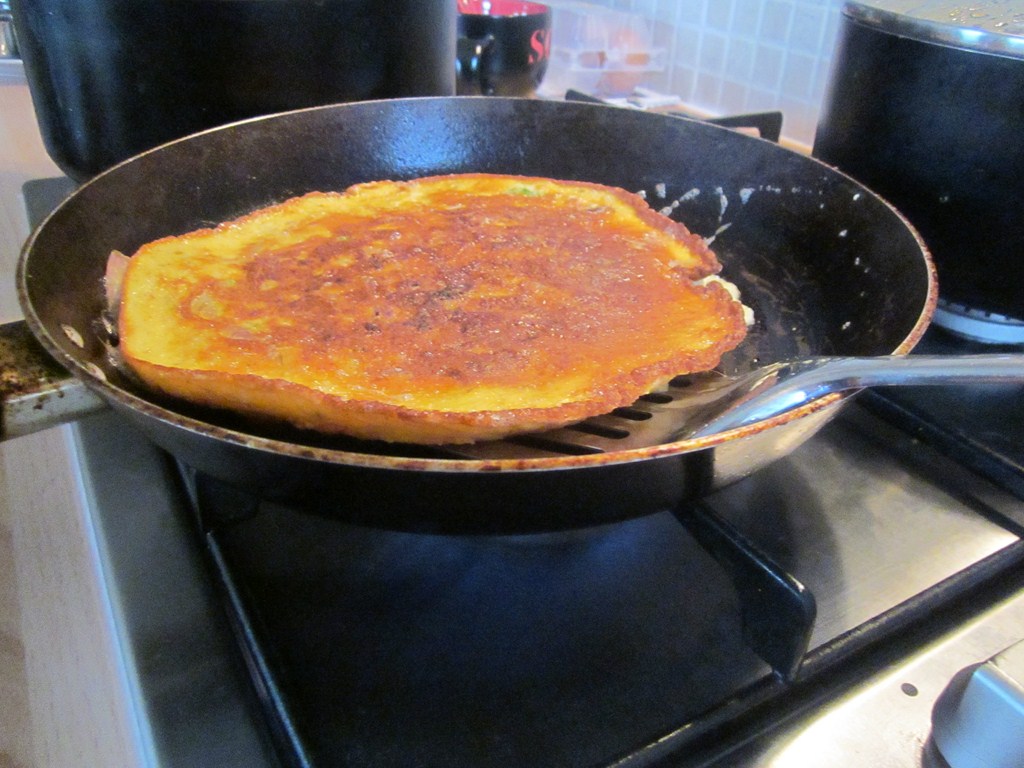
    An Omlette with a twist

    January 23, 2012 by manjirichitnis 4 Comments

    Easy omelette recipe

    What’s life without a bit of a twist I say !

    So here’s one of my “different” omelette recipes, I love eating eggs in all shapes and forms and am more so obsessed with omelettes and scrambled eggs.

    This recipe is for hungry morning times when you have a rumbling tummy and need time to hold the tummy quiet and prepare for rest of the day .It’s a filling , satisfying yummy start to the day , I serve this with 2 slices of toast generously buttered and a large glass of freshly squeezed orange juice to wash it down 🙂

    Ok so you will need the following ingredients:

    2 eggs

    1 medium size of half or a large sized red onion chopped lengthwise

    half a garlic cloves sliced very fine lengthwise again, will tell u why soon..

    1 large chicken sausage roughly cut up

    1-2 green chillies chopped into pieces which are visible n too fine

    Salt and red chilli powder to taste

    Preparation: time 15 minutes

    Chop the red onion lengthwise and so also the garlic clove, why? Because in a omelette the tiny square bits will loose themselves and vanish I like to chimp on and feel the taste of all the ingredients as I eat the omelette and appreciate each and every ingredient, it’s just so much more fulfilling and creates a immense feeling of happiness as a creator of a true mouth-watering masterpiece.

    Sauté the red onion n garlic slices in a generous blob of butter on a pan until the onion starts to reduce turns a mild brown n stays a bit soft so that when you bite into in it releases a sweet burst of onion taste on your palate.

    Toss the above mix into 2 eggs in a bowl and add the sausage ,chopped green chillies and salt and with a  fork mix thoroughly till the eggs begin to froth  and the sausage is all mashed up and mixed into the whole set of ingredients.

    Next take your favourite omelette pan , again add a generous blob of butter on a slightly heated pan , to reduce your guilt use a low fat option , I do – either Lurpack’s latest or any one that you fancy.

    Pour onto this pan the omelette mix and cover for sometime as this helps the omelette fluff up and it looks chubby almost and you start to salivate at the every sight if it 😉

    Turn it when the sides are done n there is just a bit of centre that needs cooking

    I like mine slightly brown if you prefer it to be less well done just flip it sooner n don’t cook it for as long.

    Enjoy it with hot buttered toast and as you bit in enjoy the bits of buttery toasted garlic as they hit your tongue and finely balanced by the yummy red onion caramelised to perfection almost.

    AAAHHH pure omelette pleasure.

    If you do make and enjoy eating this share your partners or husband or children’s reactions, it will surely make me smile.

    Filed Under: Food, Recipe Index, Vegetarian Tagged With: blob, breakfast, butter, caramelise, caramelize, chicken sausage, chillies, chopped, chubbybrown, cloves, cut, delicious, eat, eggs, enjoy, fat, finely, food, food blog, fork, fresh, garlic, green, guilt, hot, immense, ingerdients, juice, low, Lurpack, mashed, masterpiece, mix, omlette, onion, orange, pan, powder, red, salivate, salt, squeeze, tatsy, toast, tongue, twist, yummy

    • « Previous Page
    • 1
    • 2

    Food,travel and lifestyle writer. Photographer.

    • Email
    • Facebook
    • Instagram
    • Pinterest
    • Twitter
    • YouTube

    Categories

    • Baking
    • Breads
    • C.K.P recipes
    • Cakes
    • Chutneys
    • Cocktails
    • Curry – Meat, Seafood
    • Curry – Vegetarian
    • Desserts
    • Events
    • Featured Food and Drink
    • Featured Lifestyle
    • Featured Travel Adventures
    • Food
    • Healthy
    • Home
    • India
    • Indian
    • Kitchen
    • Lifestyle
    • London and rest of U.K
    • Meat
    • Miscellaneous
    • Product Reviews
    • Quick and Easy
    • Recipe Index
    • Rest of the World
    • Restaurant Reviews
    • Salads
    • seafood
    • Sides
    • Smoothies
    • Soups
    • Travel
    • Uncategorized
    • Vegan
    • Vegetarian

    Featured Blogger on Great British Chefs

    GBC_blogger-badge_150x300px    

    Need a New Power Blender?

    13076814_10154185434898293_7387808474266473605_n

    Read Travelfortaste’s interview on Gourmandize UK & Ireland

     Sliceoffme interviewed by Gourmandize UK & Ireland

    Travelsfortaste is Featured on Expats Blog

    England expat blogs

    Read Travelsfortaste reviews on Zomato

    View my food journey on Zomato!
    Privacy & Cookies: This site uses cookies. By continuing to use this website, you agree to their use.
    To find out more, including how to control cookies, see here: Cookie Policy
    Squaremeal.co.uk - Restaurant Reviews

    About me

    Writer and Photographer. Food,Travel & Lifestyle, Blogger and Digital Marketer. Read More…

    • Email
    • Facebook
    • Instagram
    • Twitter
    • YouTube

    Recent Posts

    • Easy Spinach and Pea Soup
    • Grenada Chocolate Festival – Festive Giveaway
    • Royal British Legion Centenary Cookbook – Cooking with Heroes
    • The Instagram Foodie Bag – Must have for all Food Photographers
    • Restaurant quality meat – Swaledale Online Butchers – a review

    Copyright © 2023 · Foodie Pro Theme by Shay Bocks · Built on the Genesis Framework · Powered by WordPress

    This website uses cookies to improve your experience. We'll assume you're ok with this, but you can opt-out if you wish.Accept Read More
    Privacy & Cookies Policy

    Privacy Overview

    This website uses cookies to improve your experience while you navigate through the website. Out of these, the cookies that are categorized as necessary are stored on your browser as they are essential for the working of basic functionalities of the website. We also use third-party cookies that help us analyze and understand how you use this website. These cookies will be stored in your browser only with your consent. You also have the option to opt-out of these cookies. But opting out of some of these cookies may affect your browsing experience.
    Necessary
    Always Enabled
    Necessary cookies are absolutely essential for the website to function properly. This category only includes cookies that ensures basic functionalities and security features of the website. These cookies do not store any personal information.
    Non-necessary
    Any cookies that may not be particularly necessary for the website to function and is used specifically to collect user personal data via analytics, ads, other embedded contents are termed as non-necessary cookies. It is mandatory to procure user consent prior to running these cookies on your website.
    SAVE & ACCEPT