Travels for Taste

Tales of travel and food with a touch of spice

  • Home
  • About
    • In the Press, Published Work and Interviews
    • PR and Disclosure Policy
  • Food
    • Recipe Index
      • Indian
        • C.K.P recipes
        • Curry – Meat, Seafood
        • Curry – Vegetarian
        • Sides
        • Chutneys
      • Healthy
        • Soups
        • Salads
      • Quick and Easy
      • Baking
        • Desserts
      • Meat
      • Seafood
      • Vegetarian
        • Salads
      • Vegan
    • Product Reviews
    • Events
  • Travel
    • UK
    • India
    • Around the World
  • Lifestyle
    • Home
    • Kitchen
    • Restaurant Reviews
    • Miscellaneous
  • Giveaways
  • Work with me
    • Meet interesting foodie entrepreneurs here

Lamb Tasting Press event, London

August 20, 2016 by manjirichitnis Leave a Comment

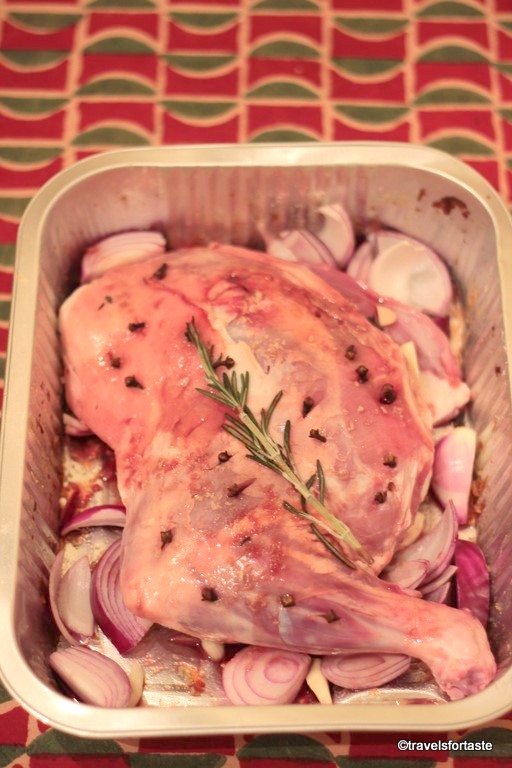
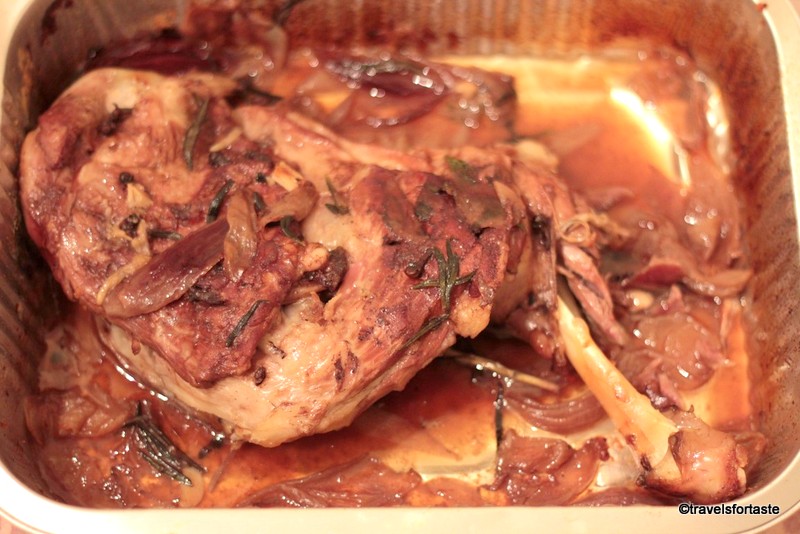
September first week will ring in the second year for British Lamb Week. A campaign that has been launched to popularise the versatile and tasty meat, especially to make it appealing to a younger audience.

Last year I was invited to the launch of this campaign which was hosted at Chef Cyrus Todiwala’s restaurant Cafe’ Spice Namaste’. As the new Lambassador for ‘ Tasty  Easy Lamb’ Cyrus very passionately demonstrated some quick and delicious ways to cook lamb. Lamb is perfect for the summer season as it can be barbecued or grilled and enjoyed al-fresco. Amongst other dishes, we tried a fabulously juicy Blue cheese stuffed lamb burger. The recipe for this by Chef Cyrus is too good not to share with all of you.

BlueCheeseStuffedLambBurger (Copy)

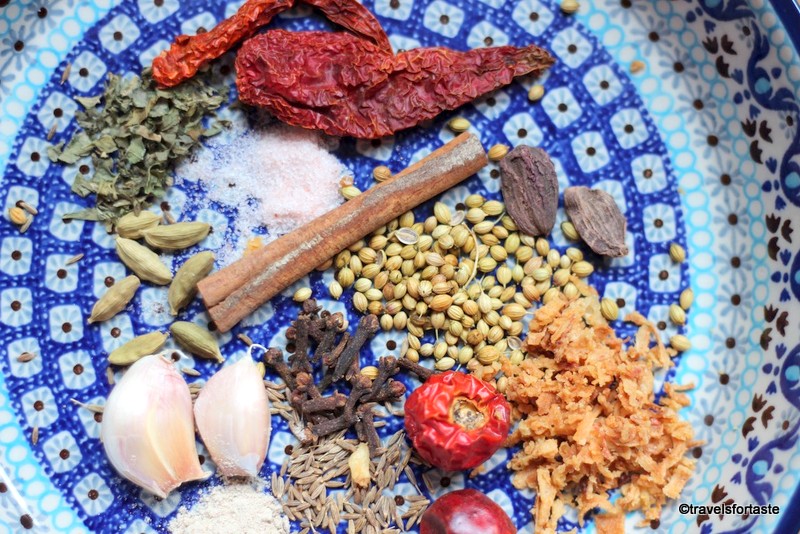
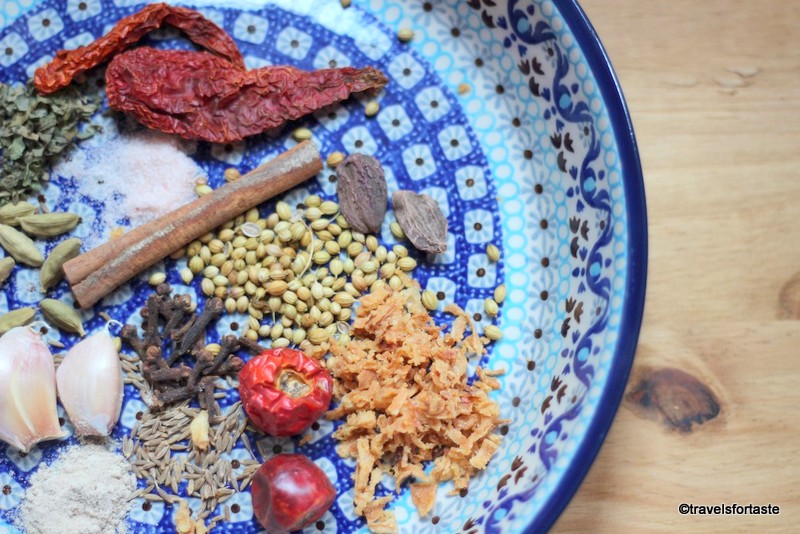
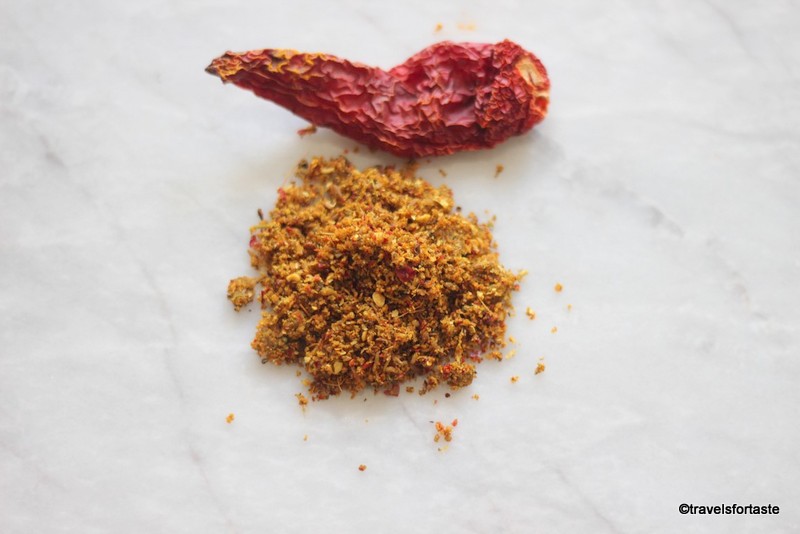
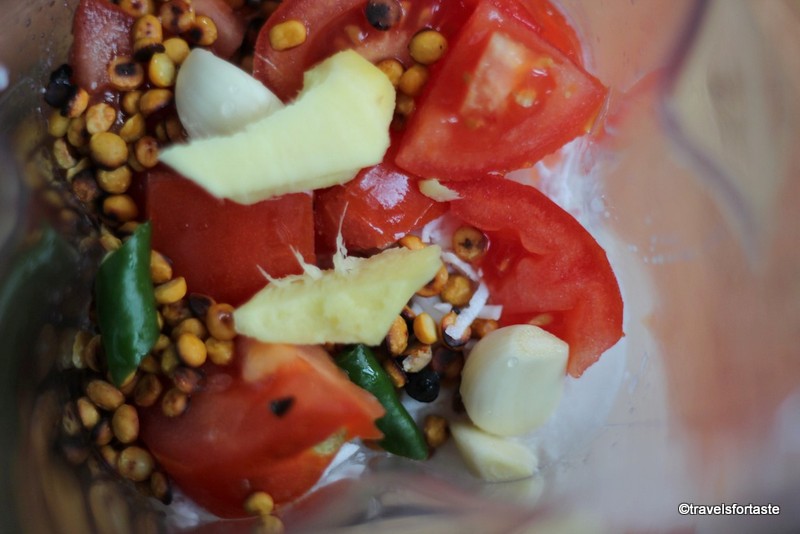
As expected the incredible spice man has incorporated the use of many wonderful spices in this recipe.

Blue cheese stuffed lamb burger recipe by Chef Cyrus Todiwala

Print Recipe
Servings 6 people

Ingredients
  

  • 675 gms lamb mince
  • 1 finely chopped medium onion
  • 2-3 cloves minced garlic
  • 1 x 2inch piece minced fresh ginger
  • 1 slender minced green chilli seeds included
  • 1 tbsp ground cumin powder
  • 1.5 tbsp ground coriander powder
  • 2 tbsp tomato purée
  • 3 heaped tbsp finely chopped fresh coriander
  • 1 tsp Garam Masala powder
  • 1-2 tsp salt
  • 1 tsp crushed black pepper

Forthe Stuffing

  • 150 gms Blue cheese, crumbled
  • 2 Finely chopped green chillies
  • 1 tbsp Finely chopped fresh coriander
  • 2 Finely chopped cloves of Garlic
  • Rolls or bread, to serve

Instructions
 

  • In a large bowl gently mix all the burger ingredients together. Divide into 6 evenly sized burgers
  • In a small bowl blend the stuffing ingredients together and shape into equal-sized balls to stuff the burgers
  • Make an indentation in the centre of each burger with your thumb and fill with a ball of the cheese. Make sure the cheese is completely encased when you form the burger
  • Cook on a prepared grill or barbecue for 6-8 minutes on each side or until any meat juices run clear
  • Serve with your favourite bread or rolls with some sliced tomatoes, onion and lettuce and some relish

We must appreciate that the demand for meat consumption is ever increasing in spite of the many pressures on limited resources of our planet. But as a meat lover myself, I must say, that it is great to know that it is possible to love your planet while continuing to consume meat. One of the ways to do that is to choose to add locally produced lamb to your diet. It is not only easy to cook but also, lamb raised in the English countryside is among the most sustainable in the world.

Sheep and lambs graze on naturally occurring grass which is good for the environment. It helps permanent grasslands to pull in carbon from the atmosphere and store it in the soil. In addition, it preserves water quality and overall helps farms reduce their energy consumption. Along with being sustainable, sheep farming aids employment thereby building communities and supporting the economy.

Here is an easy kitchen cheat sheet to get you started with which cuts of lamb are best for what you want to cook, with handy tips on freezer storage and cooking techniques.

Lamb_Cheat_Sheet

So won’t you be doing to your bit to help protect the lambscape? The results of your kitchen experiments are bound to be lambtastic! Excuse the puns, I couldn’t resist 😉

Disclaimer:  With thanks to AHDB Beef & Lamb and Cyrus Todiwala for having me as a guest. As always, all opinions expressed are my own. I was not required to write a positive review and was not compensated monetarily for this post. Kitchen cheat sheet chart and images provided by AHDB Beef & Lamb.

Filed Under: Events, Food, Meat, Quick and Easy, Recipe Index Tagged With: Agriculture & Horticulture Development Board, AHDB Beef & Lamb, blue cheese lamb burger recipe, Board Bia, British Lamb Week, Cafe' Spice Namaste, climate change, Cyrus Todiwala, eat more lamb, EU, keema, kheema, lamb cheat shet, lamb consumers, love lamb week, meat, sustainability, Sustainable foods, Tasty Easy Lamb, The European Union

Tandoori spiced Grilled Lobster Tails

June 16, 2016 by manjirichitnis 16 Comments

Tandoori spiced grilled Lobster Tails – Juicy and packed with flavour, try this easy and quick recipe on the BBQ

Although the past few days have been quite rainy and grey, we did manage to catch some sun on Sunday afternoon. It was a great opportunity to get the BBQ out and enjoy some grilled seafood.

Our back garden has a little area at the back which is perfect to fire up the grills, it has the benefit of being sheltered from the wind thanks to a massive pine cone tree.

Iceland Luxury Canadian Lobster Tails

I have been eyeing the frozen Luxury Canadian lobster tails in the freezer at Iceland for many weeks now and Sunday presented just the right opportunity to get them out from the freezer and onto the grill. Though I have cheated and used a ready-to-use tandoori masala mix for my recipe, it is dead easy to create the masala on your own. But when faced with only a 2-3 hour window when the sun is shining down on us, I had to act fast!

Iceland Luxury Canadian Lobster Tails

We are big fans of seafood in our family and last week I had worked on creating a very easy spice rub for grilled fish. You can use this spice rub for prawns on skewers or for dusting onto whole fish like those frozen sardines that you get at Iceland too.

Lobster tails on the BBQ

Now let me warn you that though it may appear that we had the perfect BBQ, it was right after a heavy downpour, which can catch you unawares, so it’s best to not wait for the sun to appear but stock up your freezer with your favourites from the frozen range that Iceland has to offer. I always have frozen kale, green peas, and some fish in our freezer. But the sheer variety of vegetables, fish, meat, and meat all ready to go on the BBQ will leave you spoilt for choice. From juicy prawns to succulent kebabs there is something for everyone to choose from. And if the weather does play spoil-sport then my recipe will give great results even when made using a pan indoors.

Iceland Lobster tails
Iceland Luxury Canadian Lobster Tails

Tandoori Lobster Tails

Manjiri Chitnis
Savour ataste of India with my easy to make juicy tandoori lobster tails, buttery andspicy all at once
Print Recipe
Prep Time 15 mins
Cook Time 5 mins
Total Time 20 mins
Course Main Course
Cuisine Indian
Servings 2 people

Equipment

  • BBQ

Ingredients
  

  • 1 pack from Iceland Frozen lobster tails
  • 2 tbsp Melted Butter –
  • 1 tbsp Ready tandoori masala mix
  • 1 Onion for the garnish
  • 1/2 Lime for the garnish

Instructions
 

  • Ideally, allow the lobster tails to defrost overnight in the refrigerator, but with our unpredictable weather try my easy method for an instant defrost – hold the lobster tails under running tap water to remove any ice clinging to the tails
  • Then place them into a zip-lock pouch and hold it under running water. Allow to rest for about 10 minutes and then repeat the process twice
  • Use a sharp kitchen knife or scissors and cut a u-shaped piece of the hard shell from the back of the lobster shell to reveal the vein. Ensure you remove the entire vein. Alternatively, after the BBQ, the shell comes off more easily and the vein is visible more clearly as it is dark black in colour and comes off very easily. Either way, just ensure you remove the vein before tucking in
  • Melt the butter in the microwave and add the tandoori masala powder into it
  • Use a brush to apply the spice mix generously to the fleshy bit of the lobster tail
  • Allow the marinade to work its magic while the BBQ gets going
  • Place the lobster tails fleshly bit down first
  • The tails begin to turn a bright orange colour when turned over, just ensure that you do not overcook as the fleshy bit will taste very dry
  • Hot off the BBQ pour some melted butter and squeeze half a lime over the tails
  • Serve with thin rings of sliced red onion and corn on the cob smothered in chilli butter
Lobster tails
Lobster tails

I would recommend serving grilled seafood like fish, lobster tails, or prawns on skewers along with grilled corn on the cob. Iceland freshly frozen mini corn cobs – 625gm for £1 is such a budget-friendly delight to have in the freezer.

 Tandoori Lobster Tails Recipe by Manjiri of Travelsfortaste
Tandoori Lobster Tails Recipe by Manjiri of Travelsfortaste

The Power of Frozen gives you quality and value that is not expected for luxury seafood especially lobster tails. All the natural flavours are sealed in and when you bite into a juicy lobster tail you can rest assured that the nutritional goodness is intact.

Tandoori Lobster Tails Recipe by Manjiri of Travelsfortaste

To complete our seafood BBQ feast, I choose Iceland’s 4 haddock frozen fillets. It was a tough choice compared to the 4 boneless Atlantic salmon steaks but personally, I love haddock and how it takes up Indian spice rub flavours over other fish.

Iceland haddock fillets

Find the recipe for my spice mix here

Tandoori spiced BBQ Haddock recipe by Manjiri of www.travelsfortaste.com
BBQ haddock fillets
This post was commissioned by Iceland. As always all opinions are my own.

Filed Under: Food, Recipe Index, seafood Tagged With: #poweroffrozen, Barbecued lobster tails and haddock fillets, frozen Luxury Canadian lobster tails, Grilled seafood feast, Iceland freshly frozen mini corn cobs, Iceland's 4 haddock frozen fillets, Power of Frozen

Homemade Spice Rub

June 16, 2016 by manjirichitnis Leave a Comment

Spice rub for everything from Vegetables to meat and seafood

Elevate the taste profile of your grilled or roast vegetables ( or seafood or meat) with this delicious homemade spice rub.

Now I have tried this spice mix on broccoli, kale, and roast potatoes and it always works wonders. But we have loved it most with fish. Grilled, BBQ’ed, fried, steamed, or baked – we love eating fish in our house and I have created my own recipe for an Indian spice rub. I used this on haddock fillets on the BBQ this Sunday and the result was very satisfying. Even with frozen fish fillets straight out of the freezer onto the hot grill, the spice mix hit all the right notes.

Spices - fragrant, warm and fresh

It was incredibly easy to create this spice rub at home using my Optimum G.21 Platinum blender, the panel has six pre-programmed functions which are a real no brainer and one of those functions is ‘Grind’. I try and use my Froothie blender as much as possible and not just for my morning smoothies, it has just made my life that much simpler!

Homemade Spice Rub

Manjiri Chitnis
Homemade spice rub – Versatilespice mix works perfectly well for vegetables like cauliflower, mushrooms,potatoes. Great with chicken chicken , lamb and seafood especially for fishsteaks and prawns
Print Recipe
Prep Time 2 mins
Total Time 2 mins
Course Side Dish
Cuisine Indian
Servings 2 people

Equipment

  • High-speed blender

Ingredients
  

  • 1/4 tsp Peppercorns
  • 2 Cloves
  • 1 Dry Kashmiri Red Chilli
  • 1 Badi Elaichi or black cardamom
  • 3 Green cardamom – without the outer green pod
  • 2 cloves Garlic peeled
  • Cinnamon stick – roughly the length of the tip of your thumb
  • 1/2 tsp Turmeric powder
  • 2 tsp Cumin/ jeera
  • 1 tsp Amchoor powder / dried mango powder
  • 1 tbsp Kasoori methi
  • 1 Heaped tbsp fried onion
  • 1 tbsp Coriander seeds lightly roasted on a pan
  • 1 Whole round Red Chilli
  • 1/2 tsp Himalayan pink salt
  • a tiny pinch of Asafoetida

Instructions
 

  • Add all ingredients into a grinder and blend till you get a grainy consistency
  • Do not grind to a very smooth paste because the texture this consistency will lend to the fish, will hit the right spot on your palate. A finer texture I think would work better for meat
  • Though this spice rub is suitable for freezing, since it contains garlic and fried onion, I would not advise keeping in the freezer for over 10-15 days
  • If you make a small batch and little remains, try adding into your curry for a lift in flavour
  • If you do not deal well with spicy red chilli flavours, then rule out the whole round red chilli completely and instead add a small pinch of paprika just for a hint of flavour
Keyword Spice mix

Homemade spice rub for grilling vegetables, meat, and seafood

These quantities yield enough spice mix for 2 medium-sized fillets with a little leftover. If you want to use it for 4 or 6 fillets simply double the quantities.

Fresh spices

Why not try my recipes for Tandoori spiced grilled Lobster tails and Haddock fillets with this spice rub?

Homemade spice rub

*This post has affiliate links.

Filed Under: Featured Food and Drink, Food, Indian, Recipe Index, seafood Tagged With: cardamom pods, cinnamon, cloves, coriander seeds, cumin, dried red kashmir chillies, fried onion, garlic, Homemade Spice Rub, kasoori methi, recipe development, red chilli, special spice rub for sea food, travels for taste recipe development

Tomato and Coconut Chutney

April 27, 2016 by manjirichitnis 18 Comments

Tomato and Coconut Chutney recipe, a perfect little treat to scoop up with your soft idlis and crispy dosas

A freshly made coconut chutney served with steaming hot idlis or a crisp dosa hot off the pan is a thing of delight.

There are many varieties of this coconut chutney, but I prefer the one with tomatoes. It just adds that much more depth of flavour and dimension.

This easy recipe becomes even more fun to create when using a powerful blender like my new Optimum G.21 Platinum blender. Why? Because the speed and convenience of having a pre-set function to grind means the job is done at the press of a button.

Besides the consistency and texture of the chutney is perfect.

Ingredients for tomato coconut chutney

If you are using frozen grated coconut as I do, it will look like this

Frozen ready grated coconut

Tomato and Coconut Chutney

Manjiri Chitnis
Fresh and delicious this tomato and grated coconut chutney adds a pop of colour and vibrancy to your dishes
5 from 3 votes
Print Recipe
Prep Time 2 mins
Cook Time 2 mins
Course Side Dish
Cuisine Indian
Servings 6 servings

Equipment

  • Blender/Mixer-Grinder

Ingredients
  

For grinding the chutney

  • 55 gm Grated coconut – 1/4 cup
  • 1/2 large Tomato or 1 small
  • 3 Kashmiri red chillies dried
  • ½ Green Chilli
  • 1 tsp Chana dal or yellow Bengal gram split and without skin
  • Ginger – a small knob about the size of your thumbnail
  • 2 Small cloves Garlic – without skin
  • Salt as per taste
  • Water – add according to consistency

For the tadka or tempering

  • 1 tbsp Oil
  • 5 Curry Leaves
  • 1 tsp Mustard seeds
  • 1/2 tsp Urad dal (split black lentil without skin)

Instructions
 

  • Heat a pan on a medium flame and pan roast the chana dal till it turns a dark brown colour, do not allow it to burn, gently keep moving it on the pan with a wooden spatula. Set aside to cool
  • Halve the tomato and add into the blender
  • Add the freshly grated coconut, I buy a frozen packet from my local Indian store, have a look at the photograph in my post
  • Remove the skin of the ginger – this is best done using the back of a spoon if the ginger is fresh – it will come off easily, of not use a knife
  • Now add the garlic cloves, Kashmiri red chillies, and salt. You can increase or decrease the number of Red Chillies depending on how hot you want the chutney to be
  • Add the roasted chana dal which should have cooled down by now
  • Add about one and a half tbsp water and grind to a thick coarse paste-like consistency.
  • The water level depends on how you would like the consistency to be. I generally add a little more water after the first grind and give it one more pulse in my Froothie to get a better pouring consistency
  • Decant the chutney into a bowl
  • Heat the oil in a kadhai or saucepan and add the mustard seeds in the hot oil
  • Once the seeds begin to pop add the urad dal and let it brown, then throw in the fresh curry leaves
  • Pour this hot tadka mixture onto the chutney and serve fresh with steaming hot idlis or dosas
Keyword Chutney

A peek inside the blender ..

Ingredients for tomato coconut chutney

If you are not using the Froothie power blender, then chop the chillies roughly into small pieces, repeat with the ginger and garlic too.

This is because the sharp blades of the Optimum G2.1 Platinum blender will be able to easily grind the whole ingredients, a task that a regular mixie will struggle with.

I add the dried red Kashmiri chilli for its colour as well as flavour. In many of my curries I just these chillies whole to add a hint of flavour. But remember once made into a paste these chillies release their hidden potency – it’s a very different beast then and the heat can be really intense. So if you don’t deal with heaty – spicy chillies well then use only a half of a Kashmiri chilli in this chutney. It will still add a dash of colour and flavour without scathing your palate

And the green chilli gives it necessary flavour which I find very distinctly pungent and traceable when I eat this chutney, if it was missing I would know instantly and would miss it.

Tomato coconut chutney

The fresh taste of the chutney and the crunch of the curry leaves is simply irresistible, the tomatoes add just the right amount of tang to this beautiful chutney. Typical to the South of India this recipe is something that most families make with variations of their own. Some even prefer to add some onion or roast the coconut before adding to the blender. whichever recipe you use this chutney will never go out of fashion.

Tomato coconut chutney

Need an easy recipe for steam idlis, check out my recipe here

*I am an ambassador for Froothie and was sent a Froothie Optimum G2.1 Platinum blender for review. This post has affiliate links.

Filed Under: Chutneys, Food, Indian, Recipe Index Tagged With: chana dal, curry leaves, dosa chutney, freshly grated coconut, garlic, ginger, grinding with Froothie optimum G2.1, idli chutney, Ingredients for tomato coconut chutney, south indian recipe, tomatoes

Steamed Idli batter recipe + Froothie Optimum G2.1 Platinum blender review

April 14, 2016 by manjirichitnis 14 Comments

When I first moved to the U.K the one kitchen appliance that I really missed was my ‘mixie’ I relied heavily on my old beat up noisy mixie or mixer as it is popularly known as, especially, when I wanted to make chutneys or grind soaked grains. In the past five years, I have tried several blenders and food processors and never really had satisfying results.

So I ended up buying many different types of blenders, right from a handheld blender worth £15 to an expensive and large, space-occupying food processor with several attachments, most of which I never use for various reasons. One of them being the pain involved in washing up – yes am lazy that way 😉

Fast forward to 2016 – When I was offered the opportunity to become an ambassador for Froothie UK and sent the new and shiny high-speed Optimum G2.1 Platinum blender to test and review, the very first thing I wanted to try was making an idli batter with homemade coconut chutney.

Optimum G2.1 power blender

Perfect kitchen companion for dry and wet grinding

I am delighted to announce that the results are really very satisfying. The 6 blade assembly makes it very easy to grind grains so my soaked rice and urad dal mixture reached the right consistency in no time!

I am so relieved that I do not have to keep blending and adding more water than required to reach the right consistency for my idli and dosa batters. Even bigger relief is in knowing that freshly grated coconut can be turned into a fabulous chutney within seconds. This especially is a blessing, considering that my parents had to lug a heavy mixer all the way from India, just so that I would stop complaining about how difficult it is to grind dals or make coconut chutney. Sorry, Baba for all the trouble you had to go through to lugging that device all the way to London!

6 blade assembly

When you are looking to purchase a high investment appliance like a power blender, comparisons are a part of the process. Froothie has made it easy for you to make that decision with this table comparing the  Optimum G 2.1 Platinum blender to a Vitamix – Pro series 500.

Optimum G.21 vs Vitamix

Ease of Use, sturdy jug, and intelligent overload protection best part about the Optimum G2.1 Platinum blender though is the ease with which the sturdy Eastman Tritan Copolyester BPA Free jug sits on the base – no twisting and turning and waiting to hear a click – just simple fit, plug and play. I recollect the horror I felt when the plastic edge of my food processor chipped while I struggled to fit it into the grooves of the base, only days after spending quite some money buying it, about three years ago. What a nightmare that was.

The Optimum G.21 also comes with intelligent overload protection meaning the built-in sensor automatically switches off the motor in case, over-heating is detected. This prolongs the Optimum’s operating life while pre-empting and avoiding breakdowns. If the blender should ever trip, all you have to do is simply switch it back on.

6 pre-set functions

Hot soups, frozen desserts and healthier smoothies in minutes

The idea of making a bowl of soup in minutes is so appealing and especially to a person like me who is trying very hard to loose weight. Not only am I trying to loose weight by eating healthier am also helping my husband throw off excess weight faster by making better food choices. It is a boon to be able to relish fresh homemade soups every single day in less than ten minutes thanks to the heat created by friction.

Nothing beats smoothies packed with fiber and that is something you can enjoy daily, fruits go into this beauty with skin and without chopping  – yes you read that right. Brilliant, isn’t it? A heavy-duty tamper tool has also been provided for improved processing and mixing.

If you need recipe inspiration your blender comes with a recipe book with 80 inspiring ideas for you try at home.

Nut butter, sauces, dips, flours – make everything at home

Throwing a party and need hummus now? I made a large bowl of smoked red pepper hummus over the weekend for a big party we threw for our dearest friends (recipe for humus coming up soon)

I am yet to make any flour in new Optimum G2.1 but that is because I have been so obsessed with soups, smoothies, and chutneys! Buckwheat flour is ready in 10 seconds flat – need to see a demo? Watch this video on the Froothie TV channel, they have a whole host of fab videos from recipes to comparisons with other brands and tests too.

The optimum now comes with a free nut milk bag too as part of the package.

Complete control at your fingertips

I am quite smitten with the latest offering from Froothie, and it’s not just the smart good looks but the 6 pre-set programs on a fabulous modern digital panel, pulse and timer settings that allow me to be in total control at the push of a button, that make this vortex blender so very appealing. It truly is the only blender you will ever need. Especially, if like me, you too have spent a lot of money on experimenting with various types of blenders. The 10-year warranty is an added bonus. You can order this fabulously stylish and highly efficient power blender via this link

Why not make the most of a great limited time offer which expires on the 30th of April 2016 and save £170 on your purchase? Get the Optimum G2.1 Platinum blender for £429 instead of £599. To ensure that the ordering is smooth and delivery process hassle-free Froothie U.K uses a next day courier service and you get your blender delivered with 24-48 hours. There’s also a 30 day trial with a money-back guarantee which includes return postage costs, but I am pretty sure that won’t be necessary!

Ok now for my recipe, I have followed the late master chef Tarla Dalal’s easy to follow recipe, for my Steamed Idli’s recipe but have adjusted the proportions to make approximately 15 idlis – the number will vary based on the size of the moulds.

Idli moulds

Steamed Idlis

Manjiri Chitnis
A Quintessential south Indian delicacy which makesfor a guilt free meal considering it is steamed and wholesome
Print Recipe
Prep Time 10 mins
Cook Time 20 mins
Total Time 30 mins
Servings 15 Idlis

Ingredients
  

  • 1/2 cup Urad dal – split black lentils without skin
  • 2 cups Par-boiled rice/ idli rice
  • 1/2 tsp Fenugreek seeds- methi seeds
  • Salt as per taste
  • Water to adjust consistency
  • Low-calorie oil spray to grease the idli-moulds
  • Coconut chutney to serve with the idlis

Instructions
 

  • Soak the rice in water in a bowl and the fenugreek seeds and urad dal in another. Add enough water to allow the dal and rice to absorb the water and then some
  • Soak for a minimum of 4 hours
  • Drain the excess water from the rice and add in the blender – enough to get a pouring consistency
  • Repeat with the urad dal and fenugreek seed mixture – this mixture will get very thick while blending so you may need to add in more water as required. This mixture gets frothy while blending which is perfectly natural
  • Mix both batters and set aside in a warm place to ferment – it took my batter 24 hours to ferment. Fermentation slows down when the temperature is low
  • Season the batter with salt after it has fermented
  • Grease idli-moulds and spoon the batter into the moulds
  • Steam the idlis in a pressure cooker or idli-steamer for about 12 minutes.
  • Take care while removing the hot idlis from the pressure cooker, to avoid steam burns. Serve the steaming hot idlis with coconut chutney
  • Serve as a breakfast dish for a weekend treat, actually, this is dish ideal for any meal
Steamed idli recipe by Manjiri of www.travelsfortaste.com

*I am an ambassador for Froothie and was sent a Froothie Optimum G2.1 Platinum blender for review. This post has affiliate links. No monetary compensation was offered for a positive review. As always all opinions expressed here are entirely my own and I only endorse products that I love and have experimented with.

Filed Under: Food, Indian, Product Reviews, Recipe Index Tagged With: Steamed Idli batter recipe + Froothie Optimum G2.1 Platinum blender review

Healthy superfood and smoked salmon salad

March 10, 2016 by manjirichitnis 8 Comments

I am on a road to discovering and working with various ideas to create and eat lighter, healthier meals and on one afternoon a few days ago I was faced with a dilemma. The kind of dilemma where one has an apparently full vegetable tray in the refrigerator but consisting of a large variety of this and that. So the salad recipe below is my way of utilising all those beautiful ingredients, preventing food waste, making the most of what my store cupboard essentials, and coming up with a healthy meal.

I love smoked salmon so I always seem to have some in my refrigerator and also had some antipasti ingredients in what remained for a large mix-n-match box from my last visit to Whole Foods.But the best part was finding some good salad leaves which were fresh and the savoy cabbage that would die soon

Healthy superfood and smoked salmon salad

I do hope you can create and enjoy something similar:

Healthy superfood and smoked salmon salad

Healthy superfood and smoked salmon salad

Manjiri Chitnis
A beautiful medley of flavours tocreate one gorgeously healthy and filling meal
Print Recipe
Prep Time 2 mins
Total Time 2 mins

Ingredients
  

  • 4 small Smoked salmon slices
  • 1.5 tbsp Shelled hemp
  • 1 tbsp Marinated chopped artichoke hearts
  • 2 Roasted marinated mini red peppers stuffed with garlic
  • 1/2 small Red onion chopped fine
  • 2 -3 Red chicory leaves
  • 2 Savoy cabbage leaves
  • 1 tbsp Alfalfa sprouts
  • 4-5 Baby courgettes sliced lengthwise
  • 1 tbsp Mixed nuts – cashews walnuts, raisins
  • Black olives – to garnish
  • Chocolate balsamic vinegar to drizzle and season

Instructions
 

  • In a bowl add the shelled hemp, chopped onion, salad leaves- red chicory and savoy cabbage, Alfalfa sprouts, Baby courgettes and add a generous slosh of Chocolate balsamic vinegar
  • On a bed of salad leaves arrange the help and onion mixture and place the smoked salmon slices
  • Arrange the mini red peppers stuffed with cheese, artichoke hearts around the salmon.
  • Garnish with mixed nuts and enjoy

And since I am hosting #CreditCrunchMunch for March 2016 I am linking up this recipe made using leftover ingredients and some vegetables that would otherwise have wilted and died like cabbage, or the last bits from my antipasti box – a thrifty recipe idea I say! #CreditCrunchMunch is a fab link up started by Helen of Fuss free flavours and Camilla of Fab food for all. Don’t forget to link up your thrifty ideas with my guest hosting post here.

Credit-Crunch-Munch-Just-Pic
Healthy superfood and smoked salmon salad

Filed Under: Food, Healthy, Recipe Index Tagged With: Alfalfa sprouts, artichoke hearts, Baby courgettes, Black olives, cashews, Chocolate balsamic vinegar, diabetes friendly recipes, Healthy superfood and smoked salmon salad, raisins, Red chicory leaves, Red onion chopped fine, roasted mini red peppers stuffed with garlic, Savoy cabbage leaves, Shelled hemp, smoked salmon, Walnuts

Flu-fighting Chinese chicken noodle soup

February 20, 2016 by manjirichitnis 17 Comments

Last week the flu bug got to me, high temperature, sore throat and runny nose – the works. What followed is an onslaught of medication and most of the week seems like a blur. All I know is that in the fever-induced delirium, I tried every possible home remedy that my mother and grandmother have tried on my sister and I growing up.

Now along with Chinese New Year and Valentines, my husbands birthday and our anniversary follow in quick succession. Imagine spending all these wonderful shivering under a duvet sniffling into a tissue. Tough, eh?

So when Blue Dragon sent me this fabulous bunch of ingredients as part of a Chinese new year challenge, I really could only think of one thing – a grand 3-course home-cooked Chinese meal which is not just ready in 30 minutes flat but incorporates a delicious and healthy flu-fighting soup and healthier options for popular Chinese dishes.

Having had every possible type of mild soup under the sun in the past few days, I am finally starting to get my taste buds back. Some fiery chilli to fire up my wok was definitely in order.

Blue Dragon store cupboard essentials

If you like me are looking to create a healthy 3-course Chinese meal along with a flu-fighting formula using just one wok and some basic kitchen equipment then look no further. Why? Because – The comforting combination of soupy noodle broth and chicken with vegetables is sure to go down a treat – whether you really are fighting the flu or simply looking for a boost to your immunity. This soup will not let you down.

The Egg fried rice with candied salmon chunks is a treat minus the guilt of a greasy takeaway. Stir-fried vegetables in black bean sauce are amongst the most popular items in any menu and serving them with smoked tofu is one of my favourite treats. I make this stir fry very often and having Blue Dragon black bean sauce on hand is very handy as it gives a very authentic taste to this popular dish.

This meal can be prepared in 30 minutes flat if you ensure that all the prep is done beforehand. The best part is if you have trusty good wok then you can literally breeze through this process with thanks to the handy products from Blue Dragon.

Flu-fighting Chinese chicken noodle soup

Manjiri Chitnis
Flu-fightingChinese Lemongrass chicken noodle soup – great as a starter and even better asa main course.
Print Recipe
Prep Time 1 min
Cook Time 9 mins
Total Time 10 mins
Course Main Course
Cuisine Chinese
Servings 2 people

Ingredients
  

  • Blue Dragon light soy sauce – as per taste
  • 2 nests Blue Dragon wheat noodles
  • 500 ml good quality fresh Chicken stock
  • 250 gm Chicken thigh pieces – cut into long thin strips
  • 1/2 Carrot peeled and chopped
  • 2 leaves Cavolo nero
  • 1 handful Baby Spinach leaves
  • 4 large green Pak choi leaves
  • 3 large bulbs of Garlic chopped fine
  • a stub of garlic about half the size of your thumb slit into thin long strips
  • 1/2 Lemongrass stalk separated
  • 4-5 strips of a spicy red chilli
  • 2 tsp sesame oil
  • some fresh Coriander for seasoning

Instructions
 

  • Boil approximately 2 large mugs full of water in the kettle
  • Place the Blue Dragon wheat noodle nests in a saucepan and pour the boiling water onto it, bring to a boil on a medium flame
  • Drizzle some olive oil and sprinkle some salt while the noodles are boiling.
  • Cook until a little more than al dente’
  • Strain and wash under cold water and set aside, use the same saucepan to start boiling the rice for the egg fried rice. This allows you to save time.
  • While the noodles are cooking, fire up the wok
  • When it begins to smoke, lower the heat, and add the sesame oil
  • Sauté the chopped garlic, ginger, and chillies – the holy trinity of Chinese cooking along with the lemongrass just until the fragrance is released.
  • Now add the Cavolo Nero and pak choi and stir for a few seconds allowing the fragrant spices to the greens and the oil to coat them
  • Then add the stock and the chicken strips and carrot. Add some water to allow a proper broth to form for all the ingredients.
  • Add salt to taste
  • Cover and the wok and cook on medium-high until the chicken is cooked through
  • Remove the soup into another saucepan and wipe down the wop using kitchen roll
  • Set wok aside to cool
  • When ready to serve, refresh the noodles by pouring some boiled water onto them
  • Add noodles into each bowl and ladle the steaming hot soup onto the noodles
  • Garnish with sprigs of fresh coriander and serve immediately
Keyword Flu-fighting Chinese Chicken noodle soup
Flu-fighting chicken noodle soup

Black bean tofu and green veggie overload stir fry

Manjiri Chitnis
Black bean tofu and green veggie overload stir fry
Print Recipe
Prep Time 2 mins
Cook Time 6 mins
Course Main Course
Cuisine Chinese
Servings 2 people

Ingredients
  

  • 120 gm Blue Dragon stir fry sauce – 1 pouch
  • 220 gm of mixed green vegetables
  • 3 large bulbs of garlic chopped fine
  • 1/2 Ginger – thumb-sized -slit into thin long strips
  • 1/2 Lemongrass stalk separated
  • 1 Red chilli strips
  • 1.5 tbsp sesame oil
  • 6 – 8 bite-sized chunks of smoked tofu
  • 1/4 tsp white sesame seeds to garnish

Instructions
 

  • After thoroughly wiping down the wok, place on high heat and add the sesame oil
  • Flash fry the ginger, garlic, and chillies
  • Turn the heat down to medium and stir continuously so to not allow the spices to burn
  • Stir fry the smoked tofu pieces for about 2 – 3 minutes and remove the tofu into a bowl
  • The mixed green vegetables I used included- green Pak Choi (5-6 small leaves), Cavolo Nero (2 big leaves), sugar snap peas and green beans -about a handful, 2 large sprigs of broccoli
  • 6.
  • Fold the Cavolo Nero leaves into half and cut into long horizontal strips
  • then add the entire contents of the Blue Dragon black bean sauce pouch
  • Stir in the sugar snap peas, broccoli, and green beans, cook for about two minutes
  • Then add the Pak Choi and Cavolo Nero and stir fry so that the leaves still remain crunchy, do not overcook as the stir fry will loose its essence if you do
  • Transfer from wok to a serving plate, top with the fried smoked tofu
  • Set wok aside to cool
  • Sprinkle some white sesame seeds to garnish
Vegetables and smoked tofu stir fried in black bean sauce

Mirin Soaked Salmon steaks in sweet chilli sauce

Manjiri Chitnis
Mirin Soaked Salmon steaks in sweet chilli sauce
Print Recipe
Prep Time 2 mins
Total Time 2 mins
Course Main Course
Cuisine Chinese

Ingredients
  

  • 2 tbsp Blue Dragon sweet chilli sauce
  • 1 tsp sesame oil
  • 1 fillet of salmon cut into 4 big chunks – approximately 130 gm

Instructions
 

  • Leave the salmon chunks to soak in a generous amount of mirin before starting out on the soup
  • After the stir fry is done, wipe down the wok with kitchen towels and place it on low heat.
  • Cook the salmon in the hot oil until each side is down, should hardly take 30 seconds each side, given that the wok is already hot and the delicate fresh fish cooks very quickly too
  • Pour Blue Dragon sweet chilli sauce on the fried salmon chunks, the heat of the wok will partly caramelise the sauce of the salmon forming a thin crispy crunchy coating
  • Remove immediately into a clean bowl and set aside until ready to serve with the egg fried rice
  • Set wok aside to cool
Egg fried rice with mirin soaked sweet chilli salmon

Chinese egg fried rice with peas

Manjiri Chitnis
Chineseegg fried rice with peas
Print Recipe
Prep Time 5 mins
Total Time 5 mins
Course Main Course
Cuisine Chinese
Servings 2 people

Ingredients
  

  • 1/2 cup brown rice and wild rice mix
  • 1 medium egg
  • 1/2 a shallot sliced lengthwise
  • 1 heaped tbsp green peas
  • Water to boil the rice

Instructions
 

  • In the same saucepan used for cooking the noodles, rinse and cook the washed rice. The trick to cooking perfectly fluffy rice each time is to use exactly double the amount of water to the quantity of rice used. That is my thumb rule and it never fails me
  • Once the rice is done set the saucepan aside
  • Wipe down the wok after preparing the fish, you may need to use another wooden spatula to scrape off the sticky bits from the wok before starting out with the fried rice
  • Crack an egg into the wok set on a medium flame
  • Stirring continuously scramble the egg and add the chopped shallot, spritz some oil onto the wok to cook the shallots
  • Ensure you keep stirring so that the egg doesn’t get lumpy and overcooked and the shallot doesn’t burn
  • Add Blue Dragon light soy sauce and stir well
  • Then add the cooked rice, season with some salt and stir and mix well
  • Cook for under a minute on high heat and add in the peas and mix
  • Take the wok off the heat and set aside
Egg fried rice with mirin soaked sweet chilli salmon

After the soup, to assemble the meal, plate the rice and garnish with some spring onion greens, string one large juicy piece of salmon onto a small wooden skewer and place on the rice.

Top with a side of the stir-fried greens and smoked tofu in black bean sauce.

Serve the flu-fighting Chinese Lemongrass chicken noodle soup in generous amounts – piping hot. For me, the noodle soup was a meal on its own. But for my husband, the stir-fry and egg fried rice with a juicy and crunchy chunk of salmon made his day!

I truly believe that to be able to create some magic in your kitchen with the right ingredients and some basic tricks under your hat is not as difficult as it may sound. I am so happy that I was able to create a 3-course delicious meal in 30 minutes flat – but am most proud of my flu-fighting soup recipe. This one is going to appear on my weekly menu throughout winter now. After all, who can deny that warding off the flu bug cannot be done in a more delicious and fun immune boosting way?!

*This post is an entry to the Foodies100 Chinese New Year recipe challenge sponsored by Blue Dragon. The range of Blue Dragon products is available in all major supermarkets at an RRP from £0.69. To find out more, visit www.bluedragon.co.uk

Flu-fighting chicken noodle soup

*With thanks to Blue Dragon for sending me samples for review. No request was made for a positive review. Sponsored post. As usual, all opinions expressed here are entirely my own.

Filed Under: Food, Healthy, Quick and Easy, Recipe Index

Roast Lamb Shoulder

January 7, 2016 by manjirichitnis 6 Comments

Succulent, delicious and easy to cook – Roast shoulder of Lamb

Happy New year everyone! 2015 has sped past at lightening pace and lots has happened offline and as well as online too. My blog has a new name and a new home and so do we, we finally decided to move ur from our tiny but very pretty flat to a new place with a proper kitchen for a change! Exciting times! I was not blogging as frequently as I would have liked to though but hope to put that behind me and regularly share my food and travel adventures with all of you. Speaking of travel I am happy to report that I started 2015 with a month-long trip to India and visited Chennai and Pondicherry apart from my usual trips to Mumbai and Pune! Very exciting and I have finally managed to write up some posts about Pondicherry – more later! We also did our first ever trip across the pond to the Big Apple and managed to squeeze in four days at Washington D.C too – was so exciting, but the best bit, of course, was that we spent Thanksgiving with our family and caught up with friends after many years – what a treat! 2015 was kind to me in other ways too, I was invited to many foodie events and met some really cool master chefs, tried exotic food and reviewed many restaurants and bars too – will soon share more as the year unfolds 🙂

On the very first of the New Year, I experimented with a cut of lamb that I haven’t before – a large shoulder of lamb that I decided to roast. Here is an easy to follow a recipe, the only tough bit – waiting for the meat to cook 😉

I wanted to use a cheaper cut than the usual ones, a lamb shoulder seemed like a good place to start – this joint cost me £7.99 per kilo from my local butcher. For that price, this cut gives some much more ‘bang for your buck’

Lamb’s shoulder is quite fatty so there is no need to add too much oil, the meat pretty much cooks in its own fat and the port wine I have used adds deep rich flavours to this very succulent cut of meat. A joint of this size also allows for a lot of leftovers and therefore a great way to make a range of other recipes – think stews, casseroles, curries, pulavs, tikkis (a mashed potato fritter stuffed with meat – a great tea time treat) and so many more. Great on the pocket and a great choice for winter recipes.

Try cooking with this highly underrated cut of Lamb today

How to make a great roast lamb shoulder

I am happy that the baster I purchased for my Christmas roast chicken is proving to be very handy. I have to say that I am so proud that my Roast Chicken turned out absolutely fab and delicious – it was another experiment and the pork and cranberry stuffing and all the sides were made at home by me with lots of chopping, peeling and cutting help by the OH.

Juicy roast Lamb shoulder recipe

Easy recipe for Roast shoulder of lamb

Roast Lamb Shoulder

Manjiri Chitnis
Deliciously succulent joint of lamb – cheap and cheerful roast
5 from 4 votes
Print Recipe
Prep Time 5 mins
Cook Time 2 hrs 35 mins
Total Time 2 hrs 40 mins
Servings 2 people

Ingredients
  

  • 1.5 kg Lamb Shoulder
  • 2 medium-sized red onions
  • 15 -18 cloves
  • 6- 8 cloves of garlic
  • Sea Salt as per taste
  • 500 ml A generous glug of ruby port wine – approximately a pint
  • handful Fresh rosemary
  • 2 – 3 spritzs Oil – from a spray bottle

Instructions
 

  • Wash the lamb shoulder and place it on a tray.
  • Make cuts on both sides with a knife.
  • Peel and cut the garlic cloves in half. Stud the joint of lamb with cloves and garlic in the cuts made by the knife.
  • Sprinkle with sea salt. Tear the rosemary leaves from the stem and sprinkle them on both sides. (lamb and rosemary – a classic combination – just about to be made better with a little twist!)
  • Peel the onions, half, and then roughly chop them.
  • Place the onion on a roasting tray – I recycled my foil tray used for my making roast potatoes for our Christmas dinner.
  • Place the seasoned and prepared lamb shoulder on the onion and spritz with oil – I used oil very sparingly and find using oil from a spraying bottle ideal for this recipe.
  • Then pour a generous glug of ruby port wine onto the lamb – I didn’t measure this but added enough to ensure that the meat is totally wet and there is enough to make a gravy – allow for enough so that you can baste the meat at least twice while it is roasting in the oven. Roughly 500ml or one pint should suffice.
  • Pre-heat the oven to 220° C.
  • Cover the roasting tray with a foil such that the foil covers the edge of the tray like a proper lid.
  • Roast in the preheated oven for 2 hours, basting at least twice to allow the meat to cook thoroughly and ensure you get a succulent soft roast that simply falls off the bone.
  • After 2 hours check the roast and adjust cooking time accordingly – I needed about 40 mins more for a soft roast.

The lamb should now be at the ‘melt-in-your-mouth stage – serve with warm bread and steamed veggies on the side – ideally beans, carrots, and peas, or broccoli. Hubster is not fond of peas but I would be very happy lots of them 😉

Roast shoulder of lamb
 Roast shoulder of lamb

The leftovers will get a rub of my home-made hot spice mix that adds a warming touch to my curries and stews – leftover lamb curry – can’t wait to share that recipe – it’s definitely a winter warmer and a firm family favourite.

Inspired to give Lamb meat a chance? Then why not also have a look at other Lamb based recipes:

  • Smoky and spicy lamb burgers
  • Hot and spicy lamb chops in apple sauce
  • Smoky spicy lamb chops with wild rice and gravy

Also, have a look a my easy recipe for an aromatic and delicious recipe for a cracking home-made spice rub that will work to elevate the flavour of any cut of lamb!

  • Homemade spice rub

Happy New Year once again folks and a lot of new and exciting recipe and travel posts coming up! wooooohoooo!

Filed Under: Food, Meat, Recipe Index Tagged With: 2016, 220° C, America, baster, beans, Big Apple, broccoli, carrots, casseroles, Chennai, Christmas roast chicken, cloves, curries, food blogger, garlic, happy new year, Incredible India, Indian fried fritters, leftover lamb curry, local butcher, New Year, peas, Pondicherry, pulavs, red onions, Roast Lamb Shoulder recipe, roasting tray, rosemary, ruby port wine, stews, tarvel blogger, tikkis, tourist, U.S.A, Visit New York, Visit USA, Washington D.C

Grilled fruit kebabs with a chilli honey drizzle

October 22, 2015 by manjirichitnis Leave a Comment

I have been craving some grilled food for a while. But my waistline will not take kindly to anything greasy so I went and bought myself a bunch of juicy peaches, nectarines and bright red strawberries and decided to make myself a huge bowl of fruity grilled goodness.

Grilled Fruit Kebabs with a chilli honey drizzle

I know the weather is dreary and not really right for starting up a barbeque so it is a relief that I can still get great results with a good griddle pan. Perfect for testing out my new cast aluminium grill pan then?

I really like the colour combination of red and black and because this cast aluminium grill pan is from the ultra-light cookware range by House of Fraser it is so much easier use especially to flip pancakes in! I was also a bit worried that now that I am in a new house and my new kitchen has electric hobs ( I so miss the gas hob! sob sob…) how things would turn out but the grill pan works on electric hobs just as fine as well as solid hot plates, gas, ceramic hobs, halogen and induction – so versatile. The best part is that it has a little groove on the side where your wooden or plastic spatula can rest – very handy.

Cast aluminium grill pan from the House of Fraser

Grilled fruit kebabs with a chilli honey drizzle

Perfect for summer, a great way to enjoy fruit, vegetarian and vegan-friendly fruit kebab dish
Print Recipe
Grilled fruit kebabs with a chilli honey drizzle
 
Cuisine: Starter
Author: Manjiri
Ingredients
  • [b]For the grilled fruit[/b]
  • 1 cup of mixed chopped fruits – pineapple, peaches, kiwi, banana
  • sea salt
  • wooden skewers
  • Blueberries for garnish
  • [b]For the tangy drizzle[/b]
  • 4 tablespoons honey
  • A generous sprinkle of smoked paprika
  • Juice of one lemon
  • 1 tablespoon mint leaves chopped fine
Instructions
  1. As it was the first time I was using the grill pan, it needed to be washed with warm soapy water <g class=”gr_ gr_121 gr-alert gr_spell undefined ContextualSpelling” id=”121″ data-gr-id=”121″>before-hand</g> and left to air dry. Also, the pan works best on the hob that matches the size of the pan.
  2. Chop the fruit into large kebab sized pieces.
  3. Allow the pan to heat for 2 minutes so that it is the right temperature – this may not be required on a gas flame hob.
  4. Carefully place the fruit pieces on the pan and gently press down with a wooden spatula. This ensures that the fruit will not bruise too much but also will ensure that the soft flesh touches the hot ridges to give it the trademark grilled effect.
  5. [cap id=”attachment_3627″ align=”aligncenter” width=”800″][url href=”https://travelsfortaste.com/wp-content/uploads/2015/10/IMG_2906-Copy.jpg”][img src=”https://travelsfortaste.com/wp-content/uploads/2015/10/IMG_2906-Copy.jpg” width=”800″ height=”534″ class=” size-full” title=”Making Grilled Fruit Kebabs on a cast aluminium pan”][/url]Making Grilled Fruit Kebabs on a cast aluminium pan[/cap]
  6. Allow for about 2 -3 minutes, about 1.5 minutes each side on high heat but check by flipping over gently. The softer fruit especially the peaches and kiwi will take lesser time <g class=”gr_ gr_111 gr-alert gr_gramm undefined Grammar multiReplace” id=”111″ data-gr-id=”111″>on</g> the pan while the pineapple and banana will take longer.
  7. Sprinkle some sea salt over the fruit.
  8. After the fruit has dry roasted on each side transfer to a plate and set aside.
  9. Remove the pan from the hob and move to a rivet or a cooling down and allow it to come down to room temperature.
  10. In a small pan over low heat, add the honey and some water to dilute give the mixture a little, mix the smoked paprika powder as per taste and immediately take it off the heat. Pour the lime juice in and the add the chopped mint leaves, mix well.
  11. Alternating between pineapple, kiwi, strawberry and peach cubes gently thread the grilled fruit onto the skewers. I like the little wooden skewers which <g class=”gr_ gr_114 gr-alert gr_gramm undefined Grammar multiReplace” id=”114″ data-gr-id=”114″>makes</g> it easier to eat them as well. Add a blueberry at the end of each skewer for visual effect.
  12. Pour the tangy honey drizzle onto the grilled fruit and garnish with some finely chopped fresh mint leaves for a fresh and light taste. Squeeze some more lemon juice on top before serving.
 
3.5.3208
Grilled Fruit Kebabs with a chilli honey drizzle
                                                            Grilled Fruit Kebabs with a chilli honey drizzle
*With thanks to House of Fraser for sending me a Linea Cast Aluminium Grill Pan  28cm  for review.  As usual all opinions expressed here are entirely my own.

Filed Under: Food, Healthy, Recipe Index Tagged With: cast aluminium grill pan, chilli honey drizzle recipe, fruit recipes, grilled food, Grilled fruit kebabs with a chilli honey drizzle, heathy kebabs, party food, quick and easy starter recipe, reviews on travels fortaste, travels for taste, travels for taste is a food and travel blog based in London, travels for taste reviews, travelsfortaste blog, travelsfortaste food blog, ultra-light cookware range from the House of Fraser

A slice of Costa Rica – Casado

September 10, 2015 by manjirichitnis 2 Comments

With summer firmly on it’s way out and Autumn settling in, the chilly nights demand some great comfort food. I wanted to try something different so I choose a popular Costa Rican dish – Casado. Why? Well, it’s the ideal comfort food, easy to put together and tastes amazing! Best part is it’s very easy on the pocket and if you plate it well, it looks like a posh meal – no one would guess what went into making it!

Costa Rican Casado

Costa Rican Casado

Casado literally means a ‘married man’ and it is said that the name probably originates from how the local men expected food to be served when they were eating outside so that it reminded them of familiar tastes of a home cooked meal. An authentic Casado which is served at ‘sodas’ or local cafes is accompanied by what is known as a Lizano sauce. The brand name Lizano is now generic and retails in N. America.  Since this sauce is yet to hit UK shores ( believe me I did a fair bit of looking around in shops that sell Mexican ingredients, Asian, Carribean and most of my local supermarkets) I finally decided to make my own ,which was a great decision – why ? Well scope to experiment and innovate for one, coupled with freedom to incorporate easy to procure, local ingredients – resulting in a deliciously moorish creation! A traditional root vegetables dish from Costa Rico called Picadillo is a popular side dish with rice and tortillas. You can safely say that the gravy sauce is a marriage of sorts between the Lizano sauce and the Picadillo. I have done a fair amount of customisation and the most interesting part of cooking Casado was creating the gravy sauce, combining it with root vegetables and serving it as a wholesome gravy side dish. Let’s get started with the sauce aka gravy as this will take the most time to cook of all the other sides.

Costa Rican Casado

Costa Rican Casado

Recipe is good for 2 with generous helpings.

Root Vegetable Gravy Side

Prep & Cooking Time: 35 mins

Ingredients:

  • 1 medium juicy tomato – finely chopped
  • 2 small red onions finely chopped
  • 3 medium carrots chopped into tiny cubes
  • 3 small sweet fresh peppers finely chopped
  • A handful of cauliflower florets
  • A handful of very finely chopped sweet potato
  • 1 heaped tbsp of finely grated celeriac
  • A pinch of garlic puree
  • Half a dry red Kashmiri chilli
  • ½ tsp of thick tamarind puree
  • 2-3 bay leaves
  • 1 tsp dried red chilli flakes
  • 2 tsp freshly grated black pepper
  •  1/2 tsp sugar
  • ½ tsp turmeric
  • ½ tsp roasted cumin powder
  • 2 tbsp Oil
  • Salt as per taste
  • A handful of finely chopped coriander

Method:

  1. In a large saucepan, heat oil and add the chopped onions, add the garlic puree and cumin powder and stir well.
  2. When the onion starts to reduce add the bay leaves, the chopped tomato and chopped sweet peppers, stir the the tomato & peppers around vigorously bit to get them to release their juices and reduce the flame to a minimum.
  3. Throw in the finely chopped carrot cubes, sweet potato, grated celeriac, tomato puree and add enough water to cover this mixture.
  4. Cook with lid on till the sweet potato and carrots begin to soften, then it’s time to toss in the cauliflower florets, season with the dry red chilli,tamarind,cracked black pepper, salt and sugar and give it a good stir.
  5. Let this cook on a low flame with lid for about 25 minutes.
  6. Keep opening the lid, stirring and adjusting the water if it becomes to run dry, we need a gravy like consistency.
  7. When it done, add some finely chopped coriander in the tamarind should give it a bit of tangy twist, while the dried Kashmiri chilli gives it colour and mild heat, the sweet pepper and tomato puree work their magic together and the gravy is delicious and wholesome what with so many veggies hidden inside!

Root Vegetable Gravy Sauce

Red Kidney bean side

Prep and Cooking Time: 15 min

Ingredients:

  • 1 can of red kidney beans
  • 1 medium sized red onion
  • 2 large tbsp tomato puree
  • 1 tsp garlic puree
  • 1 tsp red chilli flakes
  • Salt to taste

Method:

  1. In a large saucepan, heat oil and sauté the chopped onions, add the garlic puree and stir well.
  2. After the onion has sautéed, add the tomato puree and stir then add the beans and mix well.

Red onions for Kidney Beans

Red onions for Kidney Beans

  1. Add some water to the mixture and reduce the flame to a minimum, cook with a lid on but check often so that it does not burn or run dry.
  2. 4.Since the canned and ready to eat red kidney beans are preserved in salty water, check the taste before adding in any more salt, chuck in some dry red chilli flakes for flavour and set aside.

Red Kidney Bean side is done

Red Kidney Bean side is done

Boiled white rice

  • Cook 1 cup rice using exactly double the water and a pinch of salt

Fried Plantain

  • Peel and chop the plantain into large chunks and fry in hot oil in a kadhai or wok until they are a light brown. It’s easy for them to char so get them out as soon as the colour turns a golden shade of brown, allow to cool on a plate on a bit of kitchen roll to soak excess oil.

Plaintains peeled

  • Don’t fret if like me you can’t peel the plantain I simply use a knife and remove the thick green skin, even if that means that the plantain pieces are hexagonal or cubes now, well I never was too good at geometry 😉

Frying Plantains in Kadhai

Fish

  • Casado can be served with meat, fish or chicken. Chop one large fillet of fresh salmon and pan fry both sides till done in about 1 tbsp oil.

Salmon Pan Shallow Fry

Cheese Tortilla

  • Heat a large flour tortilla –shop bought on a pan and adds a generous helping of grated parmesan cheese on tortilla. Just as the tortilla heats up and the cheese shows sign of melting fold the tortilla in half and flip over and toast each side till you have a crispy yum cheesy tortilla, slice into neat triangles ready to be served.

Tortilla on pan with grated cheddar

Cabbage Salad

  • Chop a fresh cabbage fine to get one large handful of cabbage, add half a red onion and a small handful of finely chopped cucumber, squeeze half a lime, sprinkle some cracked black pepper, a small amount of fresh finely chopped coriander and toss all these together. Easy-peasy right?

Folded Tortilla

Serve the steaming hot rice with the salmon on the side, topped with some of the root vegetable gravy. Mop up the beans with the cheesy tortilla and munch on the sweet fried plantain with generous bites of the tangy cabbage salad in between mouthfuls of everything else.

Costa Rican Casado

Costa Rican Casado

Filed Under: Featured Food and Drink, Food, Product Reviews, Rest of the World, seafood, Travel Tagged With: cabbage salad, casado, cheese tortilla, costa rican recipe, dishes from around the world, fish, foodblogger, Fried Plantain, recipe development, recipes, recipes from around the world, red kidney beans, travels for taste, travels for taste is a food and travel blog based in London, travels for taste recipe development, travelsfortaste, travelsfortaste blog, travelsfortaste food blog

  • « Previous Page
  • 1
  • 2
  • 3
  • 4
  • …
  • 11
  • Next Page »

Food,travel and lifestyle writer. Photographer.

  • Email
  • Facebook
  • Instagram
  • Pinterest
  • Twitter
  • YouTube

Categories

  • Baking
  • Breads
  • C.K.P recipes
  • Cakes
  • Chutneys
  • Cocktails
  • Curry – Meat, Seafood
  • Curry – Vegetarian
  • Desserts
  • Events
  • Featured Food and Drink
  • Featured Lifestyle
  • Featured Travel Adventures
  • Food
  • Healthy
  • Home
  • India
  • Indian
  • Kitchen
  • Lifestyle
  • London and rest of U.K
  • Meat
  • Miscellaneous
  • Product Reviews
  • Quick and Easy
  • Recipe Index
  • Rest of the World
  • Restaurant Reviews
  • Salads
  • seafood
  • Sides
  • Smoothies
  • Soups
  • Travel
  • Uncategorized
  • Vegan
  • Vegetarian

Featured Blogger on Great British Chefs

GBC_blogger-badge_150x300px    

Need a New Power Blender?

13076814_10154185434898293_7387808474266473605_n

Read Travelfortaste’s interview on Gourmandize UK & Ireland

 Sliceoffme interviewed by Gourmandize UK & Ireland

Travelsfortaste is Featured on Expats Blog

England expat blogs

Read Travelsfortaste reviews on Zomato

View my food journey on Zomato!
Privacy & Cookies: This site uses cookies. By continuing to use this website, you agree to their use.
To find out more, including how to control cookies, see here: Cookie Policy
Squaremeal.co.uk - Restaurant Reviews

About me

Writer and Photographer. Food,Travel & Lifestyle, Blogger and Digital Marketer. Read More…

  • Email
  • Facebook
  • Instagram
  • Twitter
  • YouTube

Recent Posts

  • Easy Spinach and Pea Soup
  • Grenada Chocolate Festival – Festive Giveaway
  • Royal British Legion Centenary Cookbook – Cooking with Heroes
  • The Instagram Foodie Bag – Must have for all Food Photographers
  • Restaurant quality meat – Swaledale Online Butchers – a review

Copyright © 2023 · Foodie Pro Theme by Shay Bocks · Built on the Genesis Framework · Powered by WordPress

This website uses cookies to improve your experience. We'll assume you're ok with this, but you can opt-out if you wish.Accept Read More
Privacy & Cookies Policy

Privacy Overview

This website uses cookies to improve your experience while you navigate through the website. Out of these, the cookies that are categorized as necessary are stored on your browser as they are essential for the working of basic functionalities of the website. We also use third-party cookies that help us analyze and understand how you use this website. These cookies will be stored in your browser only with your consent. You also have the option to opt-out of these cookies. But opting out of some of these cookies may affect your browsing experience.
Necessary
Always Enabled
Necessary cookies are absolutely essential for the website to function properly. This category only includes cookies that ensures basic functionalities and security features of the website. These cookies do not store any personal information.
Non-necessary
Any cookies that may not be particularly necessary for the website to function and is used specifically to collect user personal data via analytics, ads, other embedded contents are termed as non-necessary cookies. It is mandatory to procure user consent prior to running these cookies on your website.
SAVE & ACCEPT